



Còi Tàu Hơi Nước Mini
 ByfifindrLikes500Downloads4K
Build another version of this model.
### English
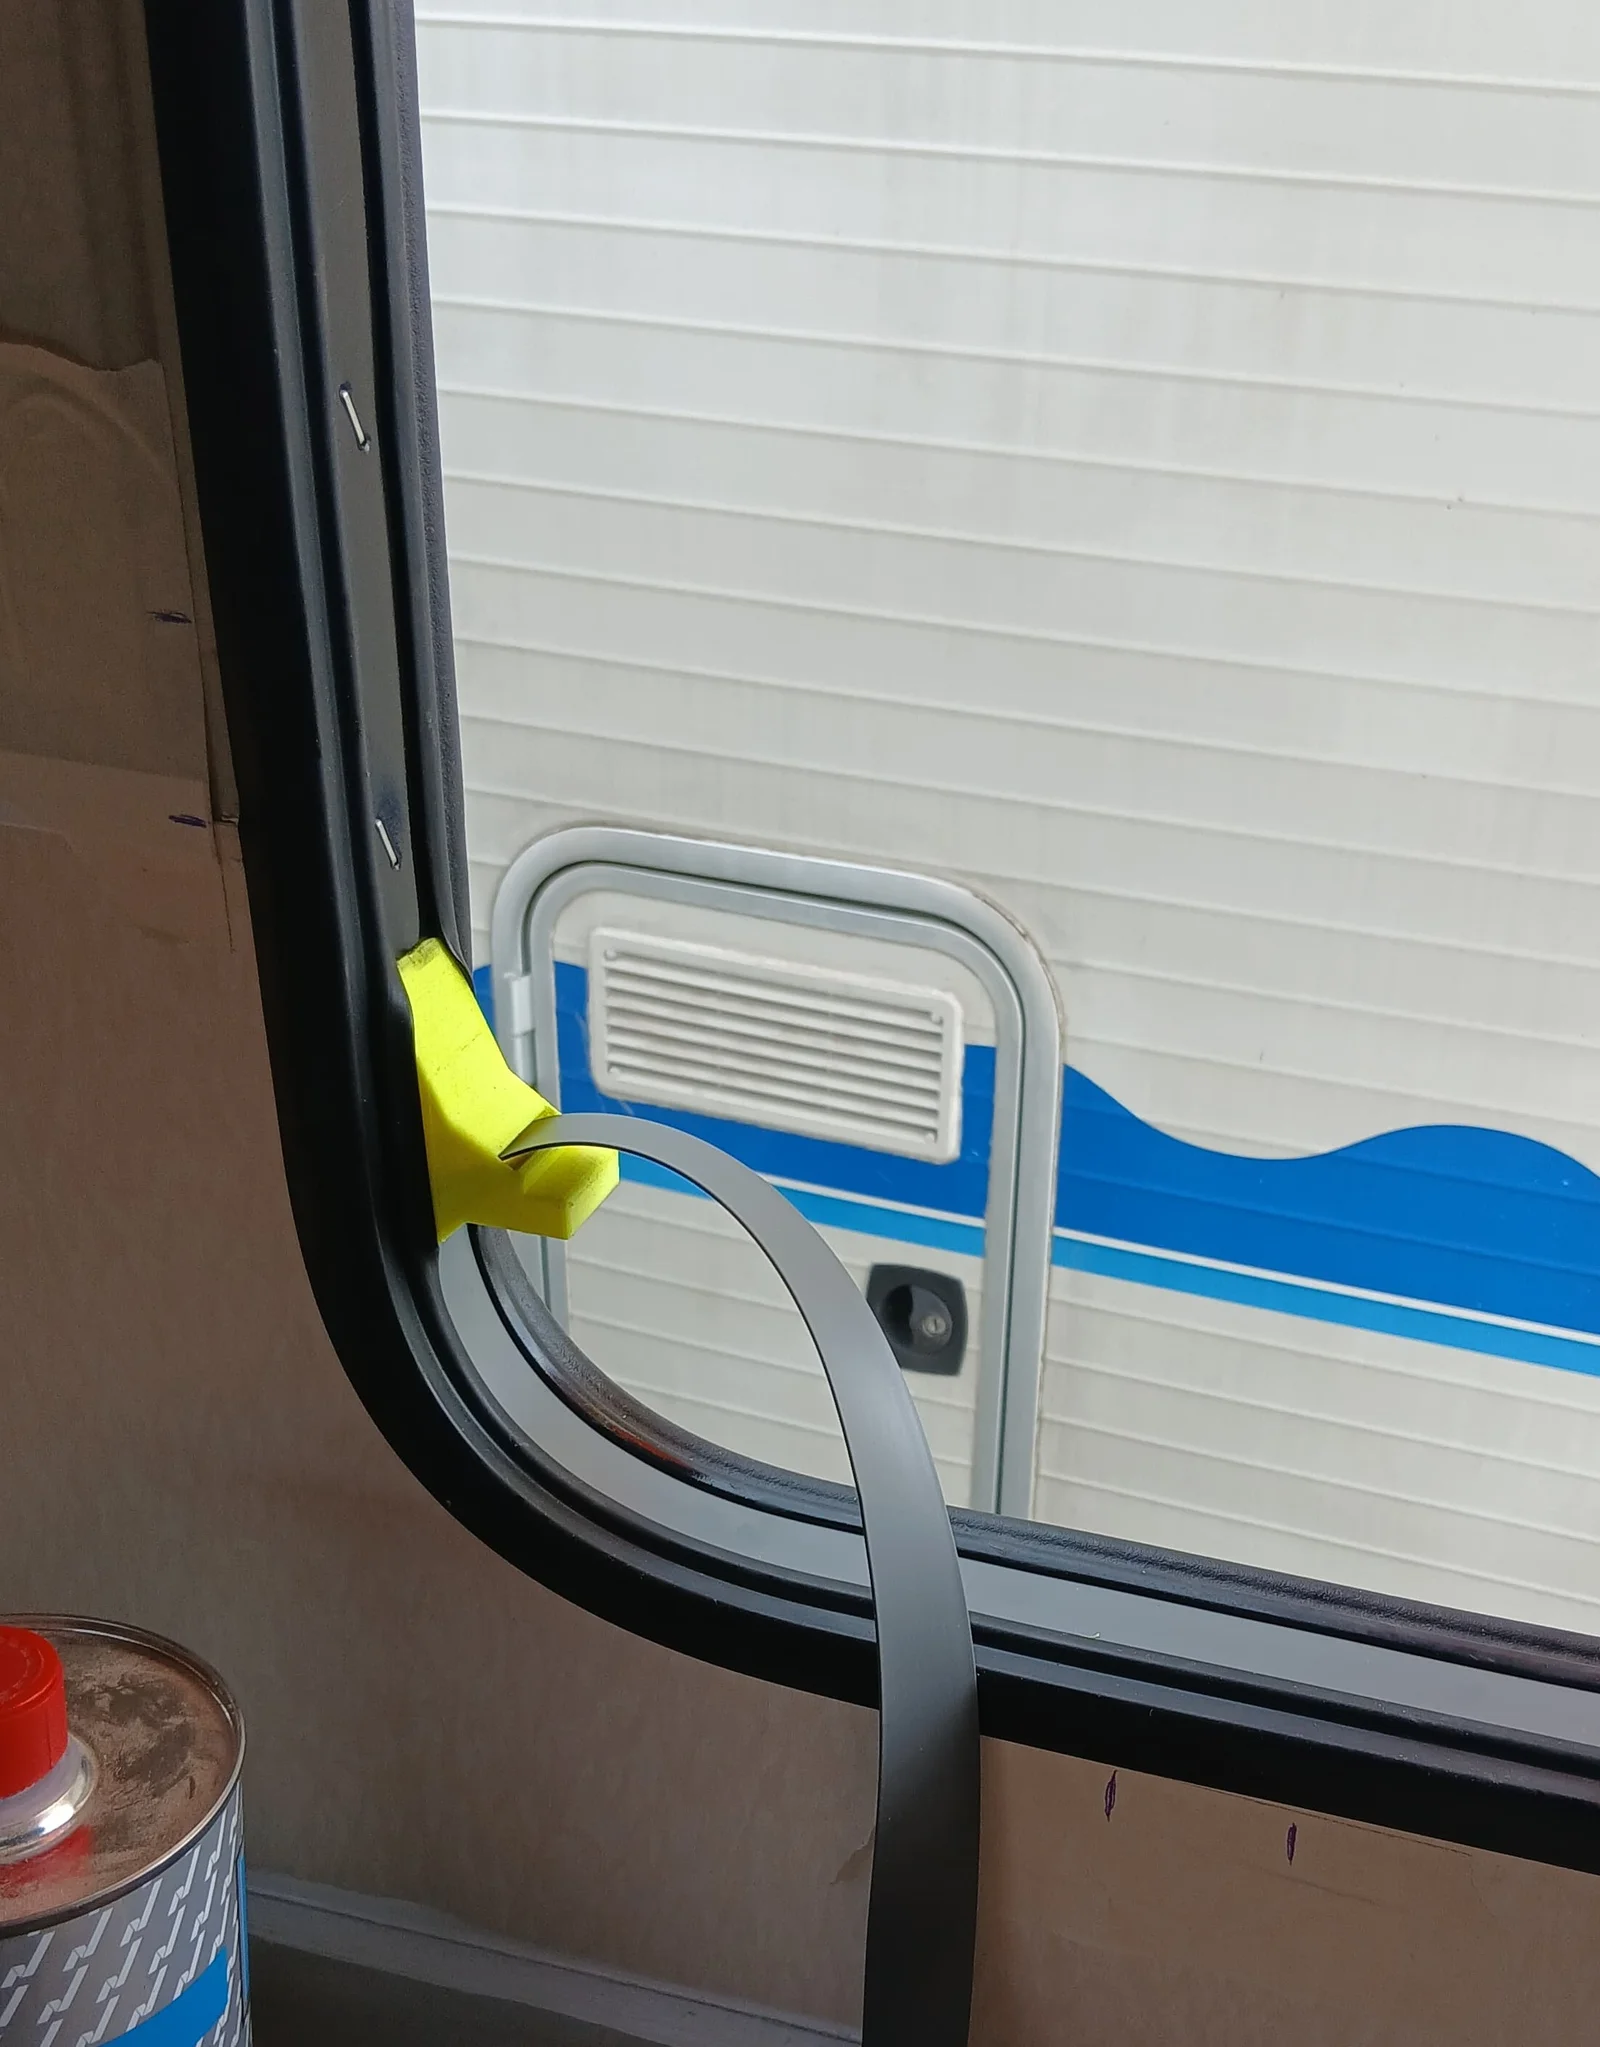
This is a custom-designed tool for installing the plastic/rubber locking strip (filler strip) into the window seals of campers, caravans, and motorhomes.
These window seals often require a central wedge strip to lock them in place and ensure a perfect waterproof seal. Specialized tools can be hard to find or expensive online, so I designed this 3D-printable alternative.
Tested and approved by my dad, it works perfectly and prevents any damage to the rubber seals during installation!
🚨 IMPORTANT DISCLAIMER / MODEL VERSION:
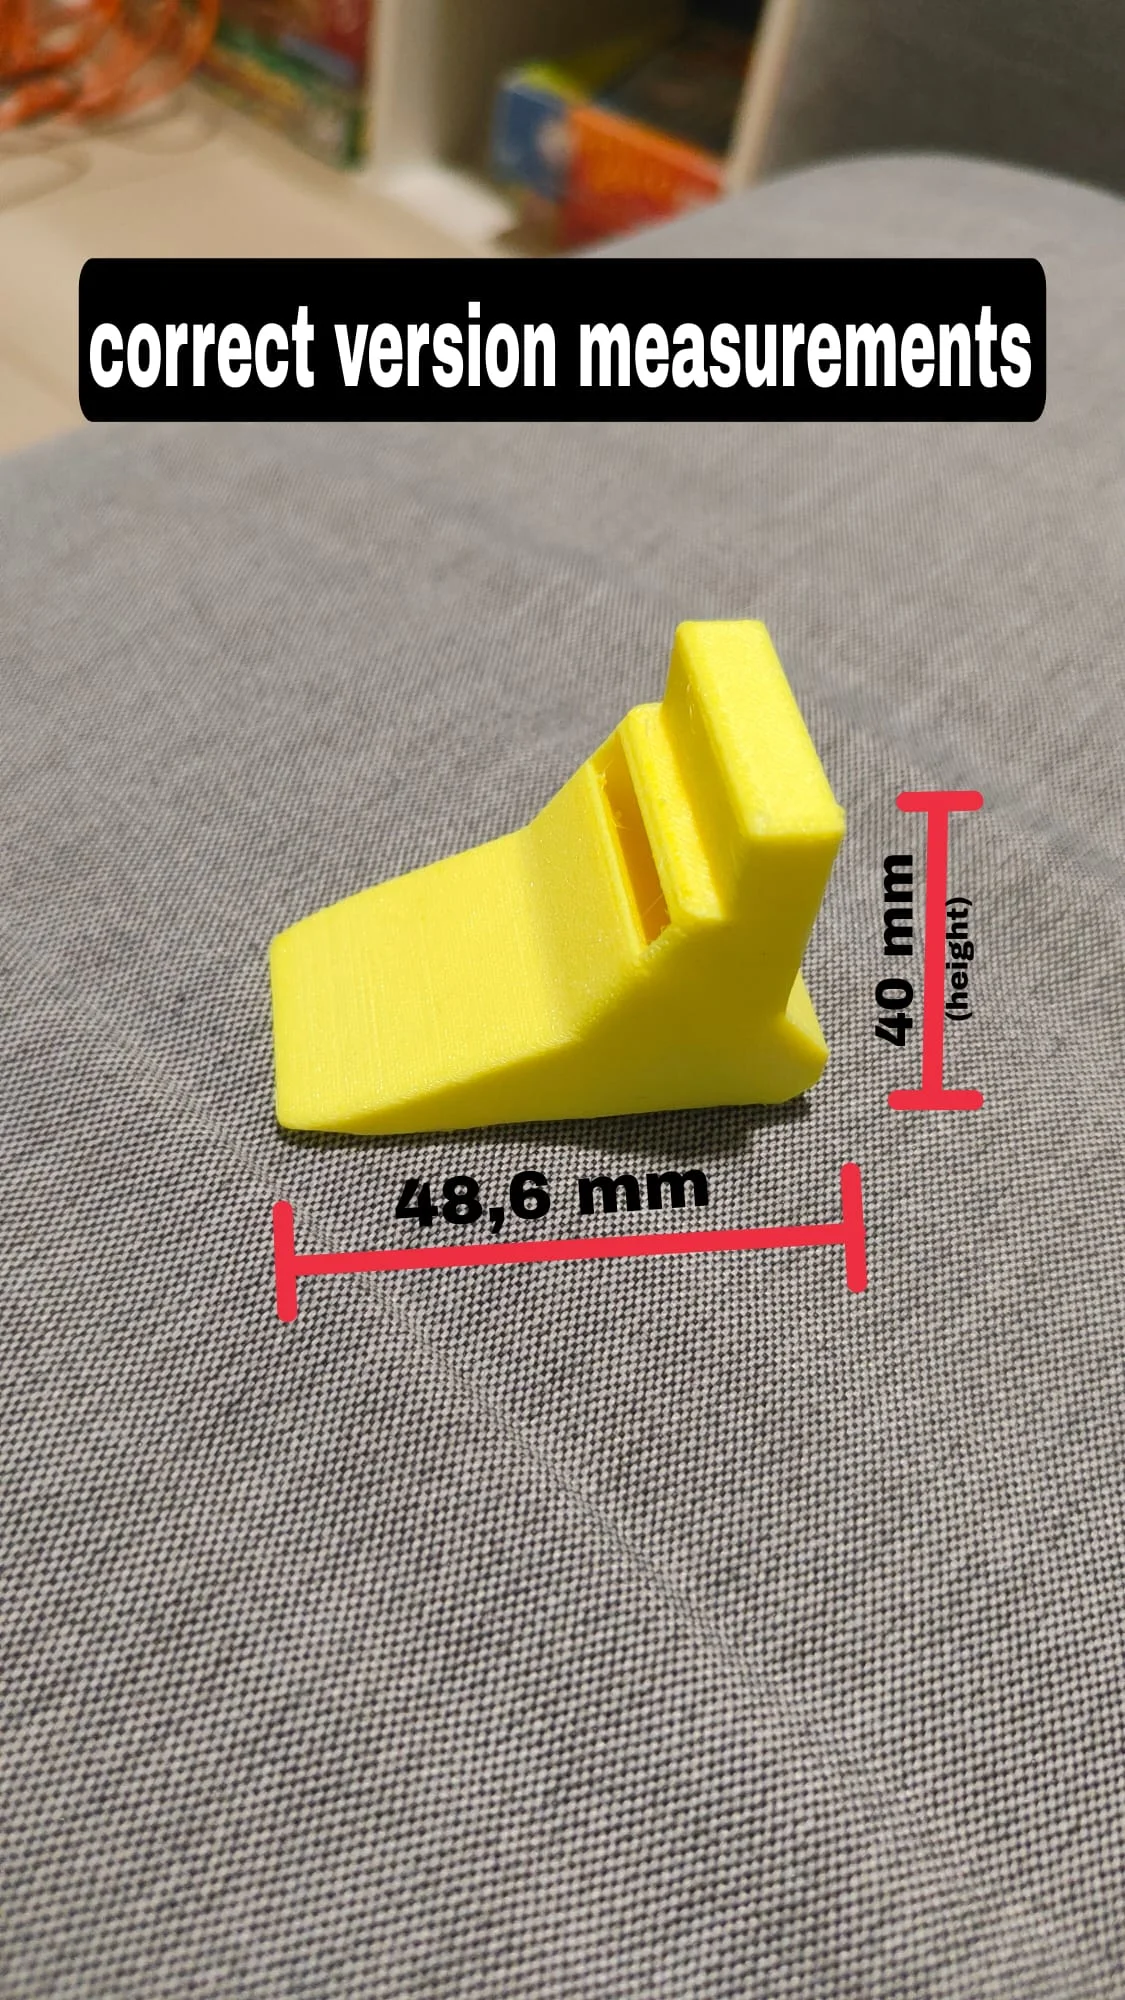
- The photos shown are from the first prototype.
- After testing, my dad pointed out that the nose was a bit too long, which made it slightly difficult to navigate around the tight corners of the window frames (though it still worked).
- The STL file uploaded here is the updated, perfected, and shortened version! It fixes that issue completely so you can easily go around corners. Because of this, the final 3D printed model will look slightly shorter than the one in the photos.
Recommended Print Settings:
- Material: I printed it in PETG because it's more durable; I had no problems using it.
- Orientation: I personally printed it upright, and it worked well, requiring little effort.
---
### Italiano
Questo è un utensile progettato da zero per facilitare l'inserimento della striscia di bloccaggio (il filetto lucido/grigio) nelle guarnizioni delle finestre di camper, caravan e roulotte.
Disegnato per aiutare mio padre in un lavoro di restauro, ha funzionato alla perfezione senza rischiare di tagliare o rovinare la gomma della guarnizione. Spero possa essere utile a tutta la community!
🚨 NOTA IMPORTANTE SUL MODELLO / DISCLAIMER:
- Le foto che vedete si riferiscono al primo prototipo stampato.
- Durante l'uso, mio babbo mi ha dato delle dritte: la punta era leggermente troppo lunga e faceva un po' di fatica nelle curve più strette della finestra (anche se si faceva lo stesso).
- Il file STL che ho caricato è la versione corretta, accorciata e perfetta! Ho modificato il CAD per risolvere il problema delle curve. Di conseguenza, il pezzo che stamperete sarà leggermente più corto rispetto a quello che vedete in foto, ma è la versione migliore possibile.
Impostazioni di stampa consigliate:
- Materiale: io l'ho stampato in PETG perché più resistente, non ho avuto problemi durante l'utilizzo
- Orientamento: Personalmente l'ho stampato in piedi, e ha funzionato bene, non avendo chissa che sforzi
ByfifindrLikes500Downloads4K

 ByJordanK_858807Likes42Downloads436

 Byvc-designLikes0Downloads3.2K

 Byquibeck_3353173Likes965Downloads1.9K

 ByZED4EverLikes313Downloads5.2K

 ByVC_DesignLikes679Downloads3.6K

 ByDan Schwartz SchwartzLikes744Downloads3.4K

 Bykjus_448782Likes314Downloads673

 ByMAFIXMAFIX_337316Likes130Downloads384

 ByUpcrid3D_1585693Likes808Downloads2.1K

 ByWilko_SLOLikes935Downloads2K

 ByartemixLikes0Downloads149