

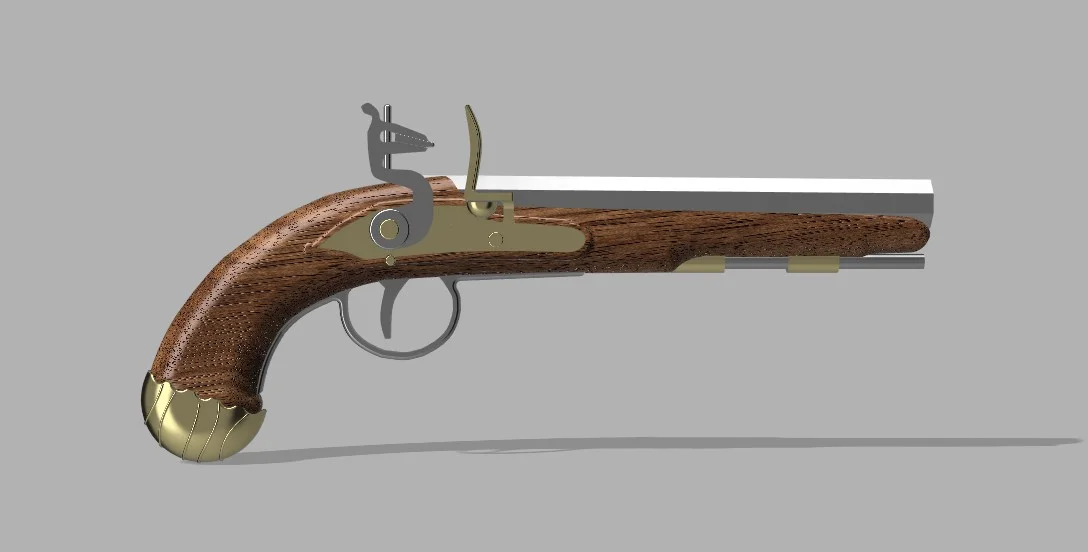


Mô hình P38 Dirk từ tựa game Sulfur
 ByOnino_318610Likes2Downloads15
Build another version of this model.
Printable in 16 parts and built around a simple elastic band mechanism for the hammer and trigger. Designed so each part can be printed separately in your chosen colours.
Assembly requires:
An elastic band
Glue
Patience
Tweezers (helpful for the fiddly internal bits)
Fitting the internals can be tight depending on your printer’s tolerances. Some parts may need light sanding, though gaps have been left to help everything fit. Do a test fit with all the parts first to ensure they all fit as they should.
Start by attaching the pommel (2) and the side panels (4 & 5). Use a small amount of glue, taking care not to get any in the pin holes. Make sure the panel holes line up cleanly.
Fit the frizzen (11) and frizzen Pin (12) next. These remain unglued so the frizzen can rotate freely.
Attach the elastic band to the hammer Insert (10) first, then thread it through the body, looping it over and around the frizzen pin before attaching it onto trigger (13). The elastic band needs to be tight enough to pull the hammer insert forward and also strong enough to return the trigger after firing.
Install the hammer onto the hammer pin. This is the part you may need tweezers for: Insert the hammer pin into the body and through the hammer insert. Line up the trigger and fit the trigger pin. Do not glue these are they need to rotate.
Slide the barrel into the body. The frame has a small overhang that locks against the barrel; glue will help secure it in place.
Slot the trigger guard into place and glue it in.
Finish by fitting the two ramrod inserts and sliding in the decorative ramrod. It’s intentionally too short to function, but it completes the look.
ByOnino_318610Likes2Downloads15

 Byquibeck_3353173Likes351Downloads2.1K

 Bycream110_291842Likes924Downloads7.7K

 ByOnemoredaveLikes861Downloads6.9K

 ByAPC_4112822Likes144Downloads380

 Byjs14581_2767550Likes118Downloads3.3K

 ByTheMakerStuffLikes315Downloads1.9K

 ByGoolow_295072Likes598Downloads1.6K

 ByMikWantecLikes264Downloads1.5K

 BySzvmkn_3779340Likes231Downloads1.3K

 ByHacker Man ManLikes248Downloads1.5K

 Bycentarico_3241219Likes257Downloads968