


Kẹp giữ sợi Filament
 Bytinx_1344834Likes1.2KDownloads6K
Build another version of this model.
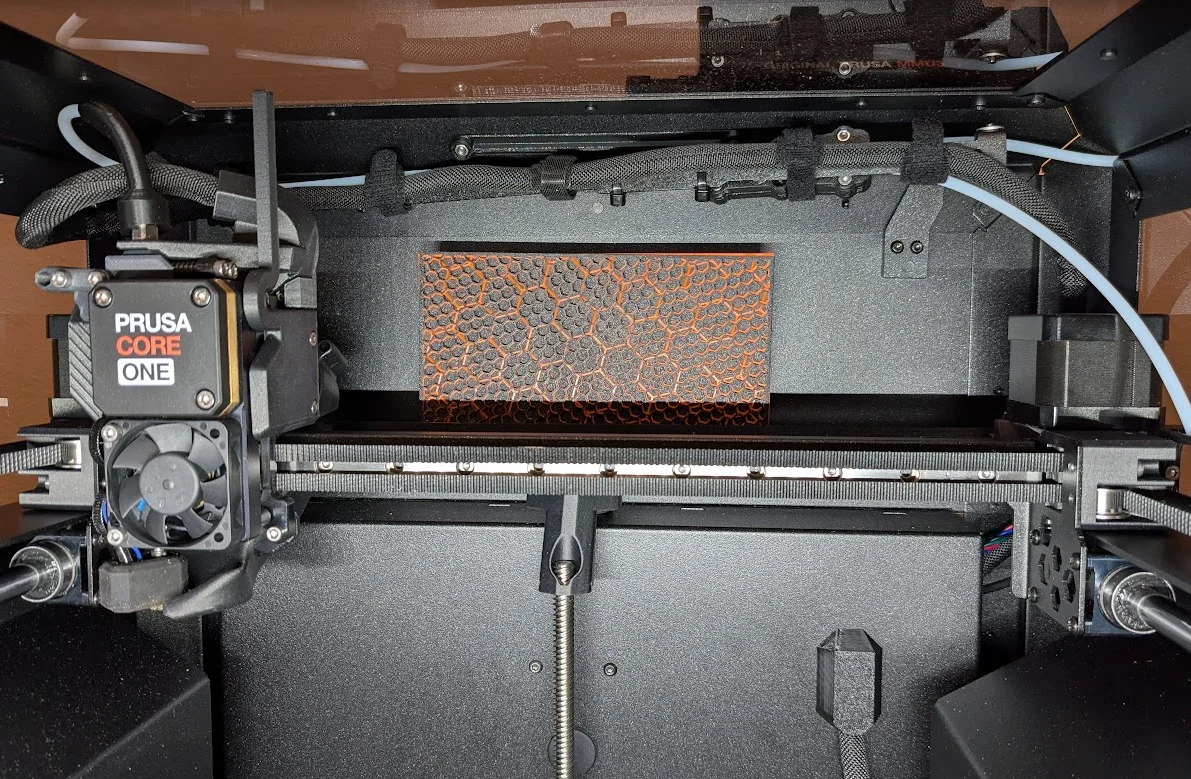
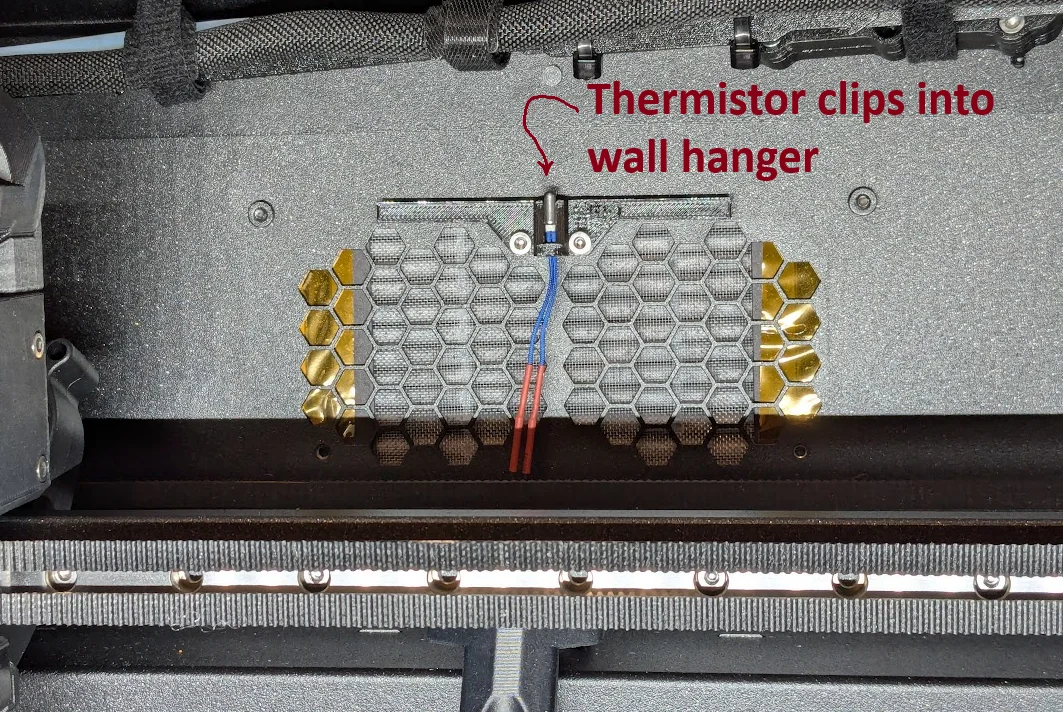
I use the Prusa advanced filtration system on the Core One. Consequently, the printer disables the 2 chamber fans. They weren't doing anything so took them out and used them for another project! However, I hated the way it left things. Looked terrible. Especially since I added kapton tape to cover holes because the filter box isn't wide enough. Also, the white filter media through those hexagonal holes was not a good look, not to mention the chamber thermistor had no mount. That's where this model comes in. It covers the awful holes, gives the chamber thermistor a better mount (and hides it too!) and personalizes the printer even further.
Print settings/ideas to customize your model:
For the "Cover - Facia" part, set the top and bottom solid layers to zero. Pick the infill at whatever density you want. For my print, I glued these 3 layers to the "Cover - Base":
bottom layer in orange at 5% hexagonal infill
middle layer in orange at 15% hexagonal infill
top layer in black at 15% hexagonal infill
Exactly how perfect you overlap the layers can be tweaked slightly to give a cool effect
Or use a solid bright color layer with a black layer on top that has your favorite sport's team logo etched out of it
A quote you really like
Prusa logo
Honestly, a blank black cover looks good too. Black Prusament PETG printed on a textured plate... looks very similar the powder coated steel behind it. Galaxy black might look even better!
...
the limit is your imagination
Installation instructions:
Mount the wall hanger with arrow pointed up and with the appropriate screws. Using longer screws than specified in the part name will poke through and may damage your filter!!
Insert the chamber thermistor into the wall hanger
Assemble the rest. Pretty simple stuff.
Bytinx_1344834Likes1.2KDownloads6K

 Byprusa-researchLikes0Downloads2.7K

 Bydet-manLikes0Downloads171

 BydalleLikes0Downloads147

 Byarhi_585078Likes64Downloads544

 ByHanzo3dLikes155Downloads416

 BydarienLikes0Downloads1K

 ByGeek5DLikes147Downloads489

 ByBrokentooth_designsLikes23Downloads411

 Byla-cave-au-chatLikes0Downloads967

 Bycrawler-3903250Likes0Downloads907

 ByvertigomakesLikes0Downloads563