



Bộ xúc xắc khổng lồ (Complete Giant Dice Set)
 BybobmakesLikes4.3KDownloads16K
Build another version of this model.
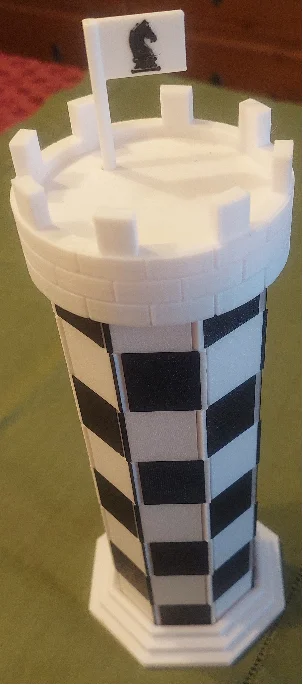
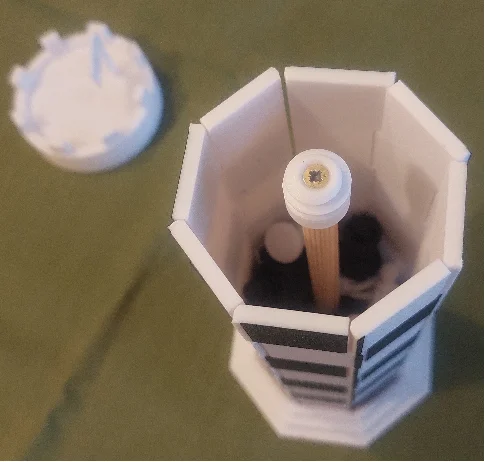
Decorative chess board. When rolled up, the chessboard serves as a container for the chess pieces. When unrolled ready for play, the gaps between the segments of the chessboard are barely visible.
The whole chessboard including the joints is print in place, no glue, no clips.
The chessboard comes in 2 variants.
There is an additonal blank flag, in order you want to design your own flag.
The chess pices are not included. I recommend the beautifull "Spiral Chess Set" from BigBadBison (found here: https://www.thingiverse.com/thing:470700). You must scale down the pieces, because the chessboard has a reduced size.
If you print the first variant of the board (bottom down),
If you print the second variant of the board (upside down),
Prints fine in PLA.
You still need a 10mm round wooden pole and two 3x12 wood screws (available in every hardware store).
Cut out a 200 mm long part of the wooden pole. Screw the pole into the holes inside the base plate and the printed screw.
Example of second version (upside down) printed on textured build plate. Only one color change in first layer needed.
BybobmakesLikes4.3KDownloads16K

 Byewr2sanLikes208Downloads817

 ByMZ4250Likes147Downloads911

 ByFishManooo_1312296Likes172Downloads588

 Byrezips_533396Likes52Downloads392

 ByYuri_13983Likes24Downloads119

 ByRT3DLikes14Downloads101

 ByDMM_Raptor_Du_516520Likes0Downloads4

 ByNickR_504962Likes33Downloads167

 BySascha_LB_581517Likes87Downloads483

 ByTaylor Johnson JohnsonLikes23Downloads102

 ByKNfLrPnLikes45Downloads220