

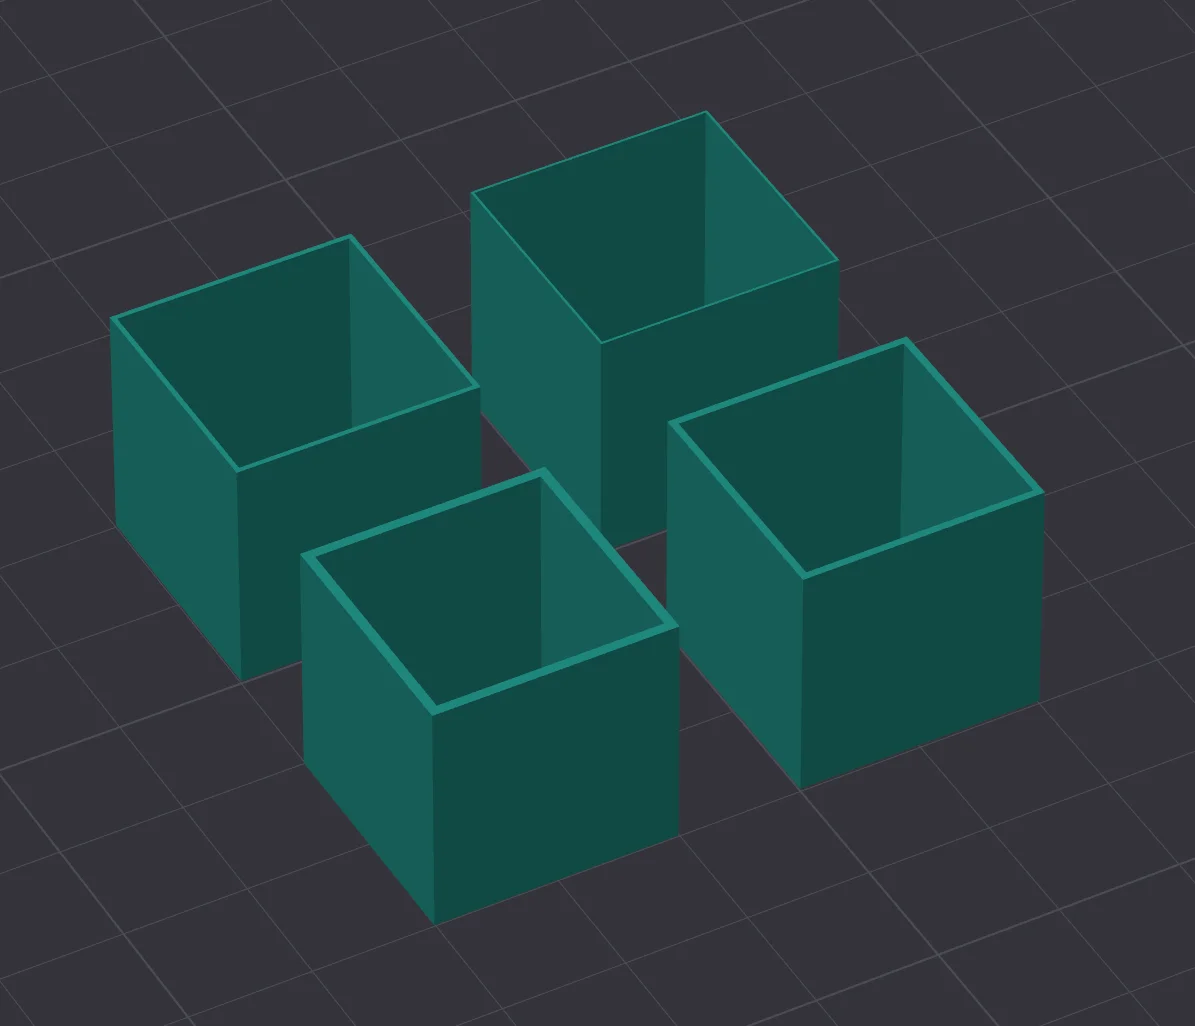


INDX Calibration Cube(s)
 ByswimLikes0Downloads109
Build another version of this model.
Note: “Detect Thin Walls” May need to be enabled if printing a wall width the same as your nozzle width.
All cubes are 20mm x 20mm externally.
Cube perimeters and base are the same respective size.
For example, the 0.6mm cube's walls are 0.6mm in width and the base is 0.6mm in height.
The hollow core allows a caliper to be inserted to test printed width and accuracy.
The exposed base also allows visual inspection of the top layer.
Each cube is about ½ gram to print (or less). Quick and cheap.
(Example Optional Uses)
The possibilities are endless!
I recommend the calculator here if you're testing wall accuracy:
Teaching Tech 3D Printer Calibration (teachingtechyt.github.io)
*NOTE: These should help increase print accuracy…not necessarily print quality. Use calibrations as the base line and adjust as needed after visual inspection.
ByswimLikes0Downloads109

 Bytinx_1344834Likes1.2KDownloads6K

 Bygafyx3dLikes0Downloads121

 BylaserbaconLikes0Downloads172

 By3d-mmakerLikes0Downloads114

 Bynadir-cn3dLikes0Downloads110

 BytheodorLikes0Downloads142

 Byprusa-researchLikes0Downloads2.7K

 ByKRYS_3DLikes8Downloads45

 Bypjs37Likes0Downloads155

 Byduo3dprintLikes0Downloads153

 ByFonnPrintsLikes4Downloads20