
F3D
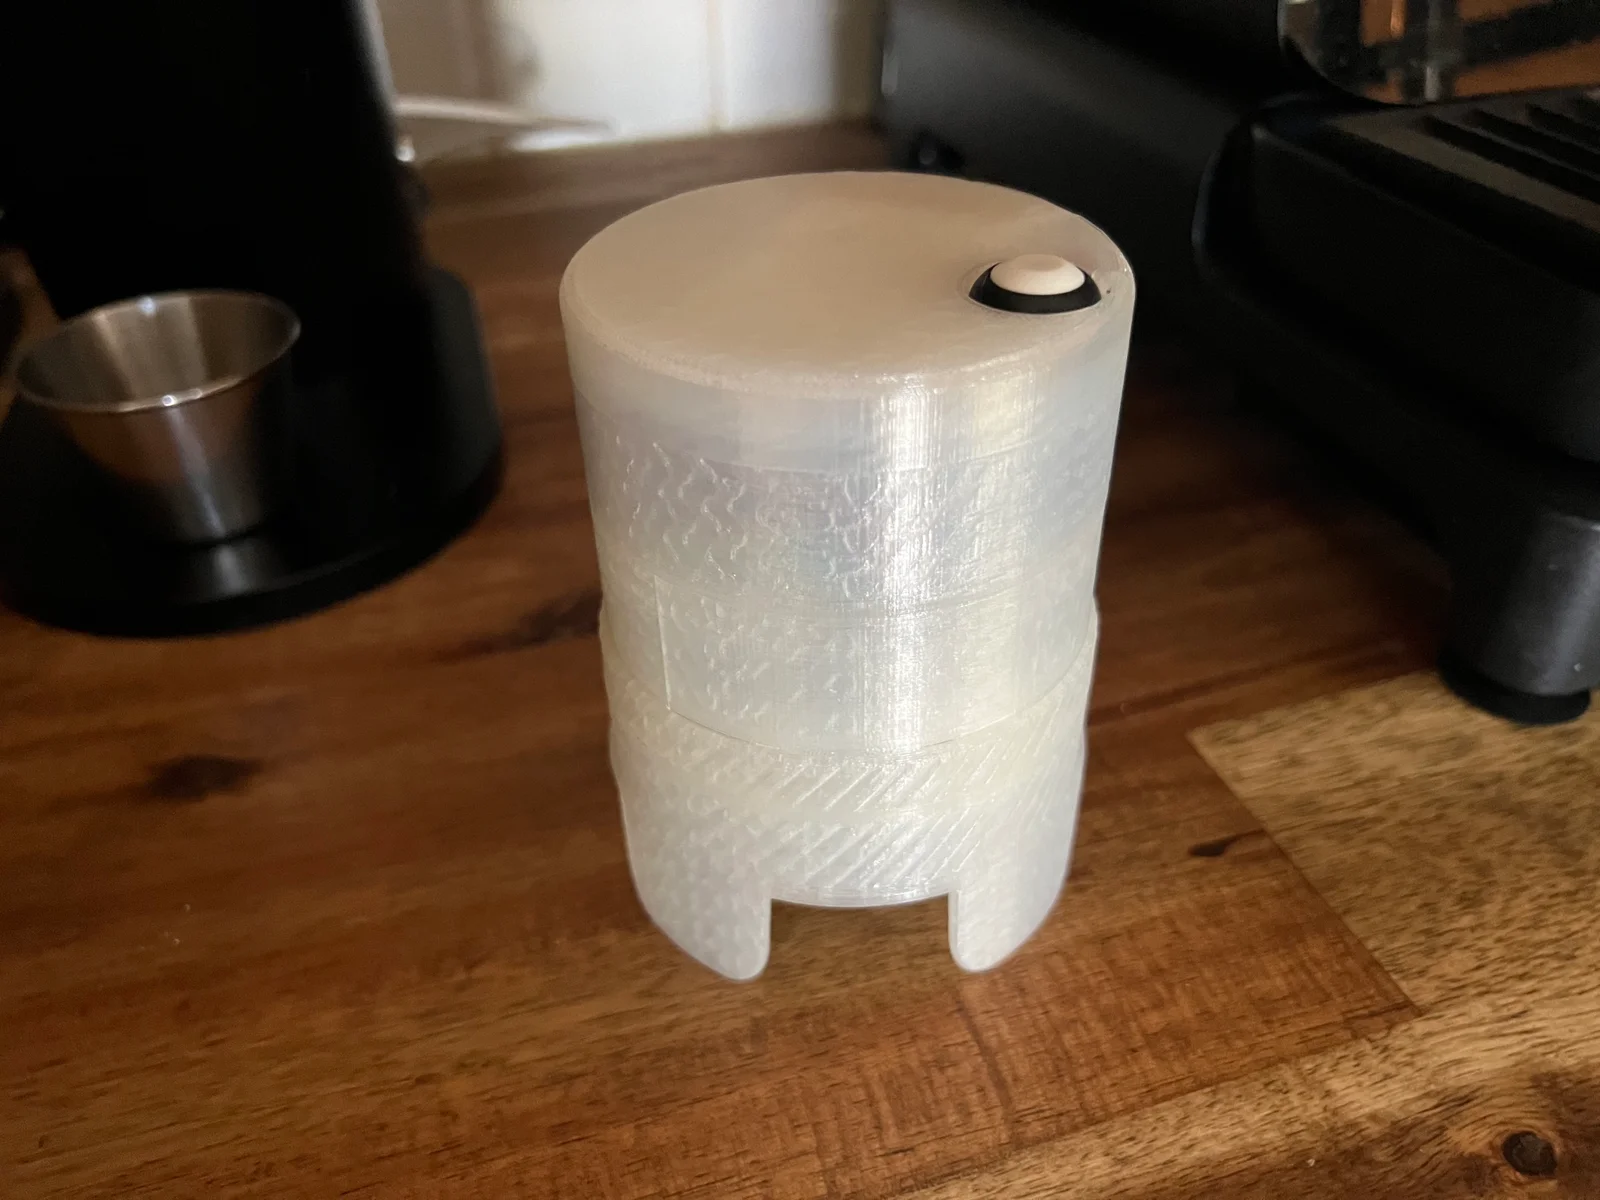
eWDT – Electronic WDT attachment cho Umikot V2 1

5 images

Đồ Gia Dụng

eWDT – Electronic WDT attachment cho Umikot V2

By DamianBrakel_871251

Downloads
219
Likes
31
Views
2,463

Files 9 65.4 MB

  • eWDT_prop_1776805993.stlSTL · 914.9 KB
  • eWDT_mount_1776805994.stlSTL · 617.3 KB
  • eWDT_case_R_fixed_1776805995.stlSTL · 156.5 KB
  • eWDT_plate_1776805996.stlSTL · 216 KB

Make a variant with AI

Build another version of this model.

Open Studio

Description

This is a revision of my 4s WDT model to now suit Umikot V2, a new housing same electronics.

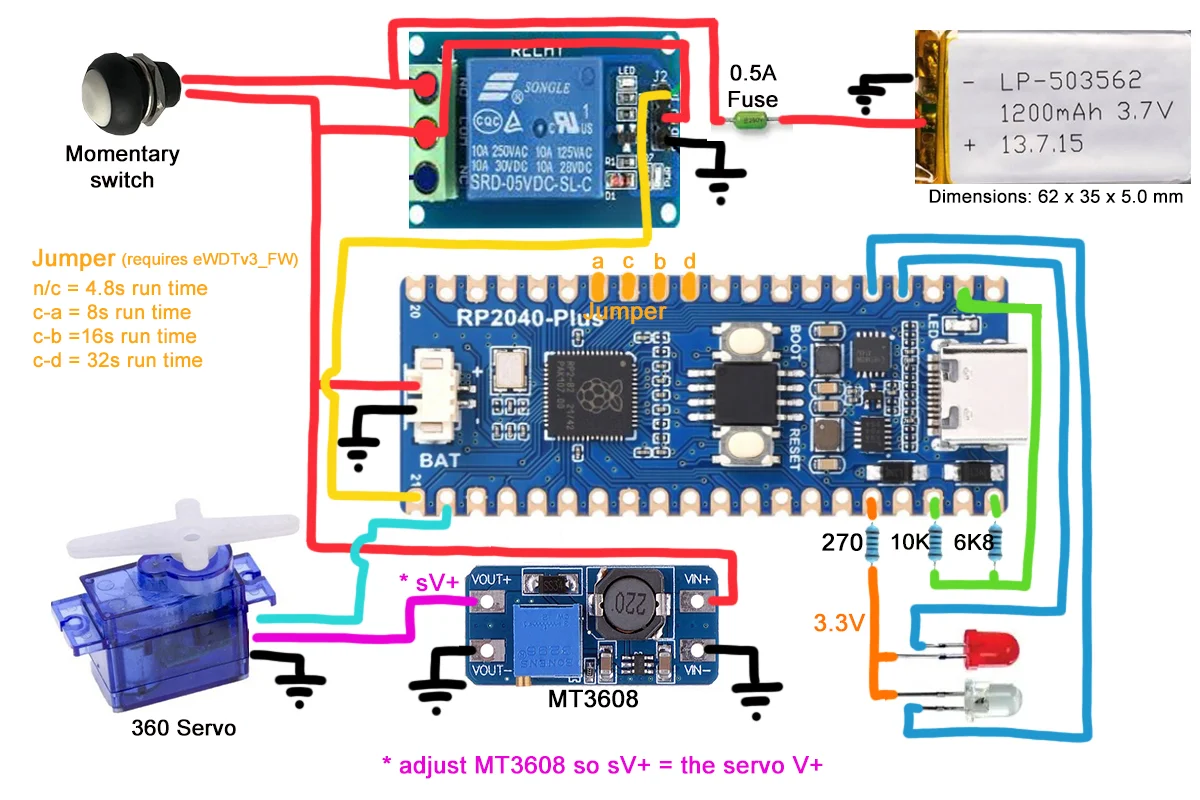
Electronic Parts (1x);

  • RP2040-Plus by Waveshare
  • 500mA fuse (1A would be better, some servo motors may blow 500mA fuse if stalled)
  • 5V Relay (needs to switch on from esp32 output, ie; 3.3V)
  • MT3608 Adj. DC-DC boost (adjusted to 5.7V)
  • 1200mAh Lithium battery, check physical size
  • Momentary switch
  • EF90D 360 Servo
  • Red LED (low battery indicator)
  • Blue LED (running, use any colour)
  • 270 Ohm Resistor (220 is ok, I like to run them cooler)
  • 6K8 Ohm Resistor
  • 10K Ohm Resistor

Other Parts

  • Optional  - alternate Umikot V2 upper mech and base.
  • 12 Needles for included mech, or 9 for original v2 mech (see the Umikot instructions)
  • 3x M3 8mm screws to attach the housing to ring (I use countersunk but flat head will do)
  • 4x M3 12mm screws to attach the prop (I use countersunk but flat head will do)
  • Optional - Glue - cyanoacrylate (AKA - CA, Super glue gel) or Weldon #16. My mount is held to the mech by friction, you can glue it if you prefer.
     

eWDT_FW 

To install the FW
Connect a USB to USB-C cable to your PC, hold the down boot button on the RP2040-Plus while connecting the in USB C cable and then release the button.
You should see a drive called RPI-RP2 on your PC. Copy the eWDTv3.ino.rpipico.uf2 firmware file to the RPI-RP2 drive

0r you may use one of the older FW versions

Operation

  • The USB-C port will charge the battery
  • The motor is disabled while connected to USB power
  • The red LED will light up when the battery voltage drops below 3.2V. Lithium battery BMS usually cutout at 3.0V, so you get a little pre warning.
  • The blue LED will light up while in use or while charging.

Optional 
eWDTv3.ino.rpipico.uf2 FW has the option of 4 run times

See wiring diagram for jumper options, you may wire a switch if you want to switch between run times.

Read more Show less

Print spec

Formats
stlzip
Model files
9
Total size
65.4 MB
Largest file
54.3 MB

0 comments

See all