



Kẹp giữ sợi Filament
 Bytinx_1344834Likes1.2KDownloads6K
Remix of Khối Hiệu Chuẩn By ItsMaxify
Build another version of this model.
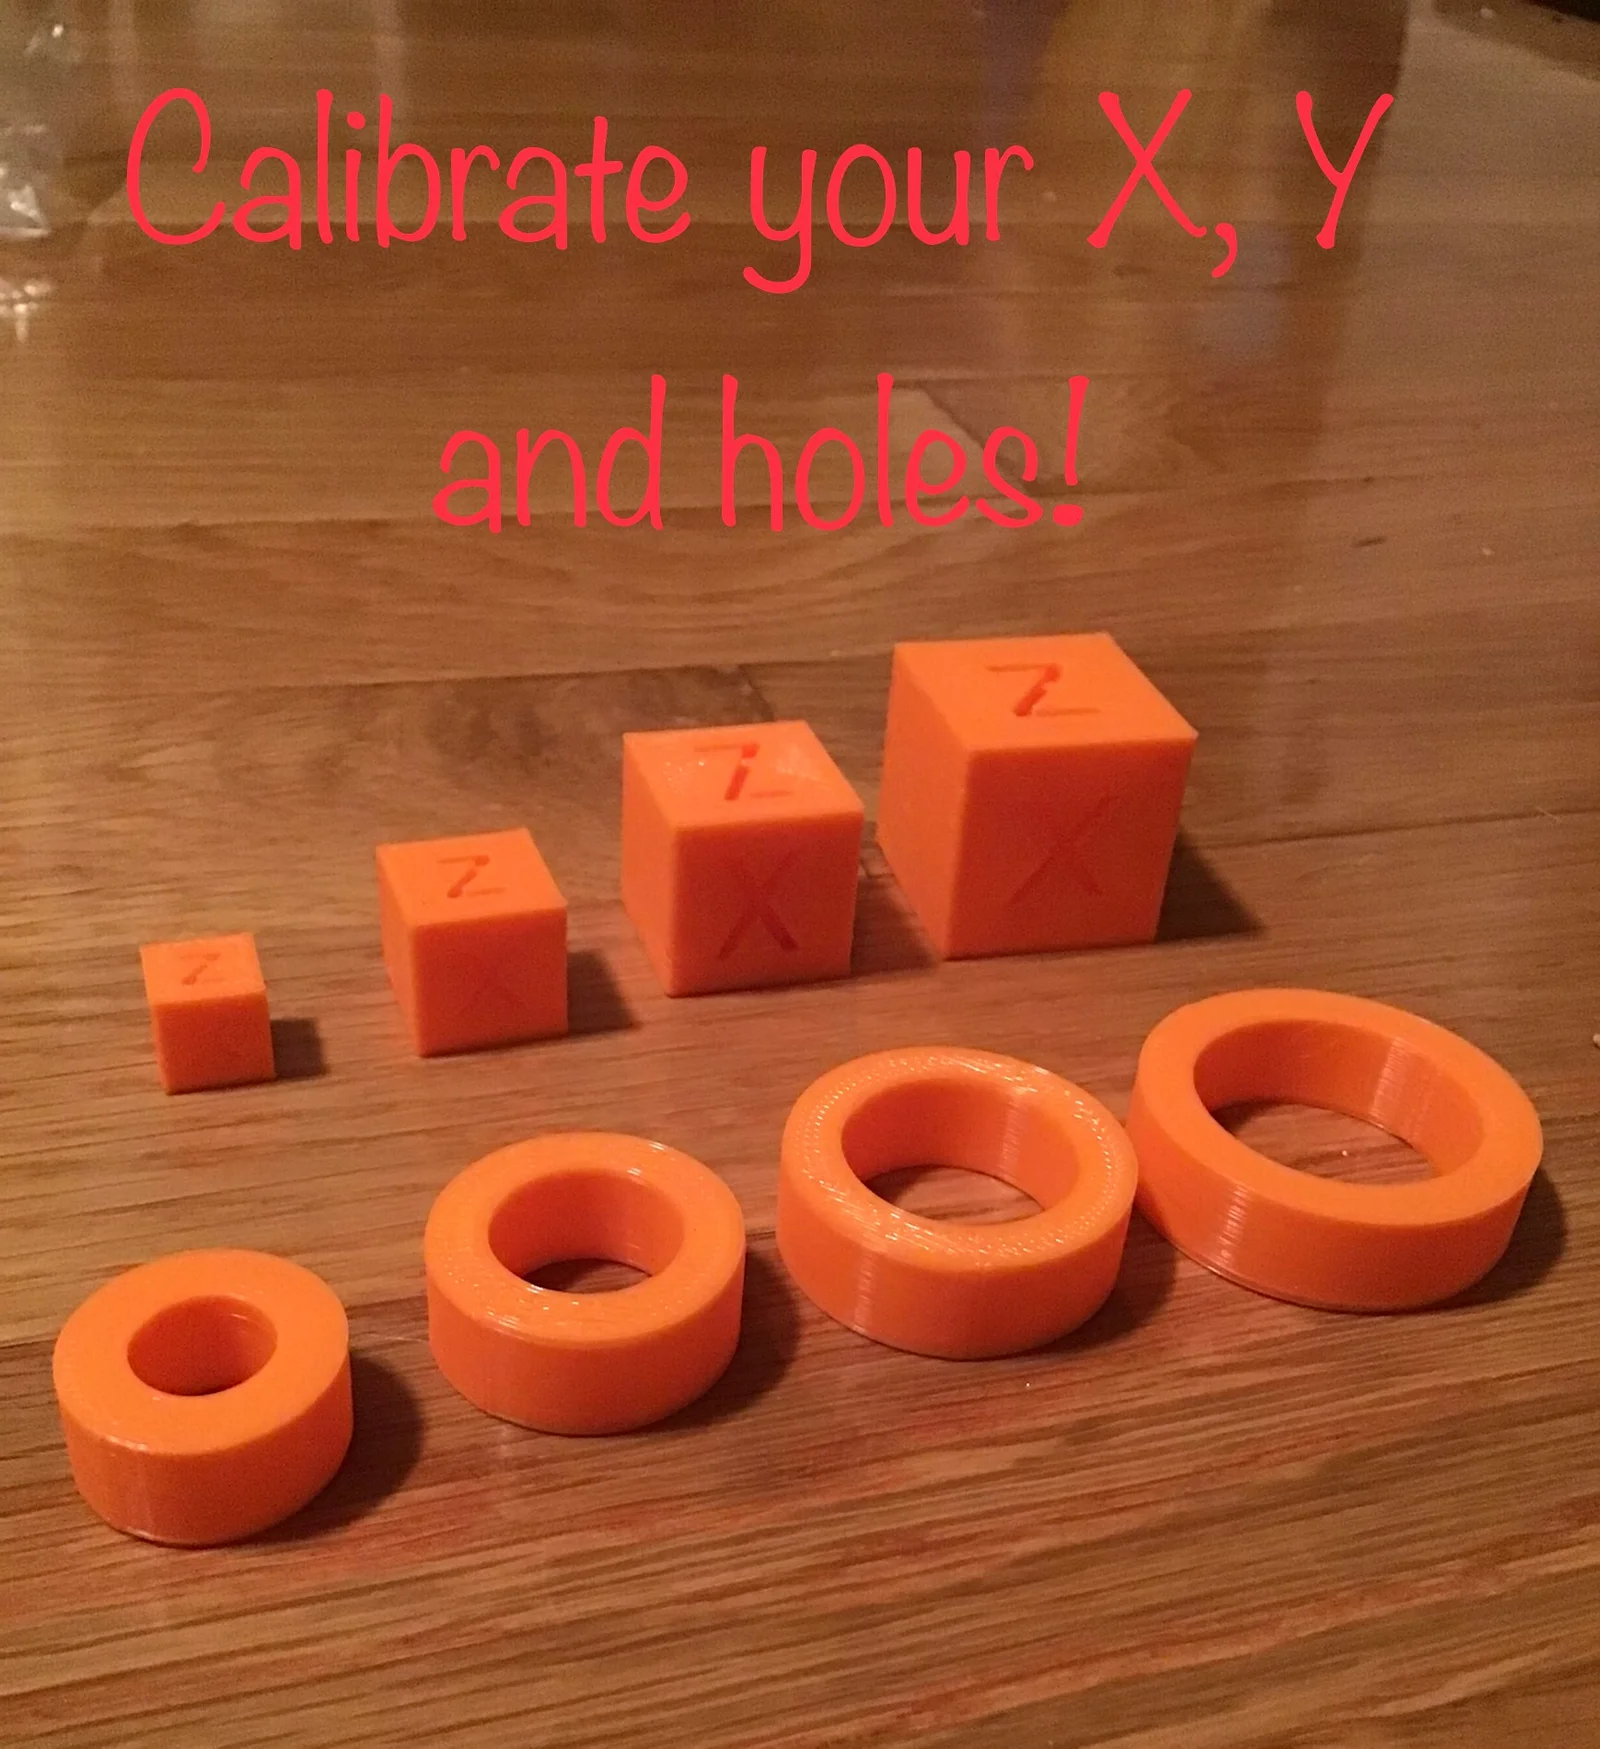
Hey I just calibrated my printer and it has done wonders so I wanted to share it with you!
I would recommend to do the cube calibration first so the rings come out better. After you print all of them you should measure the x and y sides and add them together then divide them by 2. You are finding the average of x and y. do that for all of them so you will have 4 numbers you can add them together and divide by 4.
So you will have 1 number left and you going to find the difference between it and what it supposed to be. Exp: it is supposed to be 10mm but it is 10.34 the difference is -0.34. Or 9.56 so it would be 0.44. That number is what you will put in your slicer. It is called something different in every one but cura it is horizontal expansion and orca slicer it is x y compensation. But you get the point.
You can do the hole one now. After you print all the rings, you should measure the inside of every one. You find the average of them all and this is a little different. After you add them up and divide by 4 you then divide by 2 and that is what you put in your slicer. It is called hole expansion or something like that.
If you like this be sure to love and post a comment if you have any questions! Happy printing.
Bytinx_1344834Likes1.2KDownloads6K

 ByswimLikes0Downloads110

 Byprusa-researchLikes0Downloads2.7K

 Bydet-manLikes0Downloads176

 Bygummiegecko8477Likes0Downloads168

 Bygafyx3dLikes0Downloads125

 Bypjs37Likes0Downloads159

 BydalleLikes0Downloads150

 Byduo3dprintLikes0Downloads156

 BylaserbaconLikes0Downloads175

 Bylk-3d-printsLikes0Downloads209

 BynasikLikes0Downloads122