



Thùng rác in Vase Mode
 BybobmakesLikes2.5KDownloads17.5K
Remix of Vòng Chìa Khóa Tách Mạnh #0105 - Đáp Ứng Nhu Cầu Sử Dụng Hàng Ngày! By BuildX
Build another version of this model.
*** Thanks for checking out this model! ***
If you appreciate what I'm doing, please consider buying me a coffee, and check out my other models!
**********
I was originally looking for a key ring that was 1) easy to use 2) easy to print and 3) robust enough for everyday use - but didn't find anything that met all three criteria, so I designed my own STRONG Split Key Ring. As a natural progression of design optimization, I developed this EVEN STRONGER Split Key Ring.
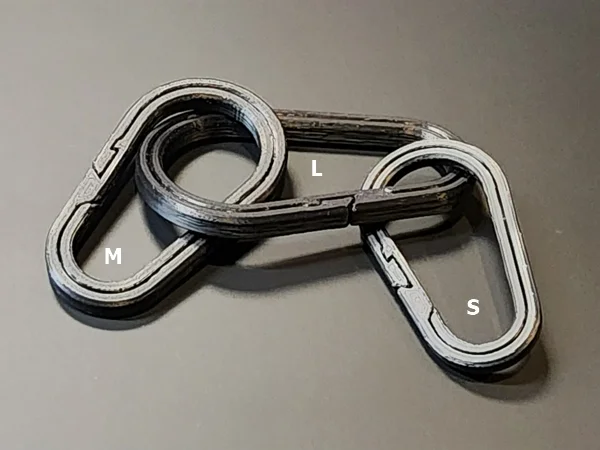
Two clearances (0.18mm and 0.25mm) and 3 sizes are provided:
*My force tester only goes up to 112 lbs. [500N or 51 kg] - I didn't want to ruin it so I haven't tested the Large size yet.
NOTE: the above numbers are for reference only, using Polymaker Polylite ABS. Results from your printer settings and material choice may vary.
Why is this stronger?
When testing, I noticed that the split ring consistently failed at the dovetail first. Once that feature “lets go” under tension, the rest of the ring breaks apart. Naturally I wanted to see if I could make the dovetail “hold on” for longer which I achieved by simply making the end loops uneven, allowing the dovetail to “grip” more, which would withstand higher forces. The idea proved to be true, so now you have an EVEN STRONGER split key ring.
BONUSES: these rings are not only stronger, they are ALSO lighter (less material used) AND prints faster than the original version!
A comparison of strength vs. size:
This gives you some idea of the iterative testing involved:
If you are looking for a quicker clip-in / clip-out option, check out my various carabiners, starting with this one.
How it works:
How to Open and Close the ring: (also see GIF video clip in the deck of pics)
Step 1: To open, slide the Dovetail in the Z direction to release it.
Step 2: Open up the ring like a “Slinky” toy as shown above.
Step 3: Slide the key (or any object that fits) through the Dovetail or Endtail.
Step 4: To close, collapse the Dovetail end together FIRST, then collapse the inner and outer rings together.
I've pull tested the rings and the results (if they are printed per the recommended settings) are below but your results may vary. Tested with Polymaker ABS.
Other variations also available:
Recommendations:
DISCLAIMER: It should go without saying, but please use common sense - DO NOT use any of these rings to carry the weight of precious cargo, like kids, pets, expensive camera equipment, or adults, for that matter. No guarantees are made on their performance. By printing this model, you take full responsibility for its uses.
If you add this to your collection and/or download the model, please click the LIKE button and give it some STARS!
Remember, you can earn some Prusameters if you post a pic of your make! Plus, it would make my day to see it. ;-D
Happy Printing!
BybobmakesLikes2.5KDownloads17.5K

 By178222178222_2484344Likes449Downloads1.7K

 Byquibeck_3353173Likes1.5KDownloads11.5K

 ByVaclav_ZahradkaLikes181Downloads1.2K

 ByowlartLikes527Downloads1.3K

 Bytjfenwick_306961Likes385Downloads1K

 ByAWSWLikes148Downloads575

 ByfifindrLikes216Downloads601

 Byskloter_271869Likes147Downloads421

 ByTommy3DLab_2023125Likes636Downloads2.5K

 Byelectric_pierogiLikes37Downloads383

 ByBeo666Likes50Downloads296