


New
SolderMate - Fully 3D Printed Desk Soldering Companion
 ByleonicLikes0Downloads1.4K
Remix of Bàn Tay Kinh Dị Đang Lộ Diện By PeterFarell
Build another version of this model.
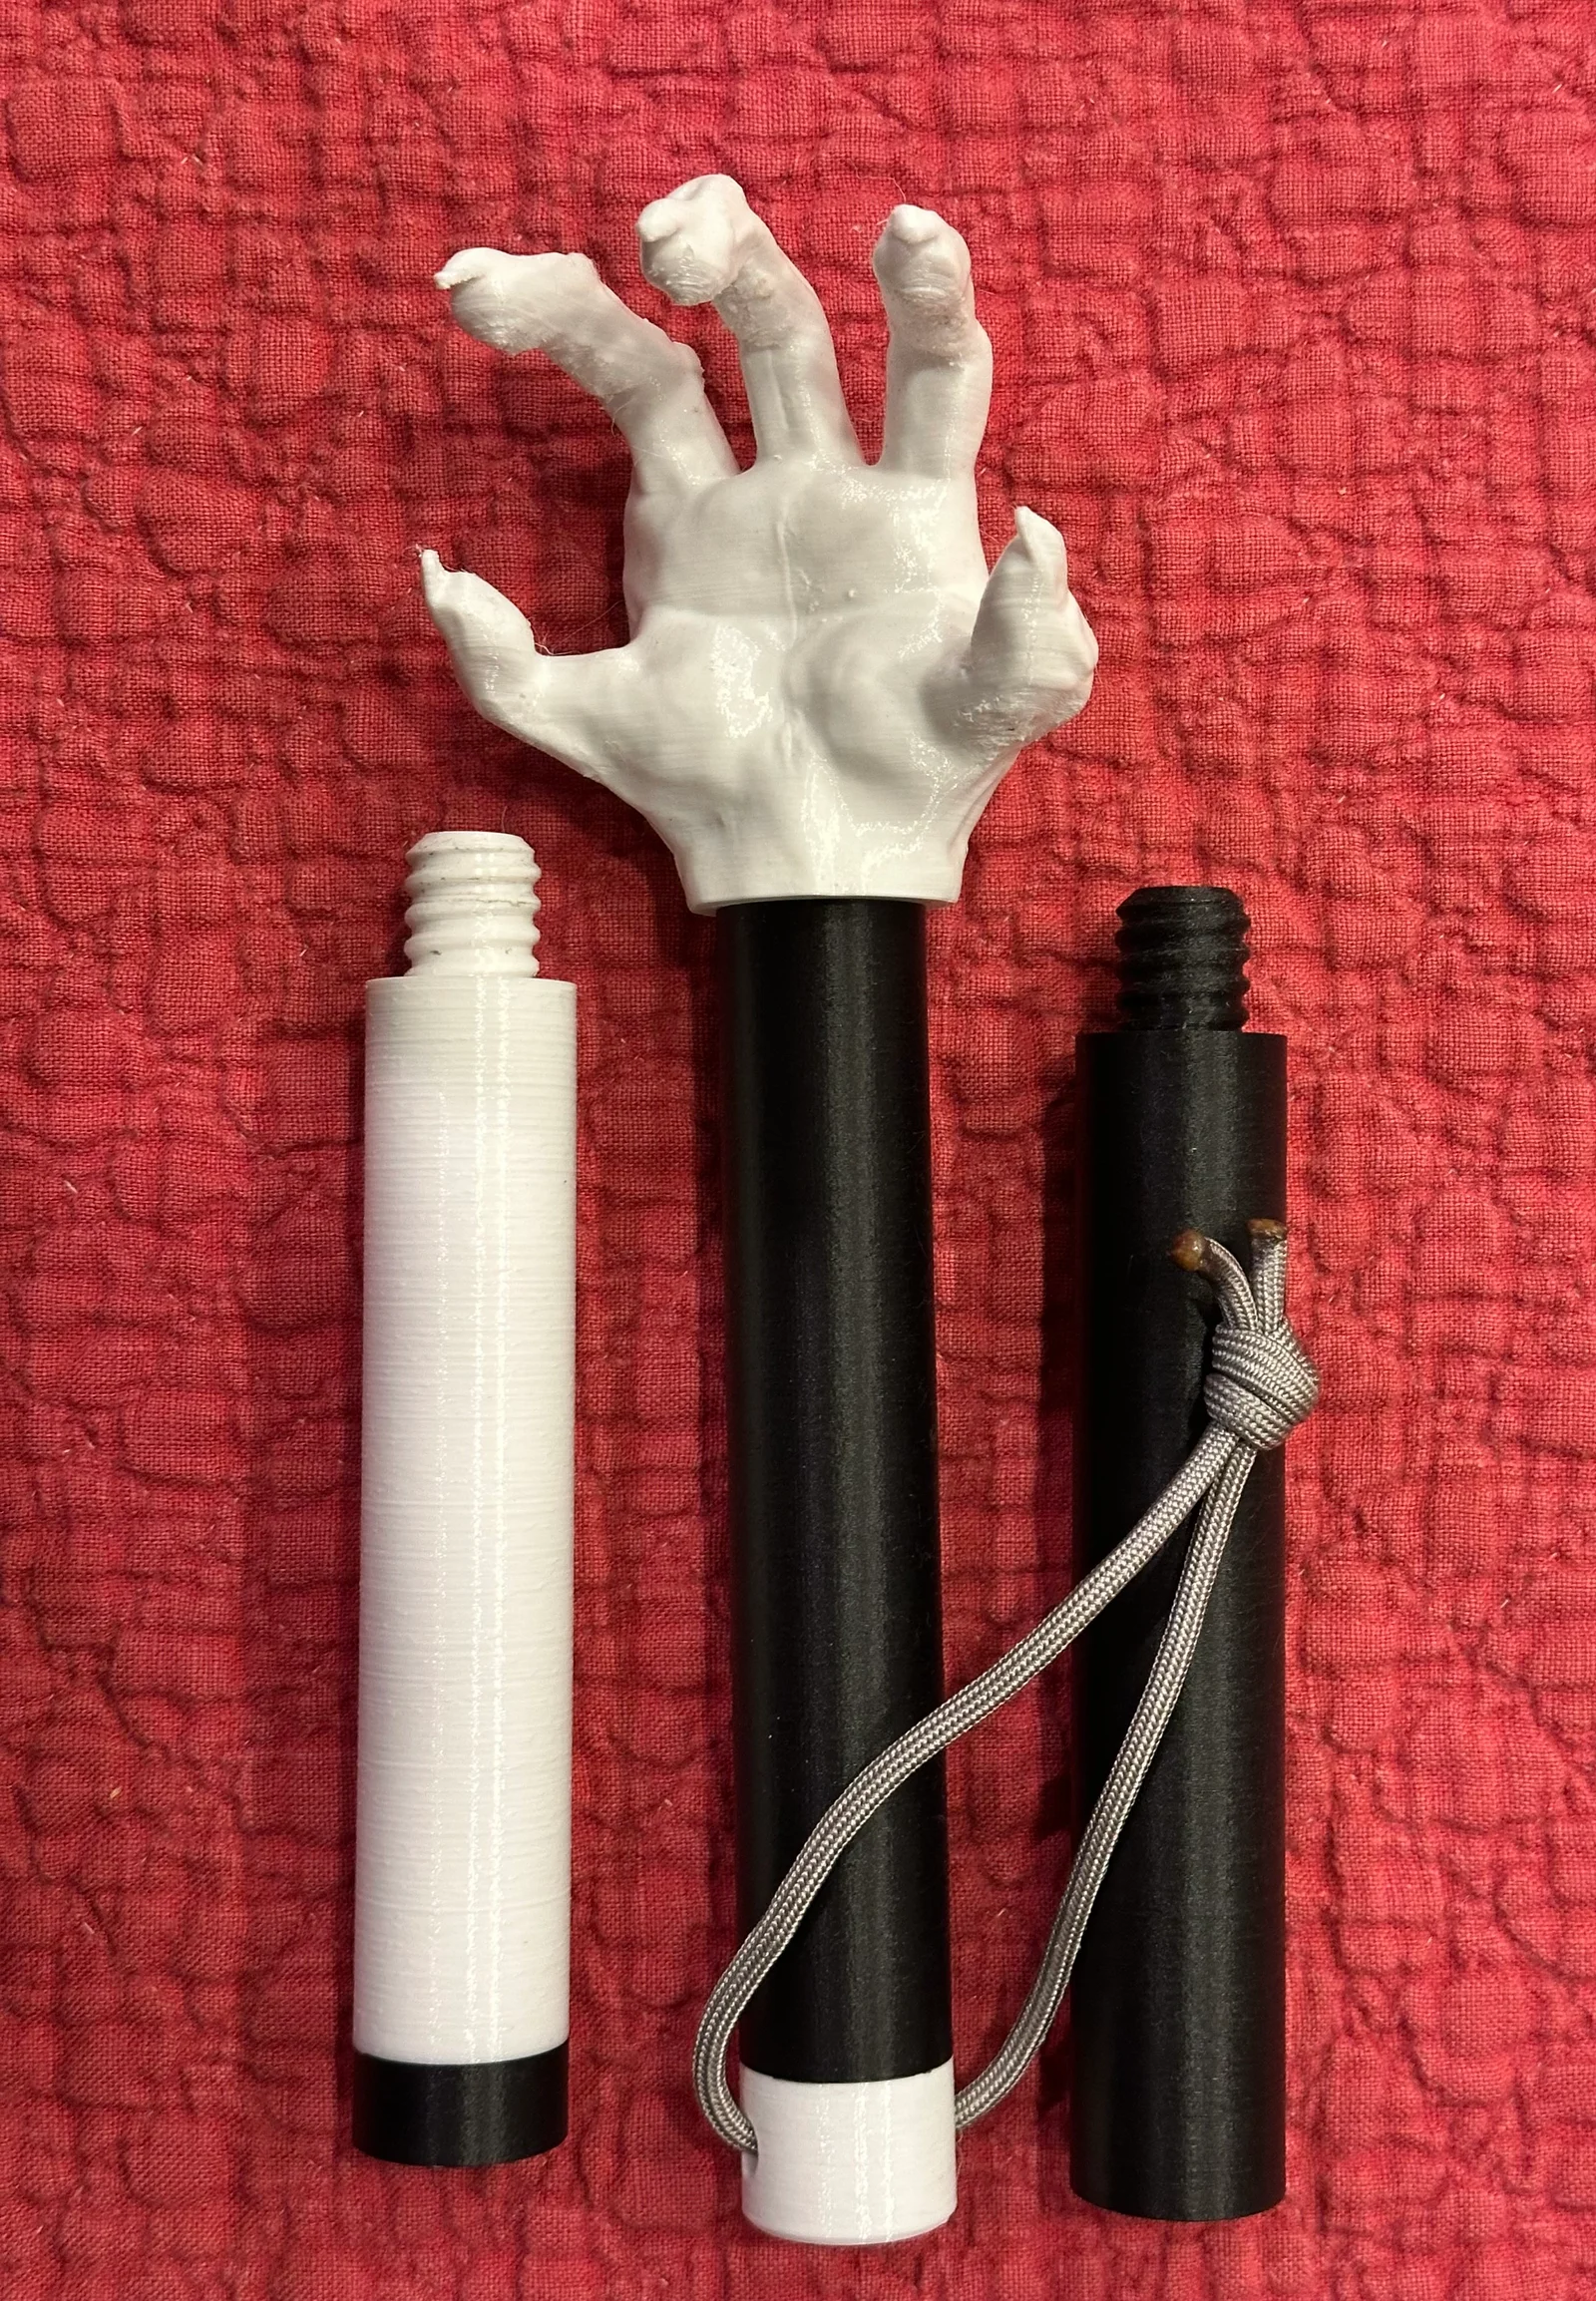
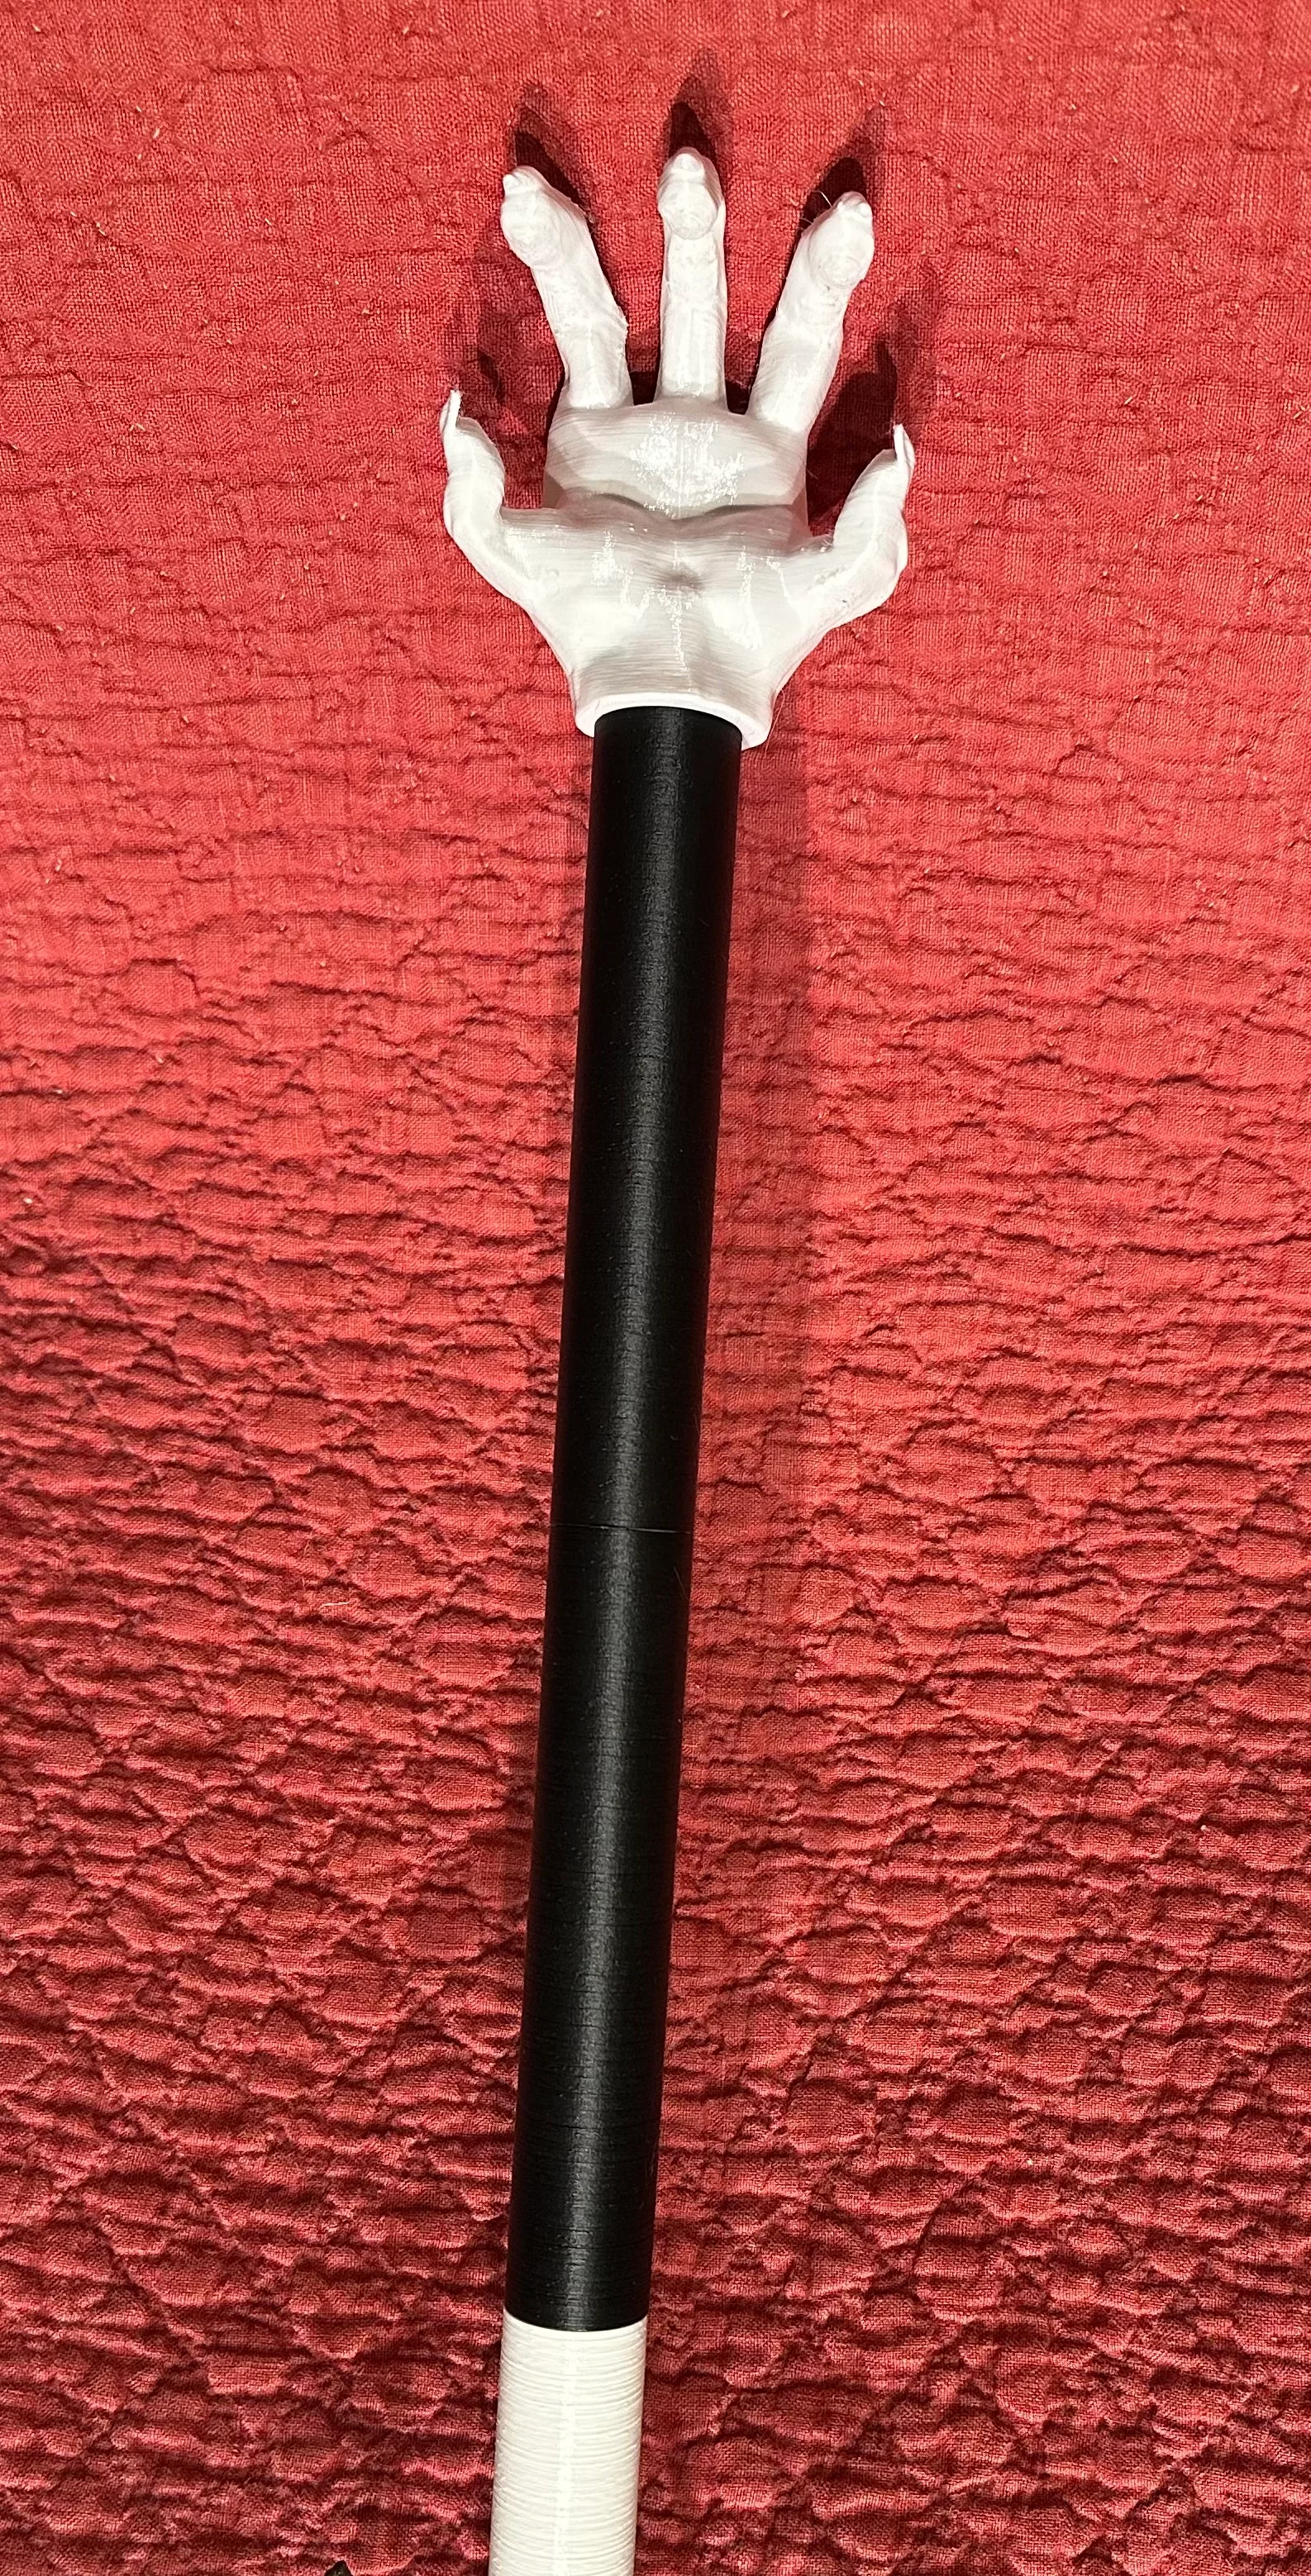
Big Back Scratcher gets that itch as good as shag bark hickory!
Be careful. This is not a toy. Don’t let young children play with it. Seriously.
This model has a few parts. The 3 finger, 2 thumb hand; “stick” for the arm; and end cap for the stick. The stick arm is threaded at each end so you can make your stick arm as long as you like (within limits, of course.) I found 3 stick pieces was right for me. That makes a scratcher about 550mm long.
I made a second one for my dog. One stick piece. Total 250mm long. She loves it!!
Even though it is a Big Back Scratcher, you can make it on a Prusa Mini.
After printing, I recommend using a little lubricant on the threads, and then work the pieces on/off a few times to help clean up any sticky spots on the threads. My preference is “WD-40 Specialist Dry Lube with PTFE”, but anything is better than nothing, and a little is better than a lot.
Slicing and Printing
4 perimeters
15% infill
Supports on the fingers. No supports in the threads.
If you have adhesion issues, use a brim on the stick arms.
Now, to strengthen the weak spot where the threaded end meets the rest of the stick.
See the last two photos. One of the weak spot, the other of strengthening in slicer.
Stand the stick upright
The weak spot is 150mm from the print plater
Slice/cut the stick at 145 and 155mm, keeping the pieces as “parts” (not objects)
Now you have 3 individual parts that can have different printer settings.
Change the infill of the middle piece to be 100%
The 3mf PROJECT files are how I printed, and it the result has been really good so far.
I hope you download and like ❤ this model, and if you do, please also download and like ❤ Peter’s original!
ByleonicLikes0Downloads1.4K

 Bydenis-3dLikes0Downloads263

 ByfifindrLikes500Downloads4K

 ByVC_DesignLikes679Downloads3.6K

 ByDan Schwartz SchwartzLikes744Downloads3.4K

 Bythorin-oakenshieldLikes0Downloads530

 Bychubbs8697_2027893Likes585Downloads1.7K

 Byquibeck_3353173Likes965Downloads1.9K

 ByRungeKuttaLikes229Downloads1.2K

 Bydelloo2008Likes0Downloads240

 ByJeremyVillalo_760366Likes68Downloads769

 ByZED4EverLikes313Downloads5.2K