F3D
Chân đáp FPV Drone [19x19mm] (vd: cho Rekon 10 Pro) 11 / 2

2 images

DIY

Chân đáp FPV Drone [19x19mm] (vd: cho Rekon 10 Pro)

By MagicAerials_514389

Downloads
172
Likes
5
Views
599

Files 2 1.3 MB

  • ma_rekon_10_landing_skids.v1.0_1776434483.stlSTL · 1.3 MB
  • instructions_1776434485.txtTXT · 3.4 KB

Make a variant with AI

Build another version of this model.

Open Studio

Description

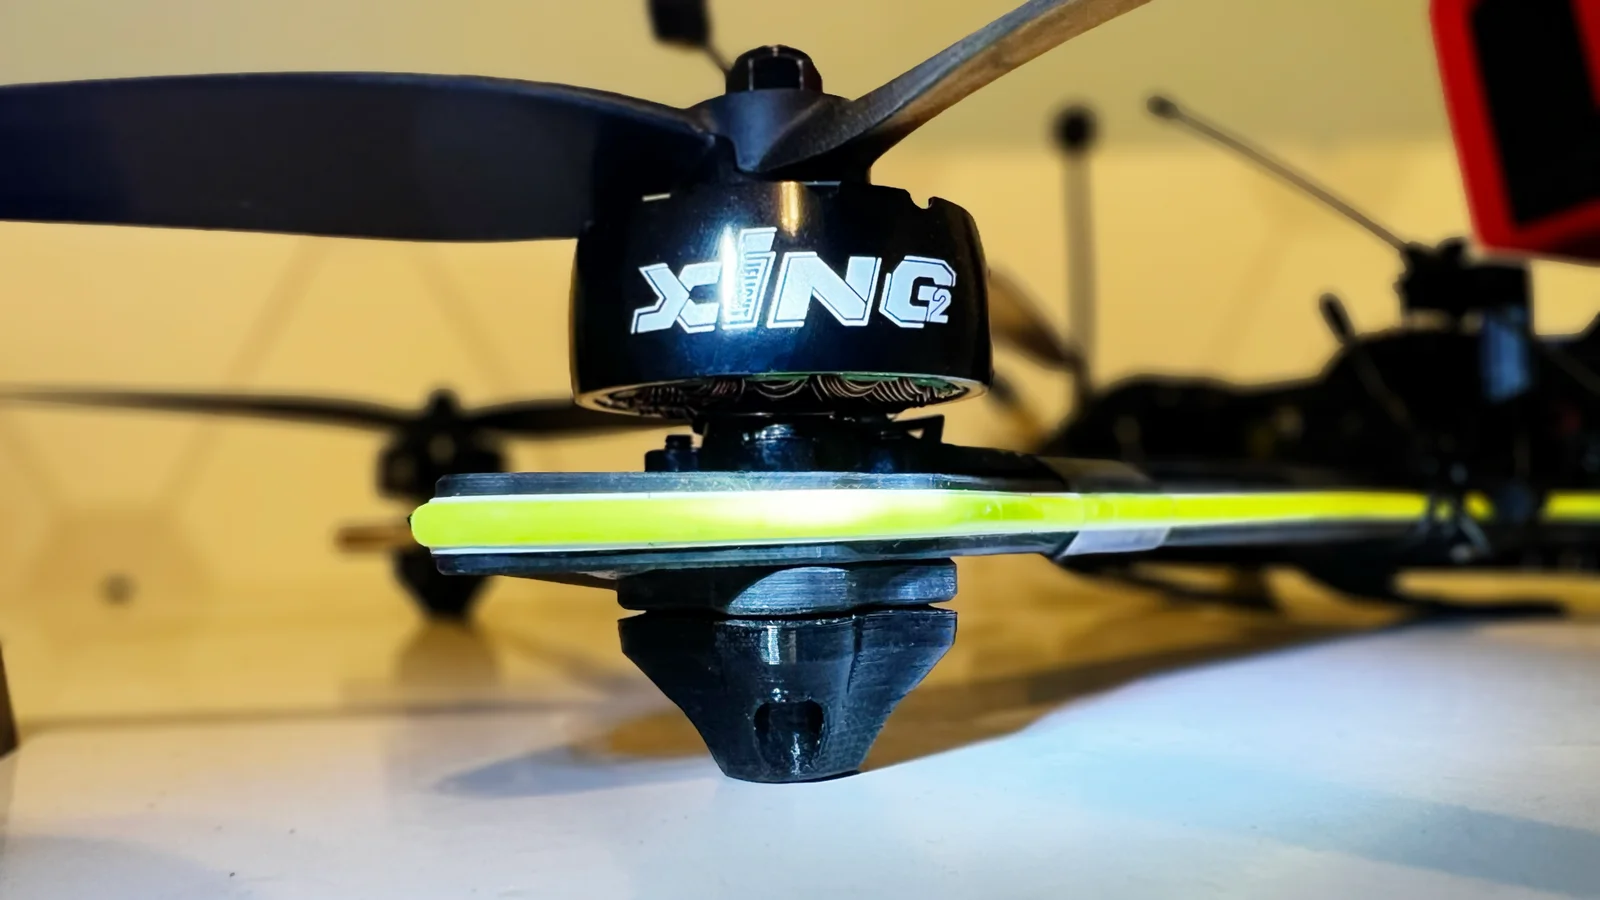
These TPU landing feet are custom-designed to mount under each motor on the Rekon 10 Pro frame, providing durable skids for smoother landings and protecting the frame during takeoff and landing. Each foot/skid has 4 mounting holes to align perfectly with the motor screws (19x19mm pattern). Using thread lock is a must when installing these skids, as the additional TPU layer between the motor base and frame can prevent the screws from being fully tightened, making thread lock essential to prevent loosening during flight.

Check out my YouTube video showcasing a build using this part:
https://youtu.be/CxsEEGlc1K0

Key Features:

  • Custom Fit: Specifically designed for the Rekon 10 Pro motor mounting pattern.
  • Durable Protection: TPU material absorbs impacts and protects the frame during landings.
  • Thread Lock Essential: Secures motor screws despite the slight gap introduced by the TPU skid layer.
  • Easy Installation: Aligns with existing motor screw holes for hassle-free mounting.

Printing Specifications:

  • Material: TPU
  • Infill: 100% for maximum durability and impact absorption.
  • Supports: Not required.
  • Orientation: Print the feet flat on the bed for the best strength and adhesion.

Installation Steps:

  1. Print the Landing Feet:
    1. Use TPU material with 100% infill to ensure maximum durability and impact absorption.
    2. Print each skid flat on the bed for proper alignment and strength.
    3. Once printed, inspect each piece to ensure clean and precise mounting holes.
  2. Prepare the Frame and Motors:
    1. Remove the motor screws from the Rekon 10 Pro frame where the skids will be installed.
    2. Clean the screw threads and motor base to remove any debris or old thread lock.
  3. Align and Mount the Skids:
    1. Place one skid under each motor, aligning the 4 mounting holes with the motor screw holes.
    2. Insert the motor screws through the skid and into the frame.
  4. Apply Thread Lock:
    1. Before tightening, apply a small amount of thread lock to the motor screws to prevent them from loosening during flight.
    2. Tighten the screws securely but avoid overtightening to prevent damage to the TPU or the motor threads.

Reference Photo:

[See reference photo for the mounted position and zip tie configuration]

Notes:

  • These skids are specifically designed for the Rekon 10 Pro frame but may also fit other frames with similar motor mounting patterns (19x19mm pattern).
  • Using thread lock is essential to ensure the screws remain secure during flight and vibrations.
  • Recheck screw tightness after the first flight to confirm the skids are firmly attached.

Watch It in Action:

Check out my YouTube video showcasing a build using this part:
https://youtu.be/CxsEEGlc1K0

Support:

Have questions or need assistance? Drop your comment on my youtube video, and I’ll be happy to help!

Read more Show less

Print spec

Formats
stltxt
Model files
2
Total size
1.3 MB
Largest file
1.3 MB

0 comments

See all