



Thằn lằn cử động linh hoạt - In tại chỗ (Không cần support)
 Bycream110_291842Likes924Downloads7.7K
Remix of Hubris Mag - Mag Nerf in 3D đầy táo bạo By donutcat
Build another version of this model.
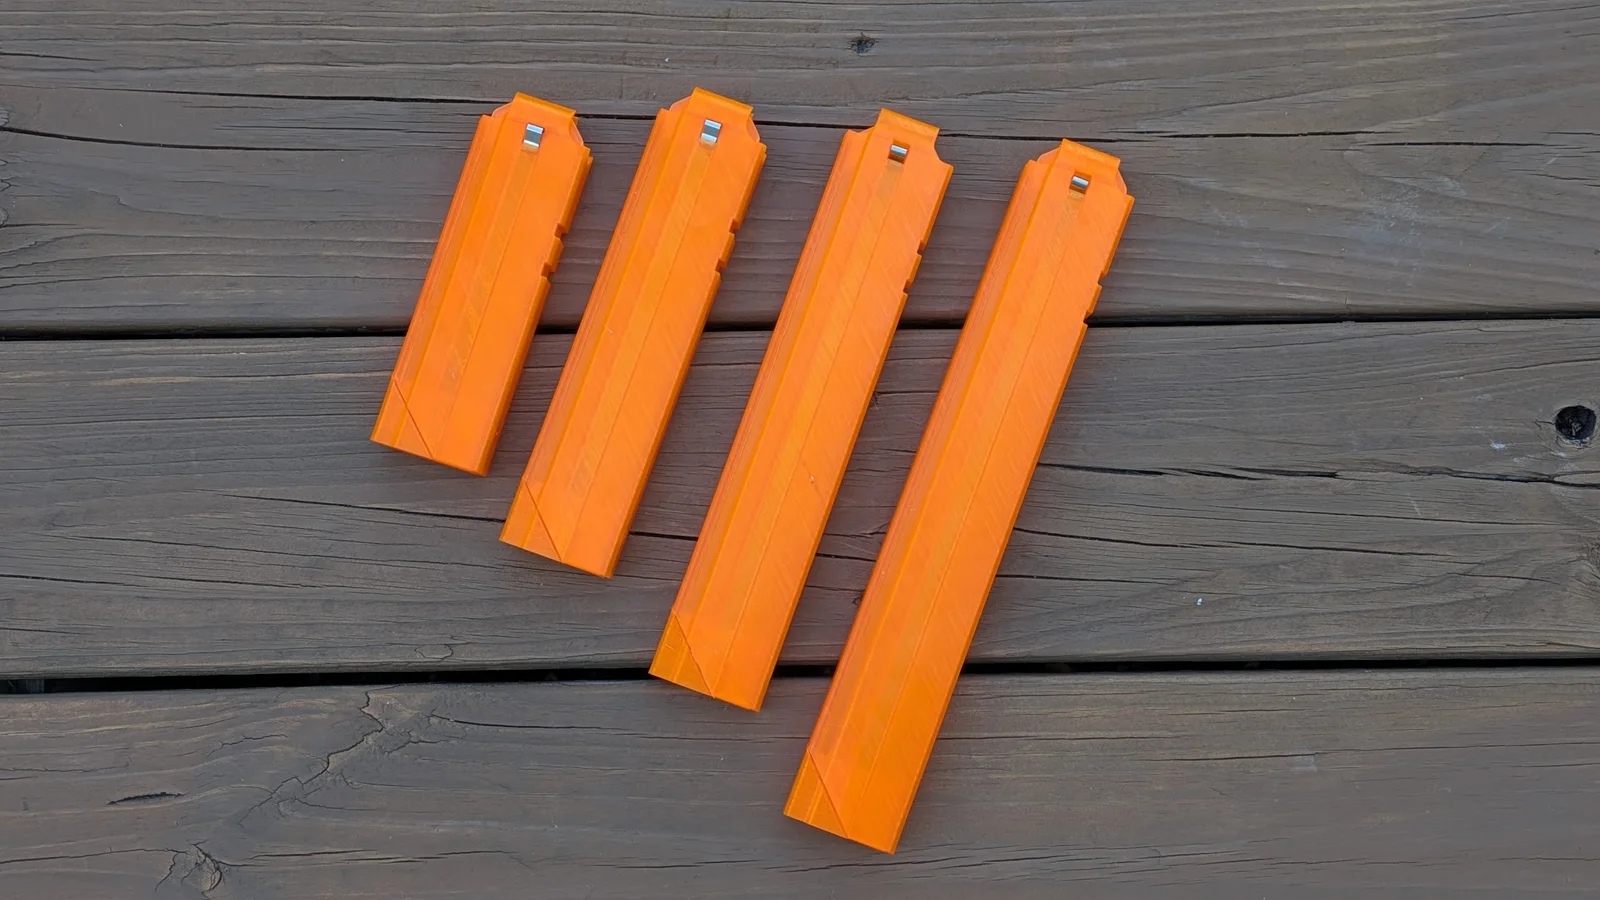
This is the Moxie Mag, a 3d printable straight talon mag. It uses sure.t mag (by t4obrien) geometry (using the improved mag release cutouts from my remix), but printed at a 45 degree angle, like the Hubris Mag (by donutcat). Printing at an angle is useful for several reasons. You can print higher capacity magazines by making better use of your print bed, the layer lines do not interfere with dart feeding or gravity drops, and the mag as a whole is more durable. Pair these advantages with the sure.t mag's great geometry and constant force spring compatibility and you have a pretty decent printed mag.
Hardware
I use McMaster Clip-On Constant-Force Springs for my mags. I prefer these to the Foamblast-style springs because those have a far heavier load than necessary, and can cause squished darts and miss-feeds, especially when using old darts.
0.2lb load - my preferred load, can feed semi-auto blasters as fast as I can pull the trigger
0.4lb load - good load for higher DPS full auto
0.6lb load - maybe for super high DPS dart hoses
I have added a Foamblast-specific follower if you still want to use them.
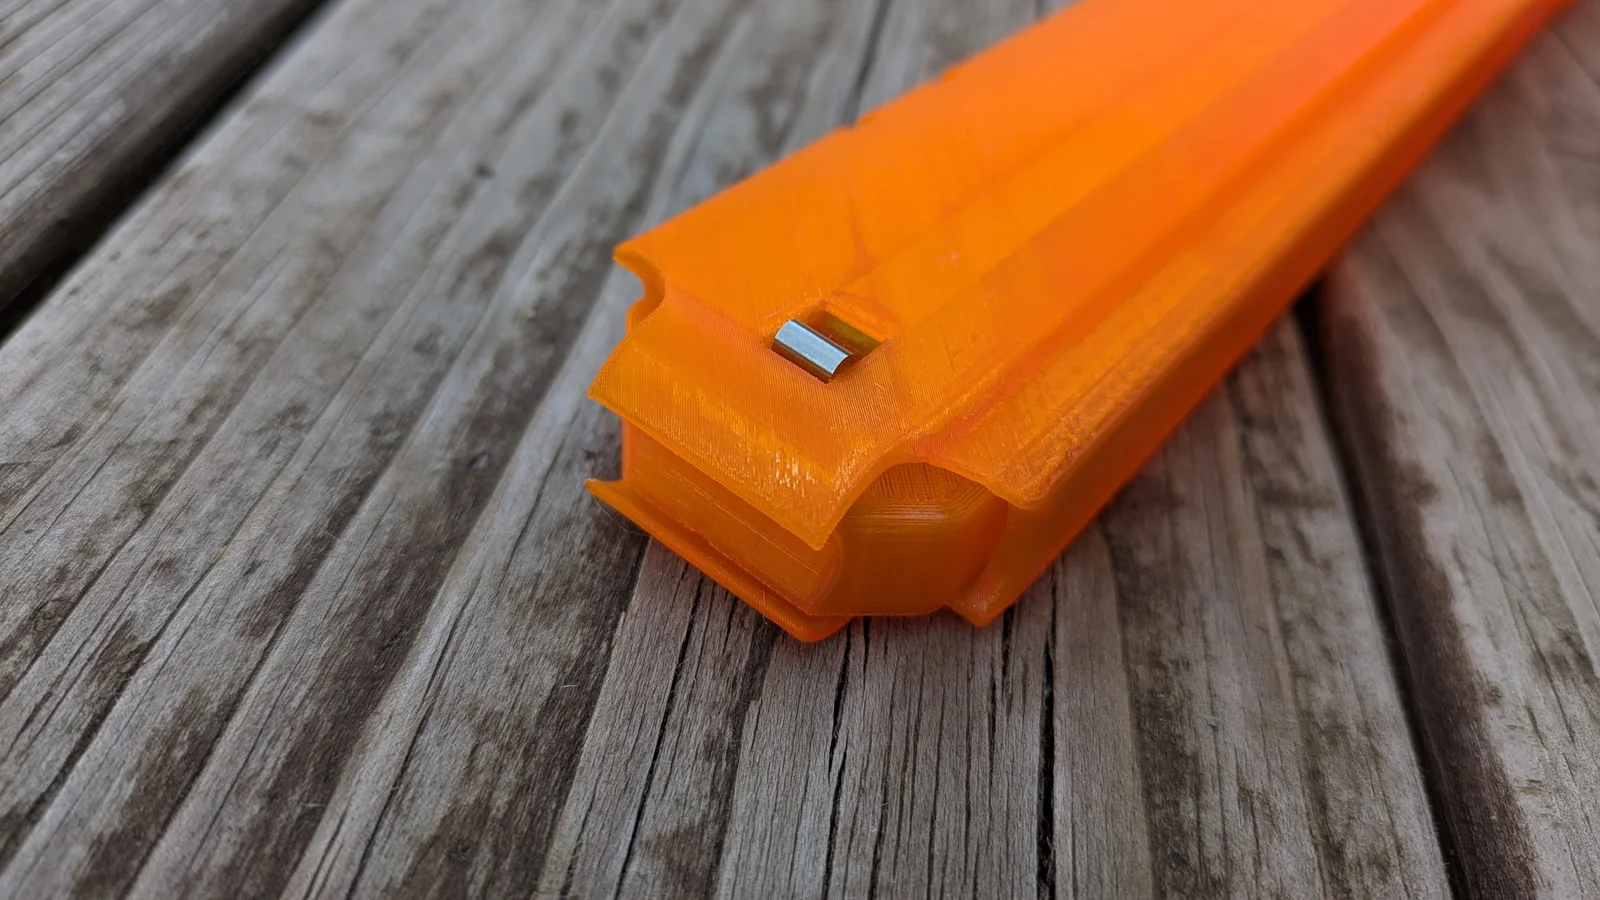
The newest update allows you to screw the endcap into the magazine body with a 4-40 x 3/8" countersunk screw.
Printing
Good bed adhesion is required, especially for the longer mags. You will need a brim. You may want to print more slowly than usual to avoid knocking the mag down. You may want to avoid printing these on bed slingers.
I print mine in PETG at 0.20mm layer height, 6 walls (so the entire mag is walls) at 60mmps with a 20mm brim. I have had no layer shifting issues or mags falling down with these settings.
Assembly
Updates
7/17/2025 - All magazines and the endcap have been updated to include a hole for a 4-40 x 3/8" countersunk screw. These are the same screws that Sillybutts and Captainslug use for most of their builds, so you probably have some hanging around. This allows you to secure the endcap in place, and should make traditional magazine springs usable without gluing the cap down. I have re-adjusted the size of each mag to compensate for losing some of the mag body to the endcap. The old endcap will still work as well as it ever has on the new mags, and will increase listed mag capacity by ~3 darts. All the old magazines will still be available in the ARCHIVE folder if you preferred them. I have also adjusted the tolerances of the follower, it should no longer flip!
03/14/2025 - Adjusted Endcap tightness. Added a new endcap option, a TPU bumper. I print these in 95a TPU at 0.20mm layer height, 2 walls, 10% gyroid infill at 30mmps. These settings make the bottom of the bumper nice and squishy to absorb impacts, while the top is still strong enough to grip tightly to the bottom of the mag.
Bycream110_291842Likes924Downloads7.7K

 ByOnemoredaveLikes861Downloads6.9K

 Byjs14581_2767550Likes118Downloads3.3K

 Byquibeck_3353173Likes351Downloads2.1K

 ByTheMakerStuffLikes315Downloads1.9K

 ByGoolow_295072Likes598Downloads1.6K

 ByMikWantecLikes264Downloads1.5K

 BySzvmkn_3779340Likes231Downloads1.3K

 ByHacker Man ManLikes248Downloads1.5K

 ByAPC_4112822Likes144Downloads385

 Bycentarico_3241219Likes257Downloads973

 ByDanny Kmack KmackLikes34Downloads193