



Pocket-Size Third Hand Mini Spring Loaded Vise
 ByrjunLikes0Downloads306
Build another version of this model.
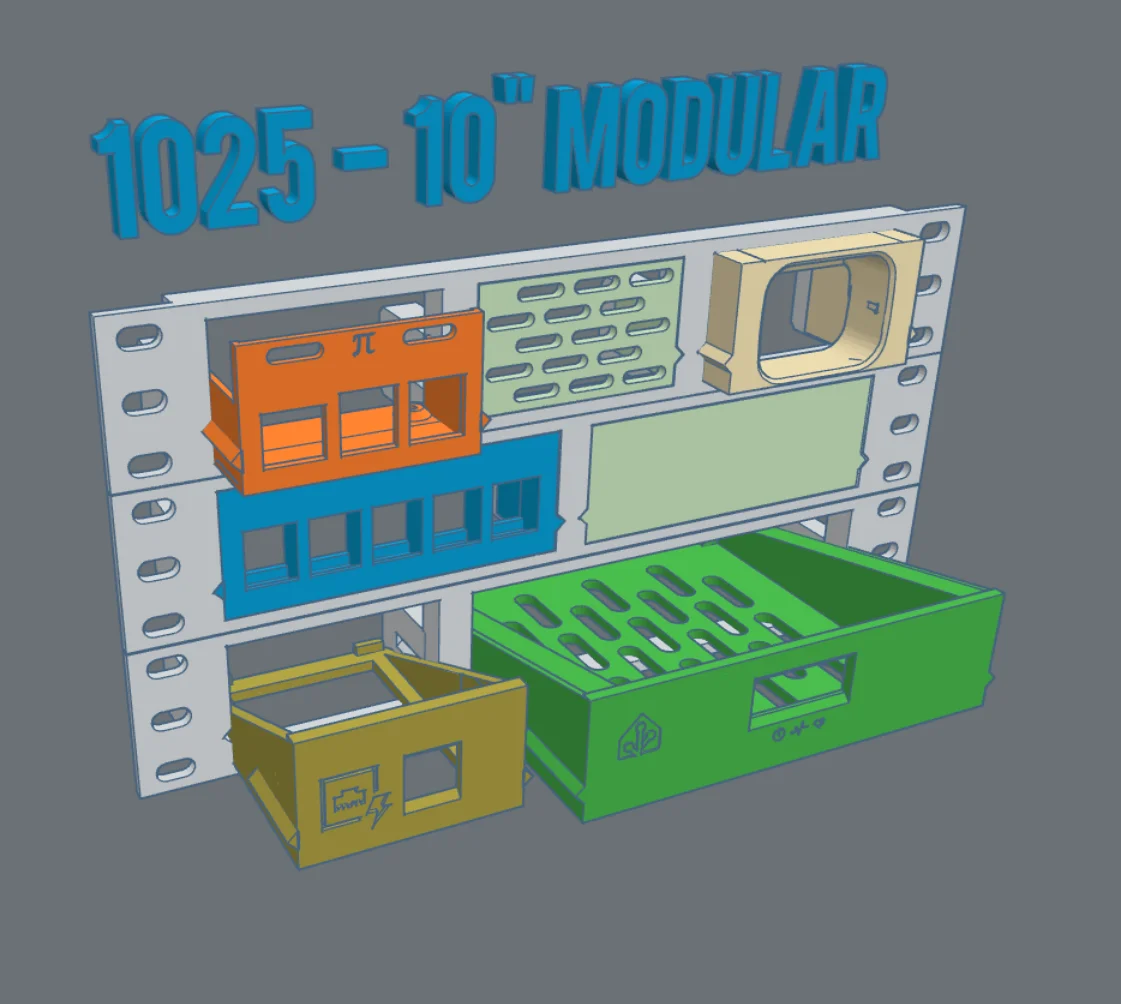
This is a collection of modules for my 1025 modular system. This collection will grow over time, and I take requests for things to add to this system.
Note! Not all modules are represented in the photos! A full list is available below.
Screws and cage nuts that came with your cabinet, nothign else
The rackmount comes in three variations:
3x1w
2w+1w
1.5w+1.5w
1.5w+2x 40mm fan
The modules come in three correspnding sizes:
Single width (1w):
Blank
Blank vent
1x Keystone
3x Keystone
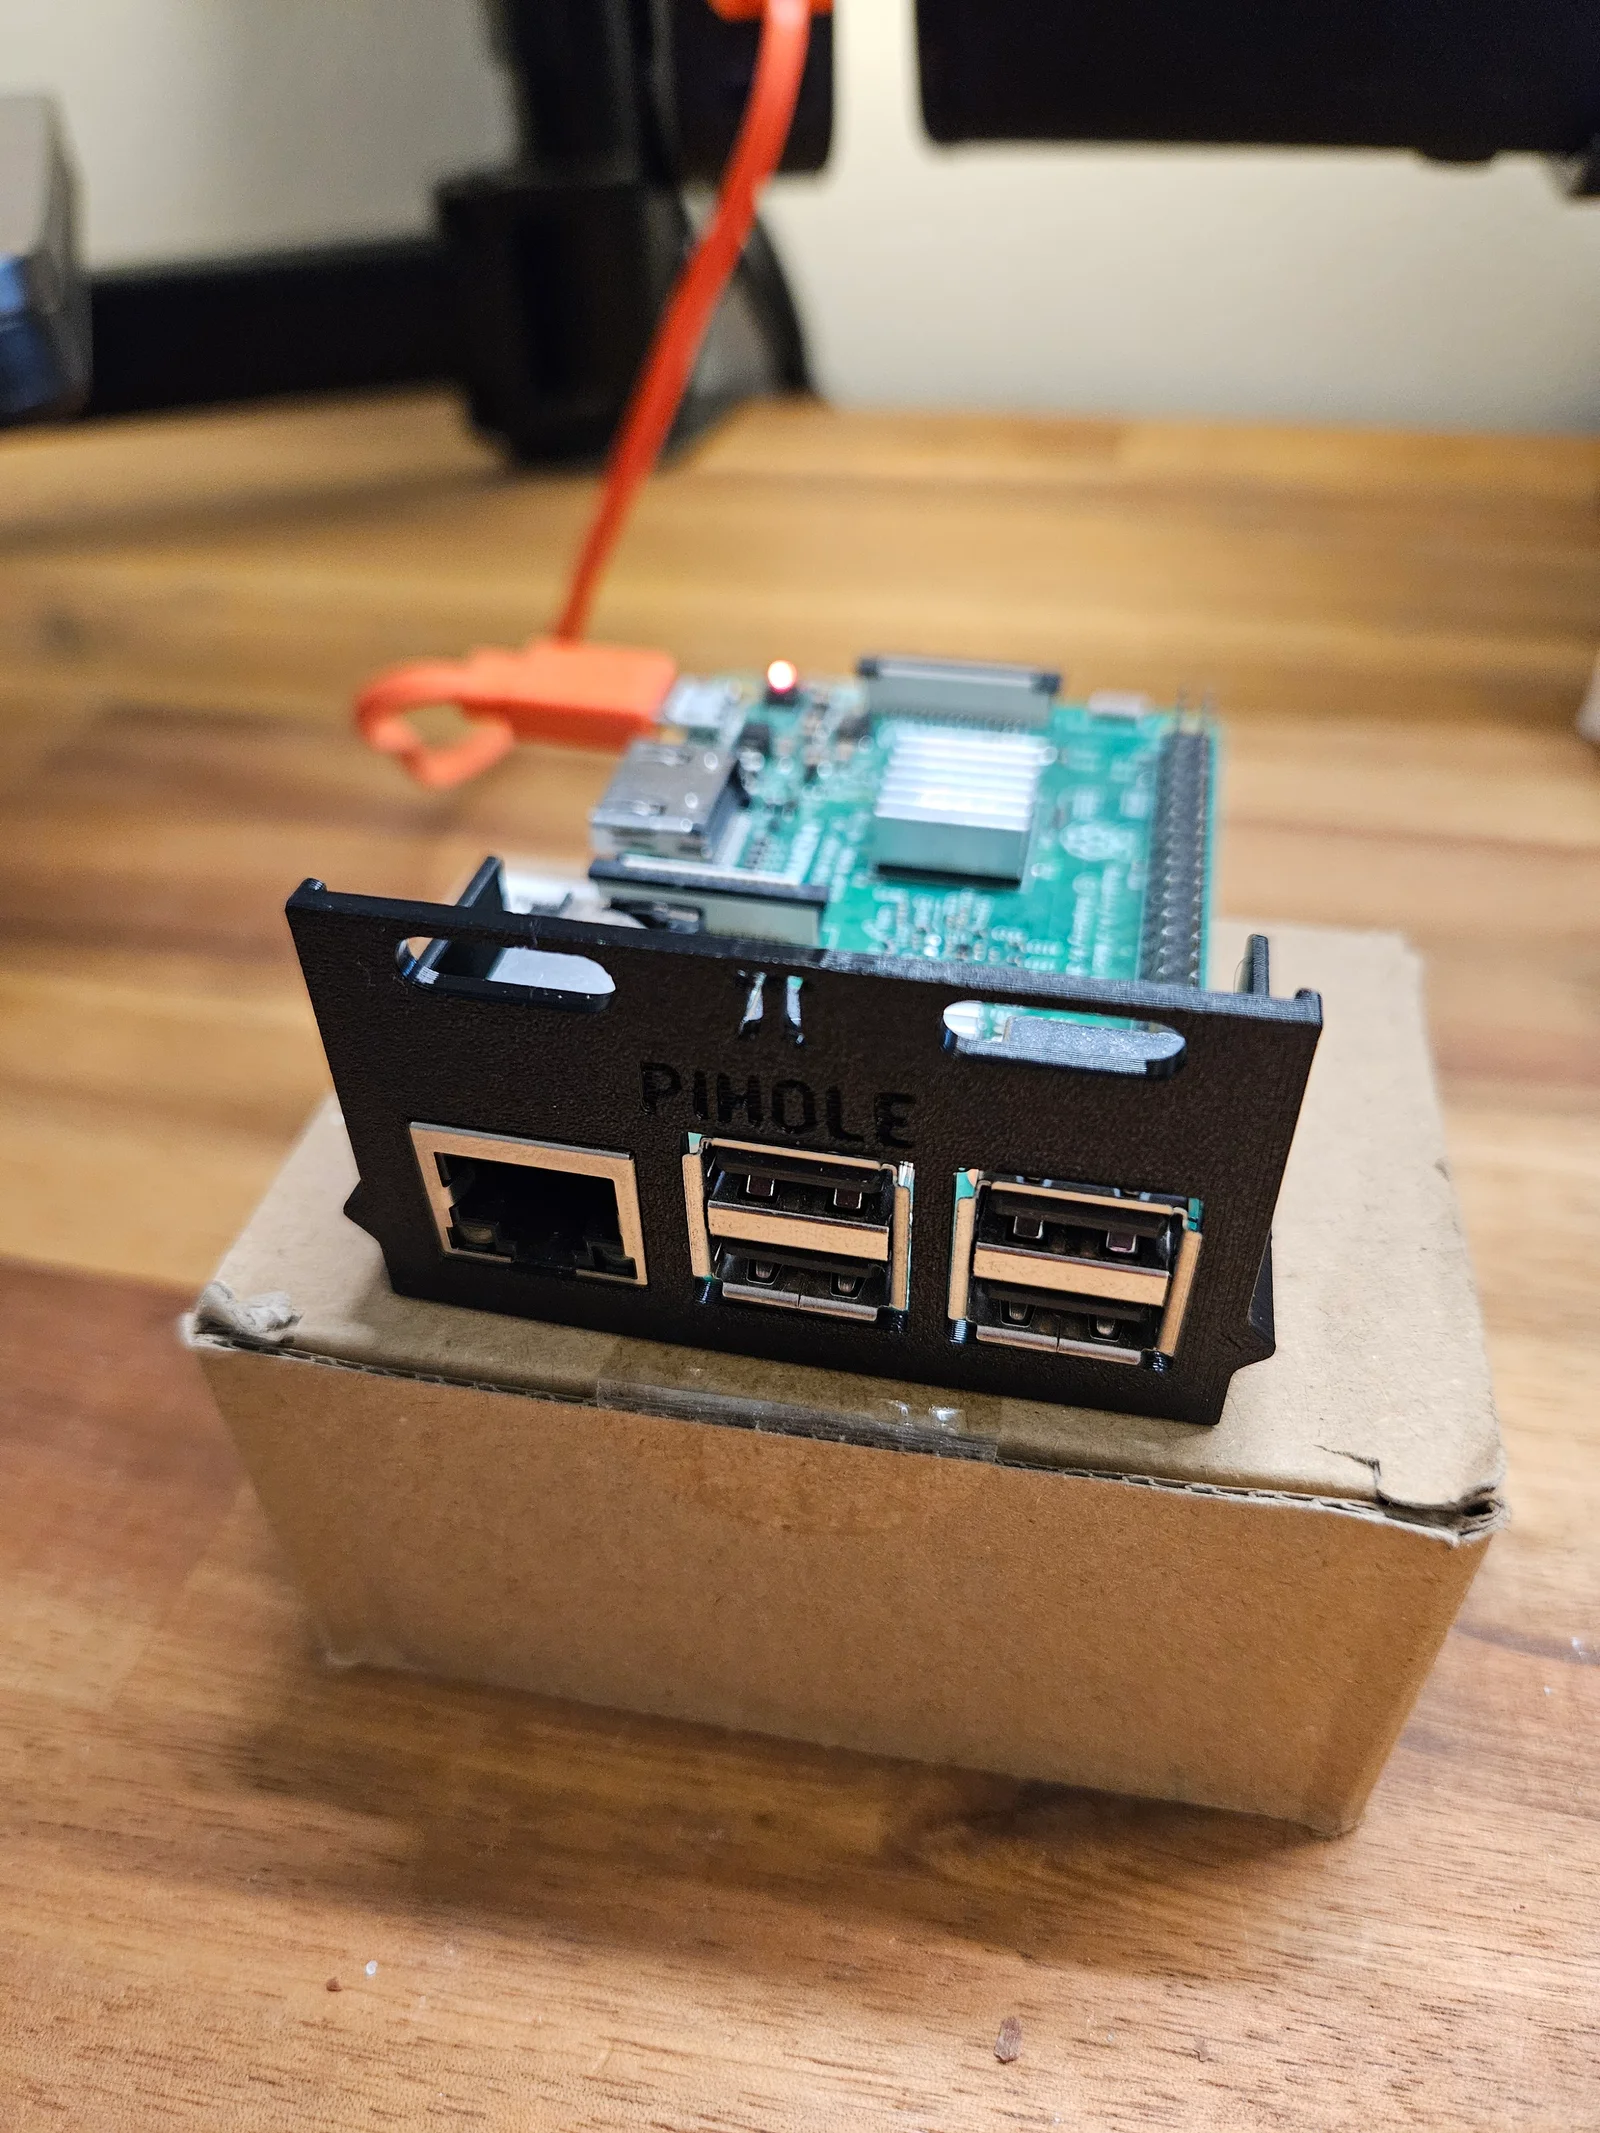
Raspberry Pi 3/4/5
TP-Link TL-PoE150S (PoE injector)
JetKVM
Ubiquiti ETH-SP-G2 (Surge protector)
One-and-a-half width (1.5w):
Blank
Blank vent
5x keystone
Philps Hue Bridge (V2, non pro)
2x JetKVM
Double width (2w):
Blank
Blank vent
7x Keystone
Ubiquiti Flex (5 port switch)
Raspberry Pi 3/4/5 + keystones (for instance for Retropie)
Home Assistant Green (Combines perfectly with a TP-Link PoE injector module in a 2+1)
Philips Hue Bridge + 2x keystone (Untested by me, provided as is. New version coming, I would not print this!)
Apple TV 4K 2nd and 3rd gen & remote (Untested by me, let me know if something needs fixing)
Steam Link box
To print the rackmounts on a Prusa printer, place them diagonally.
Strength at your discretion. I printed with the following settings:
3 perimeters
15% infill
Gyroid
PETG (for heat resistance)
Most modules will print equally fine on their face or sitting flat on the build surface. Layer orientation wise prints will be stronger if you print them sitting flat. However, most items placed in these are very light and do just fine placed face down instead. I printed them all face down to get the pattern from my textured plate on the front.
The current only exception is the blank vent, which should be printed face down to avoid unnecessary support material, seeing as it doesn't bear any load when in use.
Thank you to Andsten for his design of the Home Assistant Green rack mount found here. While I designed most of my holder on my own, I did use his front panel as I liked the look of the icons and hole. Credit for the icons go to their respective designers;
CC icons by:
Royyan Wijaya (Activity)
i cons (Power)
Eliricon (Heart / Status)
Thank you to @OloDeepdelver for his design of the JetKVM mount found here.
Thank you to @n3rding for his design of the fan guard found here.
ByrjunLikes0Downloads306

 ByleonicLikes0Downloads1.4K

 ByZED4EverLikes313Downloads5.2K

 Byreinvent3dLikes0Downloads135

 ByfifindrLikes500Downloads4K

 Bymrfixit_324954Likes65Downloads478

 Bylab-96Likes0Downloads108

 BymoonyxLikes0Downloads700

 ByVC_DesignLikes679Downloads3.6K

 ByDan Schwartz SchwartzLikes744Downloads3.4K

 ByBrokentooth_designsLikes83Downloads454

 Byvc-designLikes0Downloads3.2K