




Móc treo máy CPAP
 ByDaan Tholenaars TholenaarsLikes461Downloads3.1K
Build another version of this model.
A friend of mine started having issues with his tailbone. His job requires a lot of sitting, and even with decent office furniture he kept getting irritated pressure points. His doctor eventually prescribed a pressure-relief cushion, which did its job well from a medical point of view and definitely helped him
However, other issues started to appear. For one thing, heat and sweating became a problem because the prescribed cushion was anything but breathable. It also forced him into different sitting positions depending on the chair he used. Sitting at work became more comfortable, but when working from home the curvature of his chair caused unpleasant pressure on his thighs
Since my job involves custom wheelchair construction, he came to me and asked if I could come up with something better — and that’s how this project started
First step was adjusting the cushion geometry so it matched his body more precisely. At the same time we figured out how firm he actually wanted it to feel.
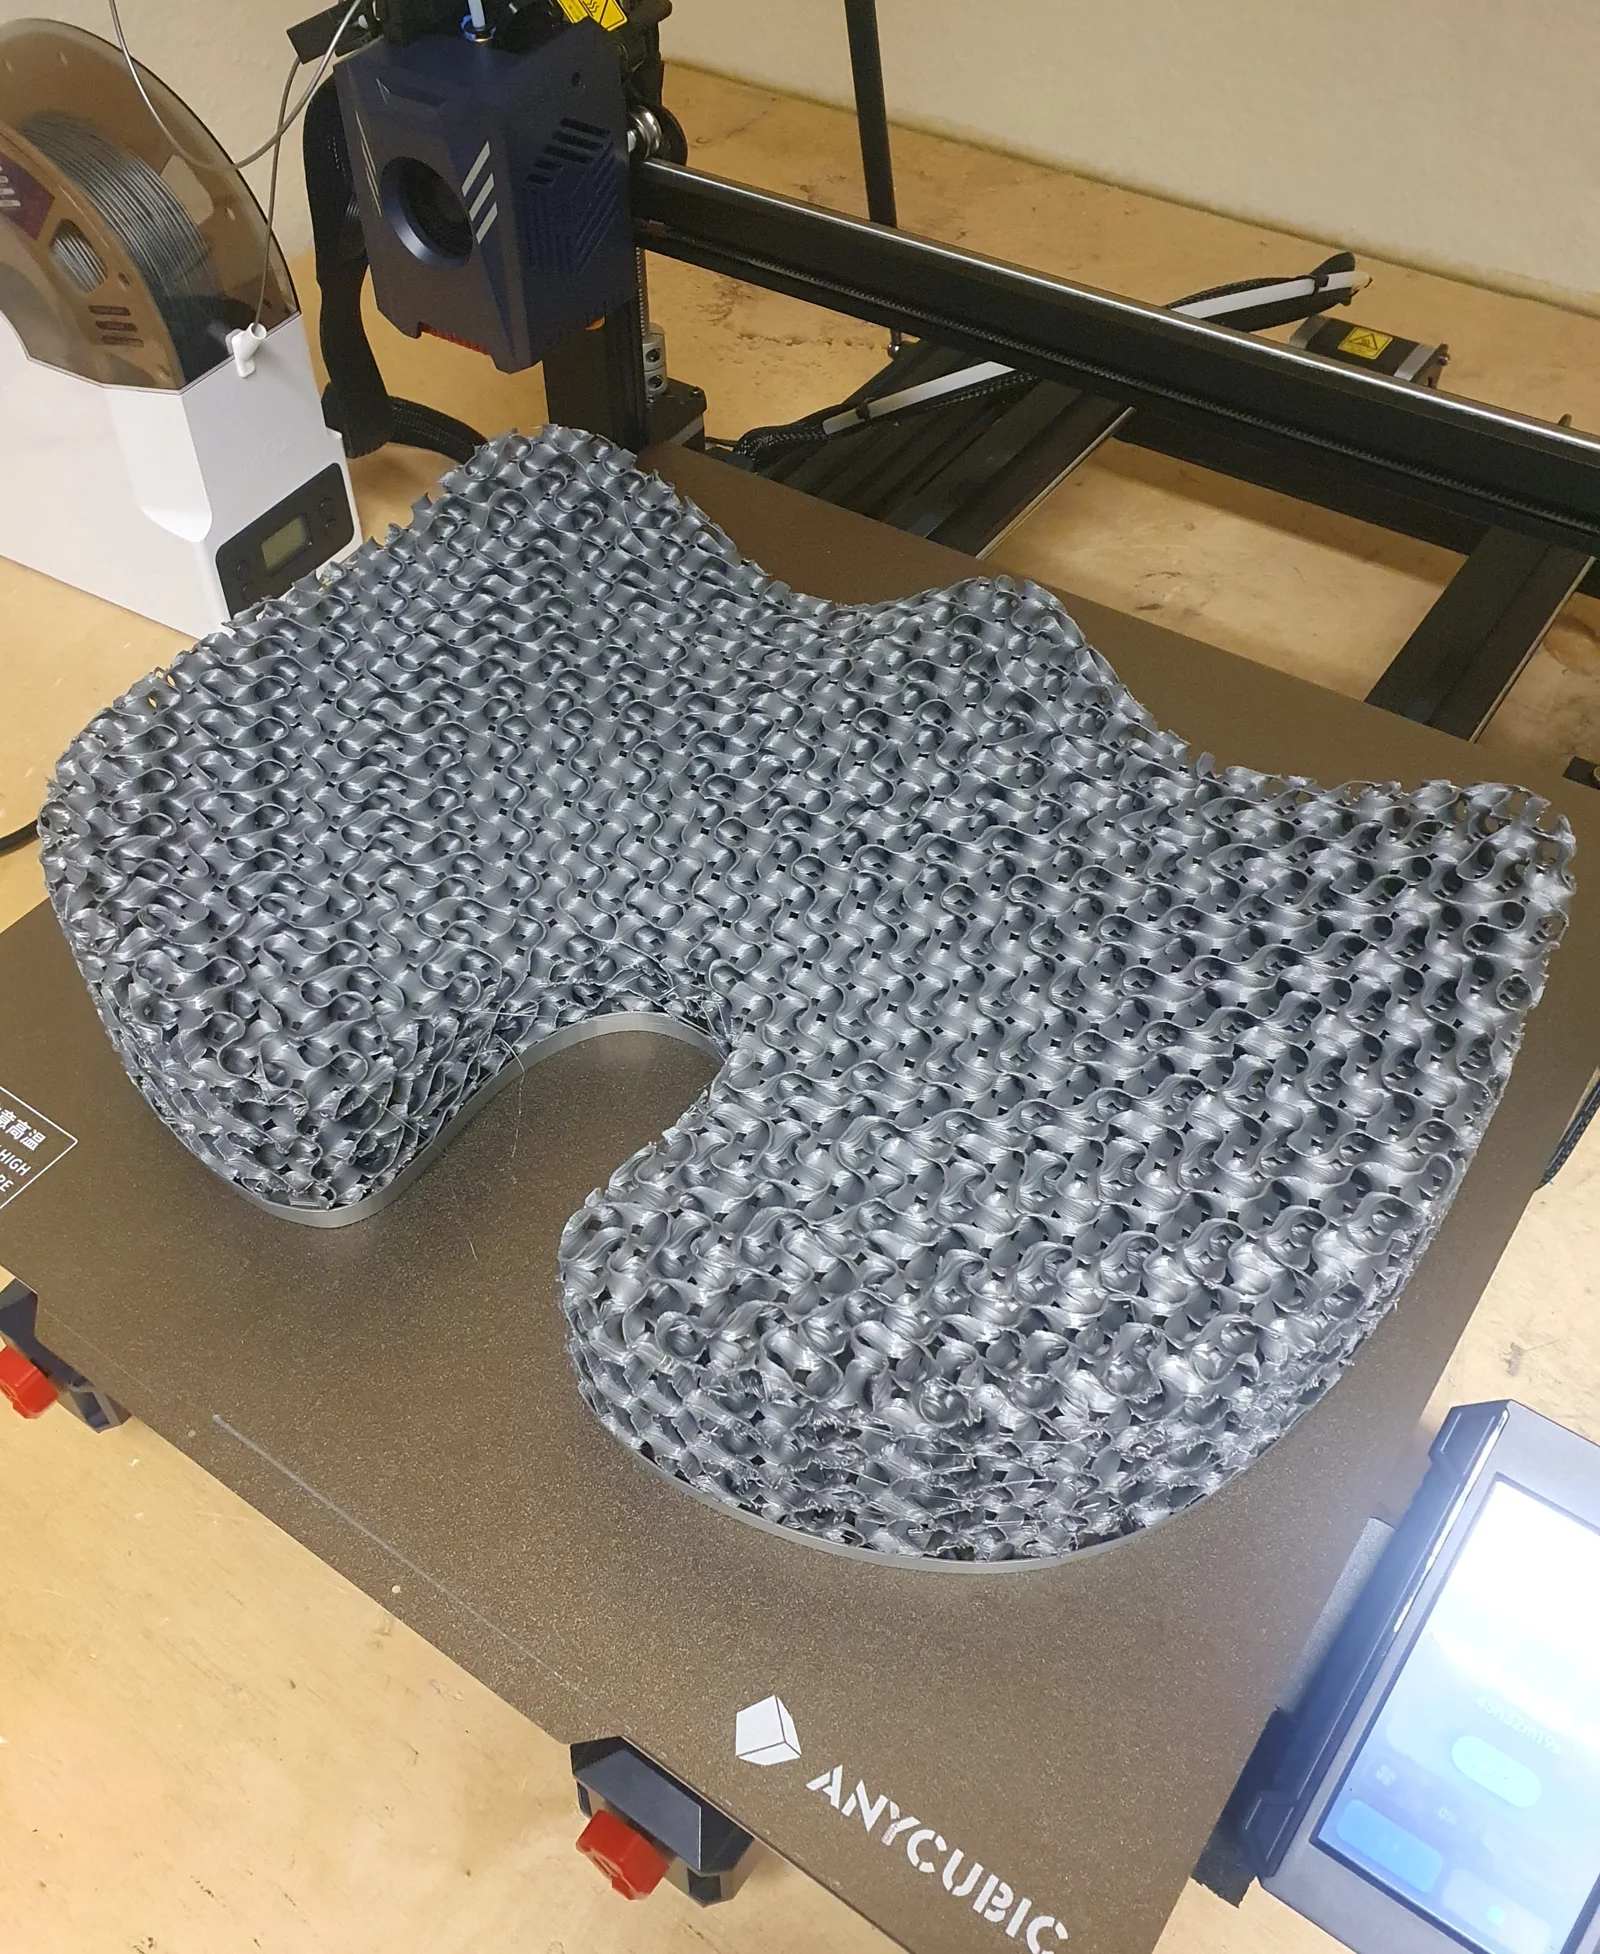
After optimizing the dimensions, I considered the simplest way to compensate for different chair curvatures. I decided to use a honeycomb structure. When properly oriented, honeycombs have the ability to collapse laterally and adapt to the radius of the chair’s seat surface without significantly changing the overall shape of the cushion - The orientation of the honeycombs (90°) is very important here - otherwise there would be no targeted effect in the load direction
Next challenge: how to create different firmness levels in a reliable way. This is a very long print, so reliability beats experimentation
Using multiple flexible filaments would have been the obvious idea, but without a TPU-capable multi-material printer that would only allow layer-by-layer softness changes. That would have made printing time extremely impractical
Another option would have been different infill percentages. The problem there is that the finished print sees significant loads, often in shear. Changing infill percentages would reduce layer overlap and potentially introduce weak spots
So the solution I settled on was varying layer height and extrusion width. Using several modifiers I defined zones with different layer heights, infill structures, and extrusion widths — and started printing
The print used a 0.6 mm nozzle. The honeycomb base started at 0.3mm layer height with 8% infill and 0.65mm extrusion width. Up to 2mm above the infill transition I used a single perimeter. Important detail: the infill anchor must be set to 0 in perimeter-free areas, otherwise you’ll get serious stringing
After that I switched to an 8% gyroid infill because of its excellent three-dimensional load behavior. The transition area started at 0.2 mm layer height with 0.68 mm extrusion width, which improved lamination and created a firmer base cushioning layer.
Two mm later I increased the layer height to 0.32mm and reduced extrusion width to 0.6mm to soften the structure again
I also added a small “roll” at the tuber edge to keep the cushion stable despite the steep seat angle. That section again used 0.68 mm extrusion width at the current layer height. The exact shape here should ideally be customized
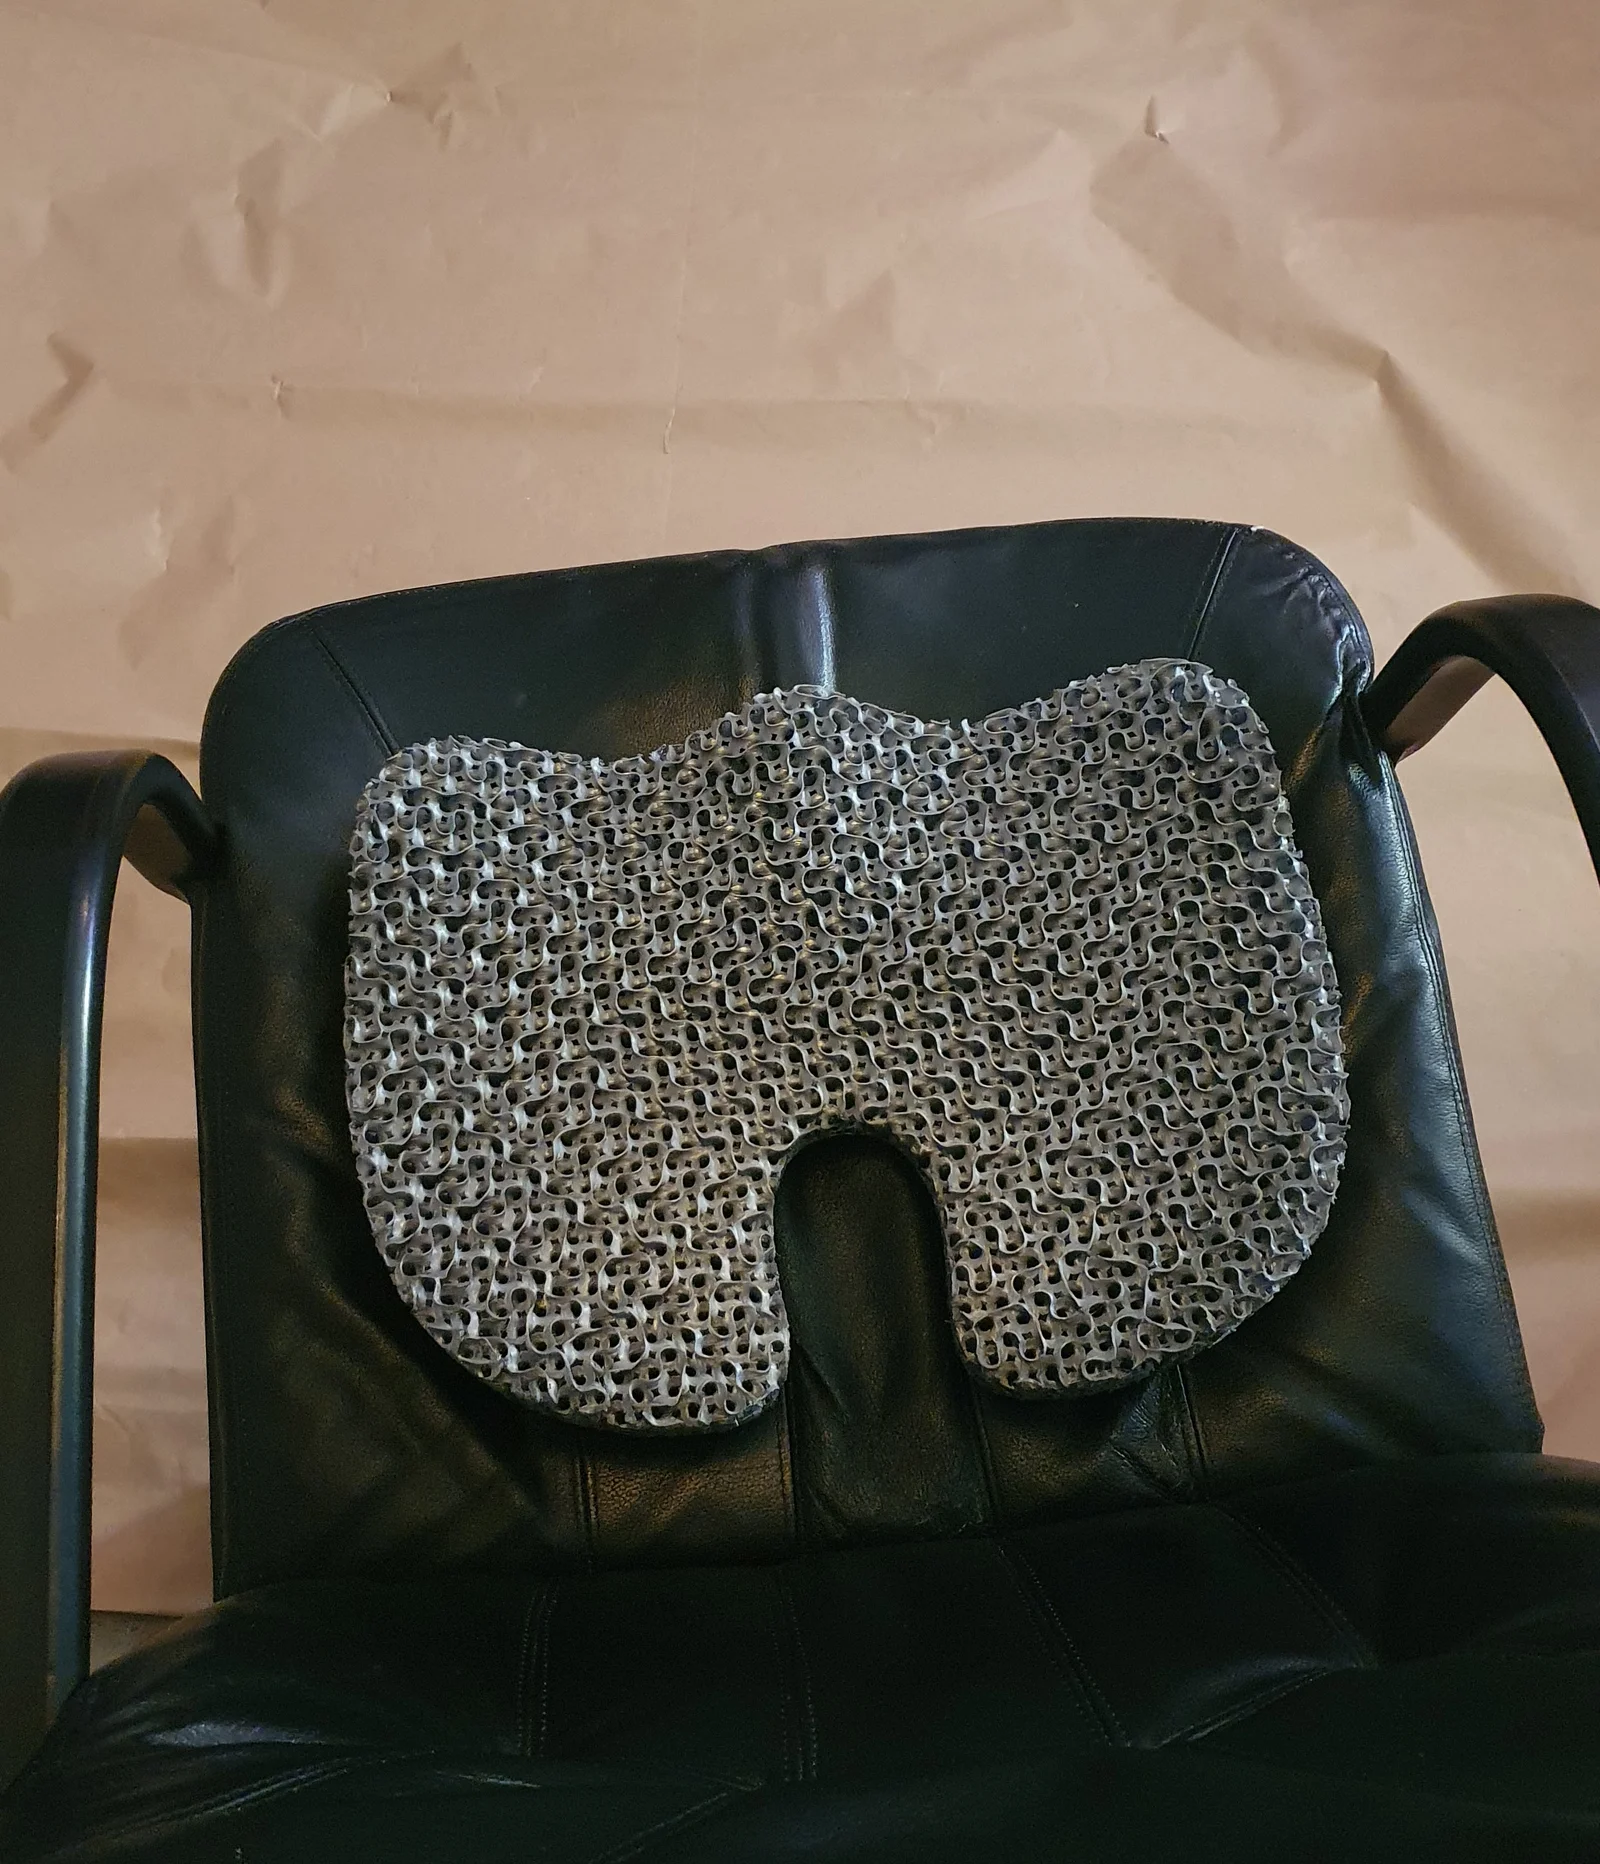
After all this planning and a long print time the cushion was ready for testing. The result: everything fit, it felt good, and it did exactly what it was supposed to do. As a nice bonus, my friend actually found the gyroid structure comfortable through his pants, so I didn’t even need to sew a cover
Quick summary:
Flexibility controlled via layer height and extrusion width → better adhesion and shorter print time.
Base structure orientation matters to properly handle load directions.
For perimeter-free printing, set the infill anchor to zero or you’ll get heavy stringing.
Add a perimeter slightly above the infill transition for structural stability.
This is not a certified medical product. The design is personalized and would need adjustment for general use. If there’s enough interest, I can put together a short guide on how to adapt it properly.
In this case, printed with shore 95A - I will soon release a split, stickable version to make it accessible to a wider range of printers
Happy flex printing
ByDaan Tholenaars TholenaarsLikes461Downloads3.1K

 BySMACKMAXLikes1.5KDownloads3.2K

 BymfettingLikes66Downloads592

 ByReferentielLikes289Downloads2.3K

 ByKen_198787Likes185Downloads2.2K

 BytkachmikhailoLikes211Downloads1.7K

 Byross549Likes274Downloads1.4K

 Bynekenlight_3305158Likes227Downloads1.3K

 ByBobHayesLikes18Downloads251

 Byludomatic_146245Likes60Downloads1.2K

 Bydaniel-tavaresLikes0Downloads874

 Bykubasi3Likes220Downloads1K