

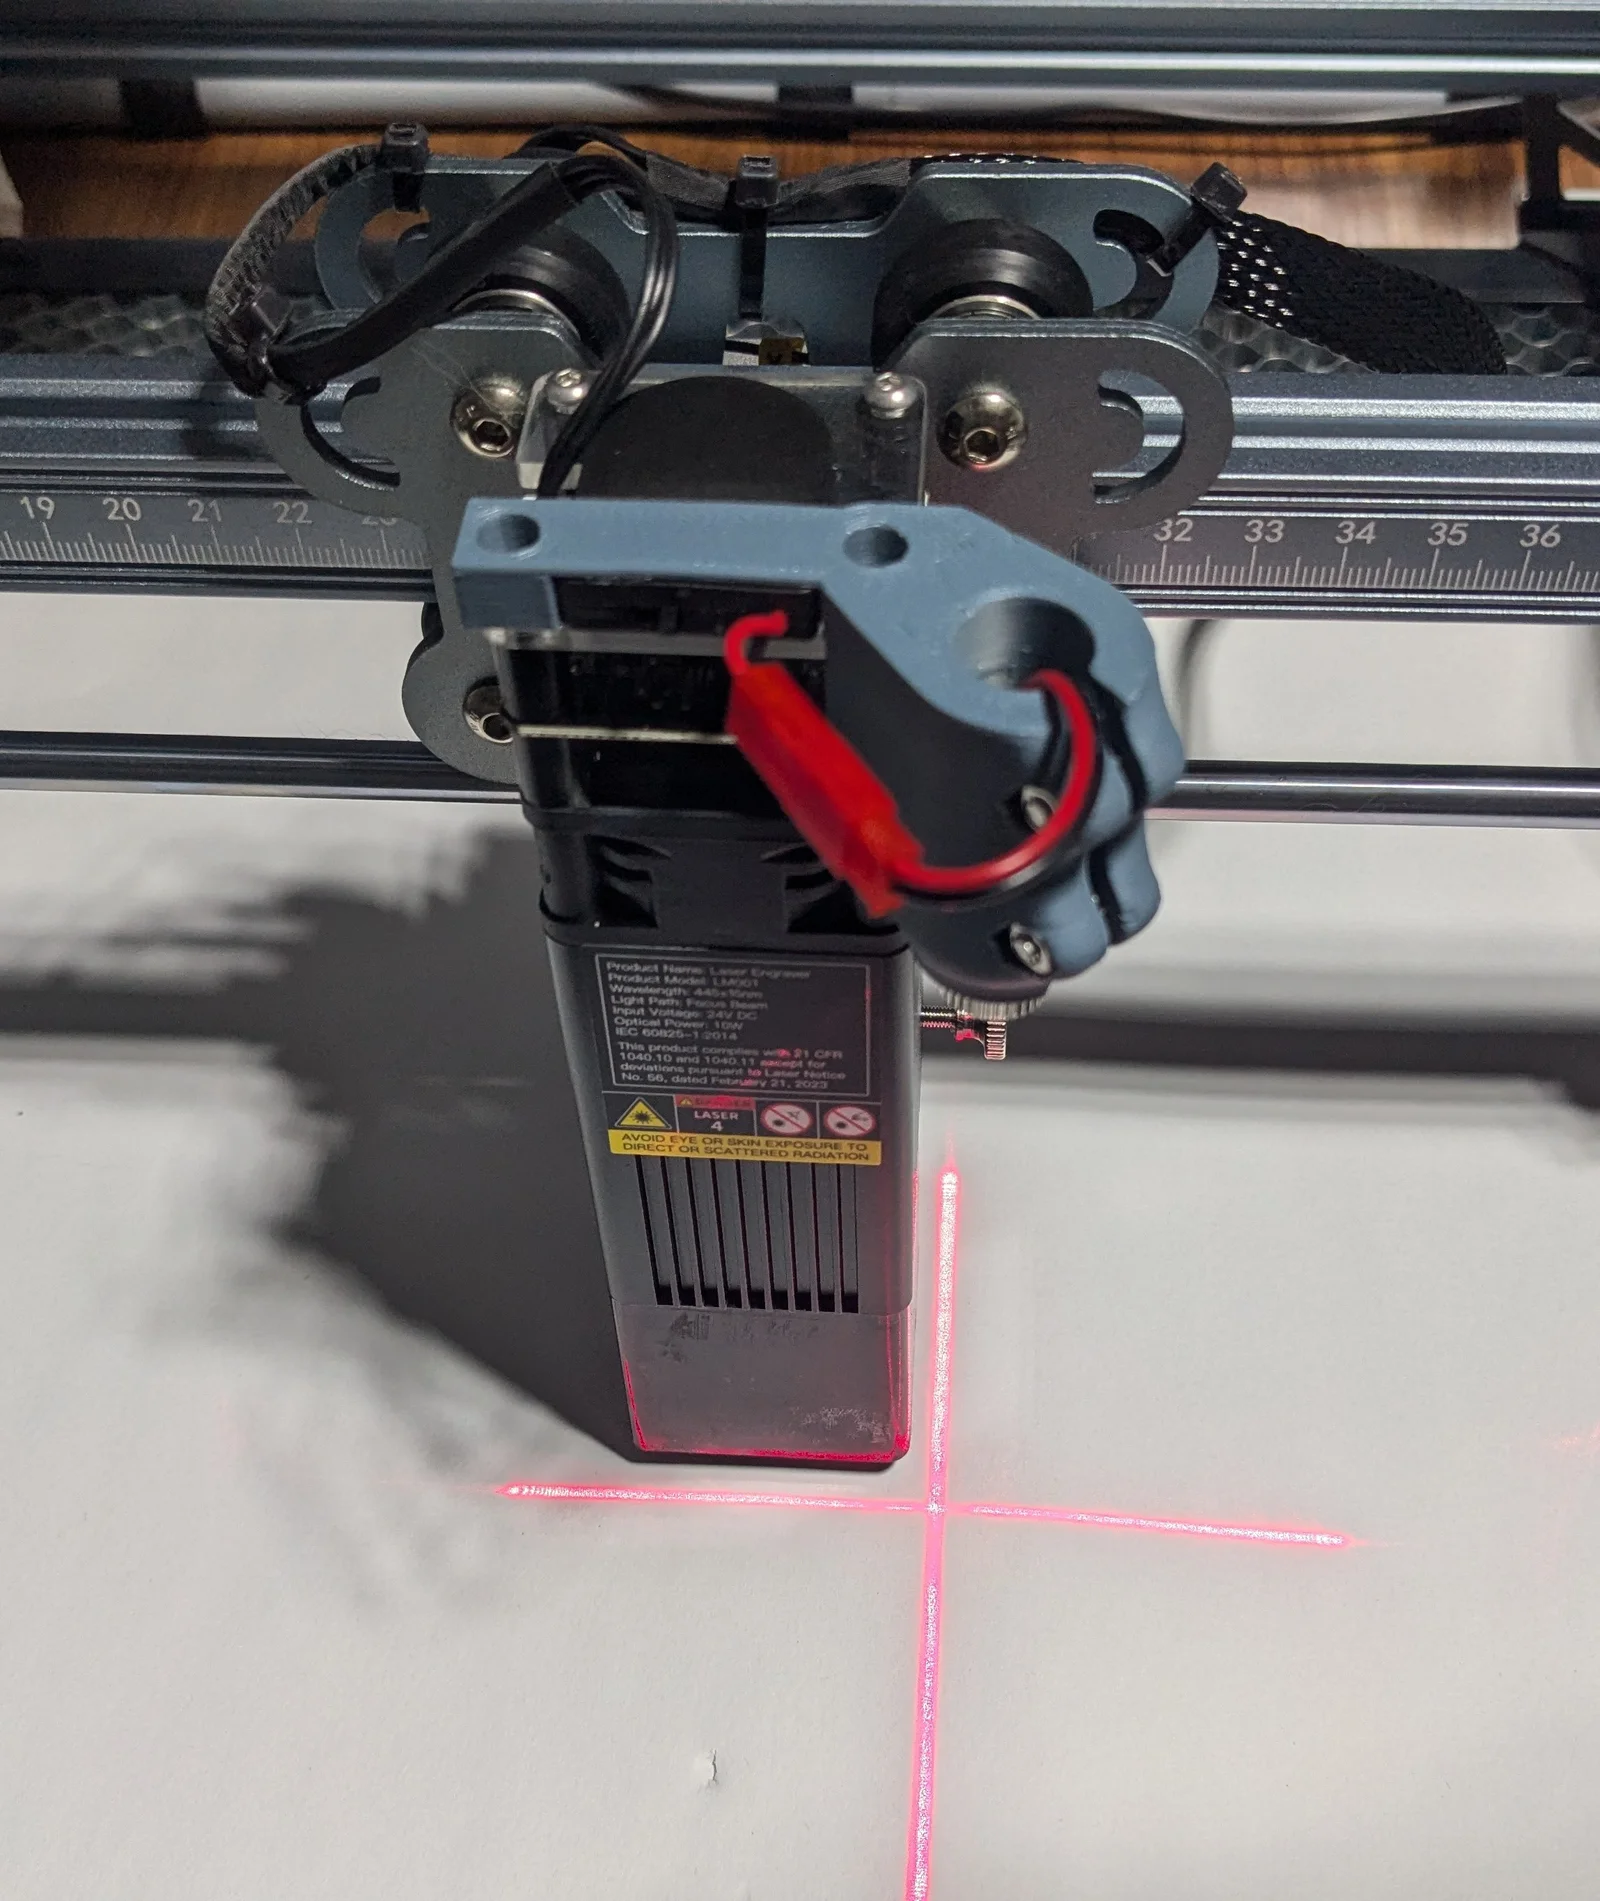
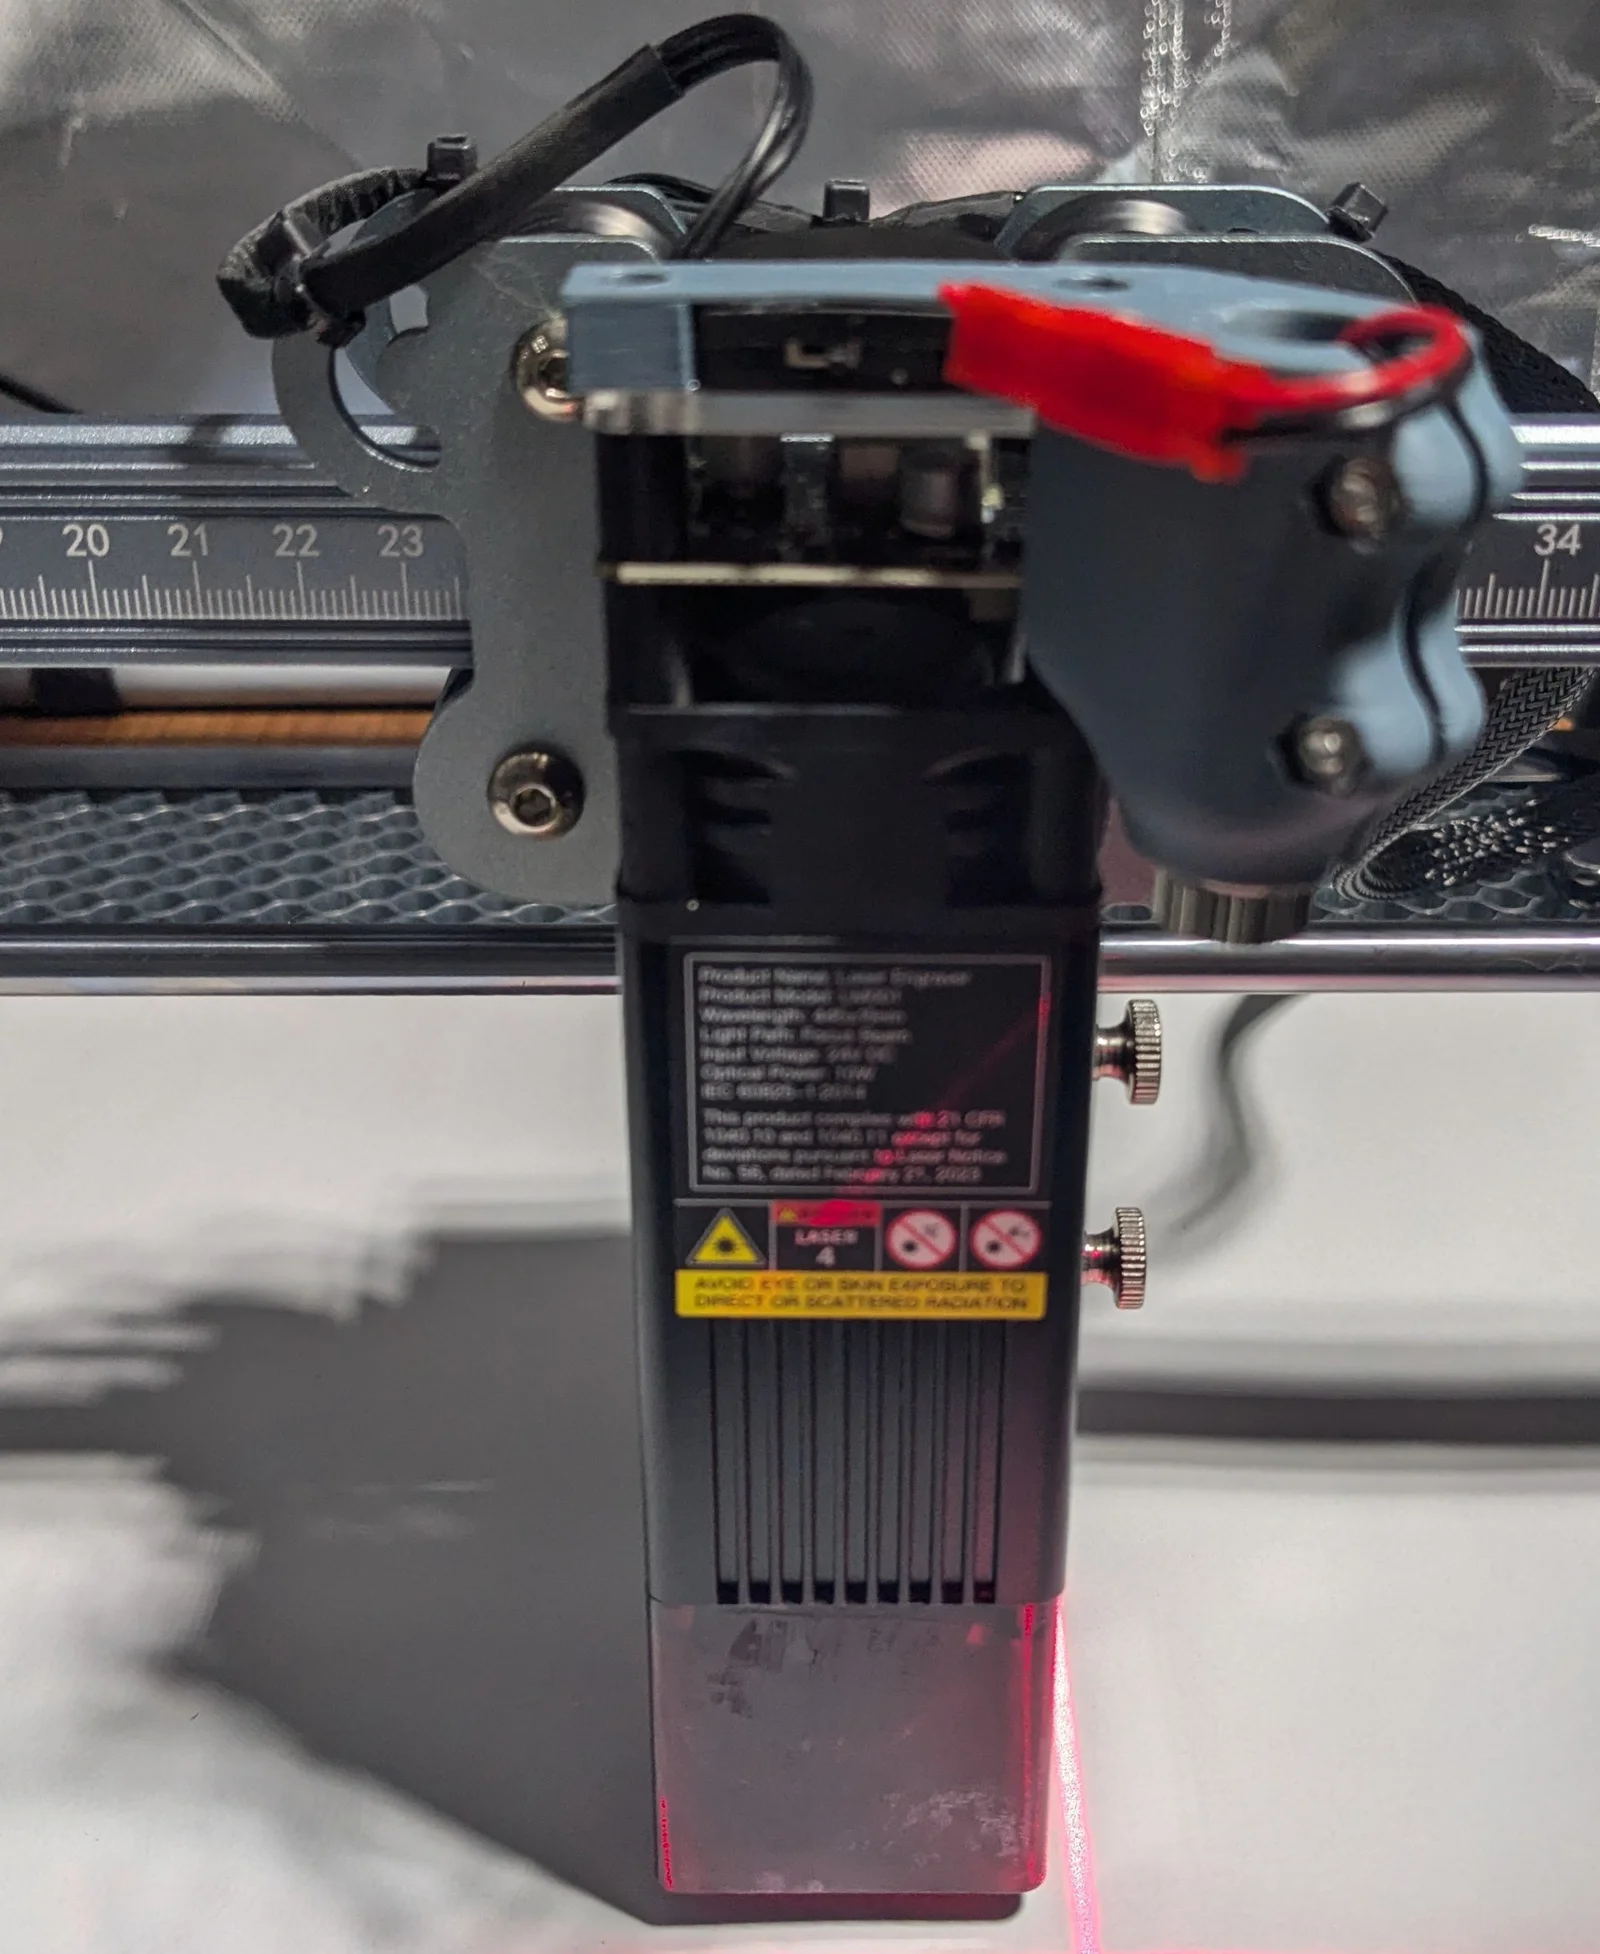


Kẹp giữ sợi Filament
 Bytinx_1344834Likes1.2KDownloads6K
Remix of Ngàm giữ Laser Crosshair/Pointer cho Creality Falcon 2 By TheGingernee_2314844
Build another version of this model.
A Laser Level Holder for a Creality Falcon 10W.
This design is based off of remixing https://www.printables.com/model/977794-creality-falcon-2-laser-crosshairpointer-holder with a crossbar that fits a 33mm diameter laser (such as the Creality Falcon 10W).
The crossbar is intended to reuse the Creality laser's M3 screws and have space for a CR2032 battery holder to power the laser.
The OpenSCAD files are provided should you wish to attempt remixing it for other lasers.
This was written with the assistance of Copilot.
I have uploaded 2 Versions:
LaserLevelHolderv2
LaserLevelHolderv2.1
Cross Laser - https://www.amazon.com/dp/B091YNJMR5
CR2032 Battery Holder with On/Off Switch - https://www.amazon.com/dp/B09KTVG1Y5
2x M3 x 12 Socket Head cap Screws
2x M3 Screw Bolts
(Optional) JST Servo Plug and Crimper - https://www.amazon.com/dp/B0BGX7157Y
Assembly is super straight forward:
3D Print the part "upside down" with supports.
Connect the CR2032 battery holder to the Cross Laser.
Hot glue the button cell to the crossbar.
Insert the M3 bolts and screws lightly.
Insert the laser and tighten the screws.
Carefully remove the front top screws from the laser
Insert the Laser Level assembly and re-insert the front top screws.
Open Lightburn and connect to your machine
Go to Edit → Device Settings. Under Basic Settings, there is a group called Laser Offset.
Enable pointer offset, and enter your offset values.
Bytinx_1344834Likes1.2KDownloads6K

 Byprusa-researchLikes0Downloads2.7K

 Bydet-manLikes0Downloads179

 Bygummiegecko8477Likes0Downloads170

 Bychukwufumnanya-arinzechukwuLikes0Downloads155

 Bychris-barwickLikes0Downloads134

 BydalleLikes0Downloads153

 ByBrokentooth_designsLikes17Downloads159


 BynasikLikes0Downloads125

 Byarhi_585078Likes64Downloads547

 ByHanzo3dLikes155Downloads417