



Bộ sưu tập 11 nhân vật mô hình Mecca Chameleon in 3D vui nhộn
 ByZED4EverLikes313Downloads5.2K
Build another version of this model.
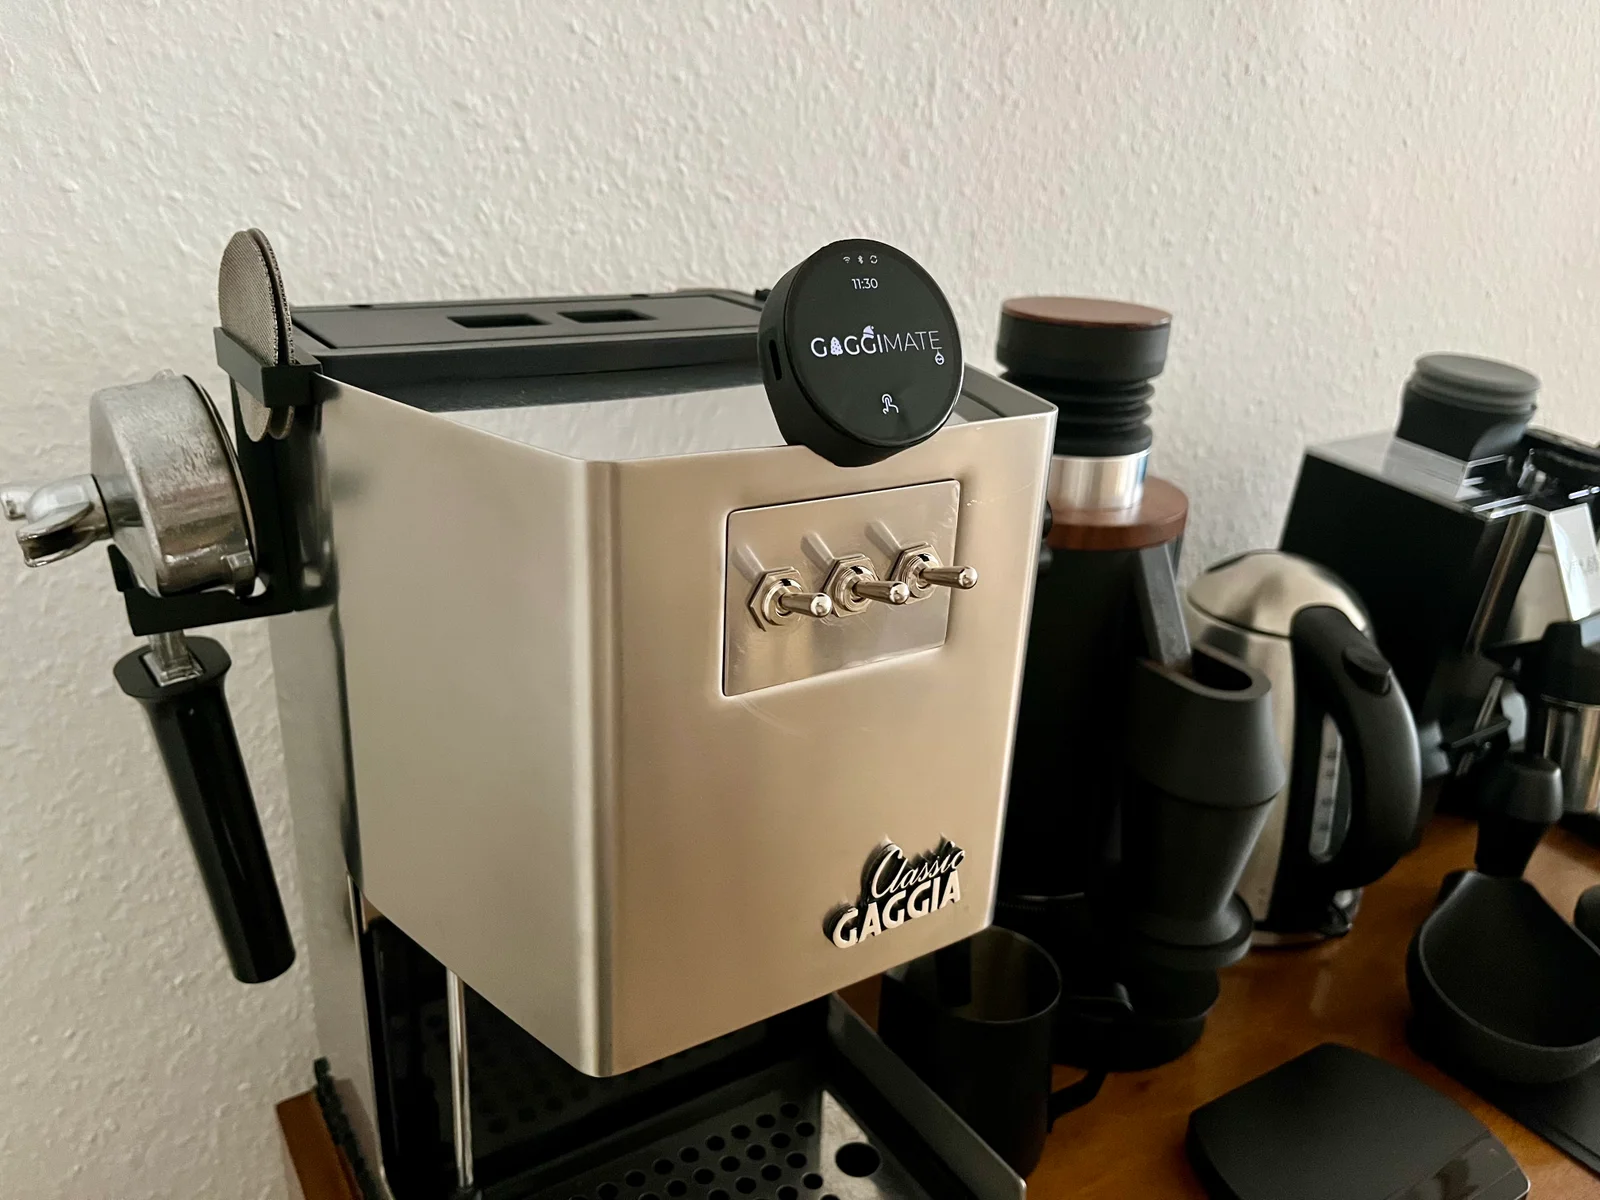
This switch bank mod can be used with or without an additional iron plate.
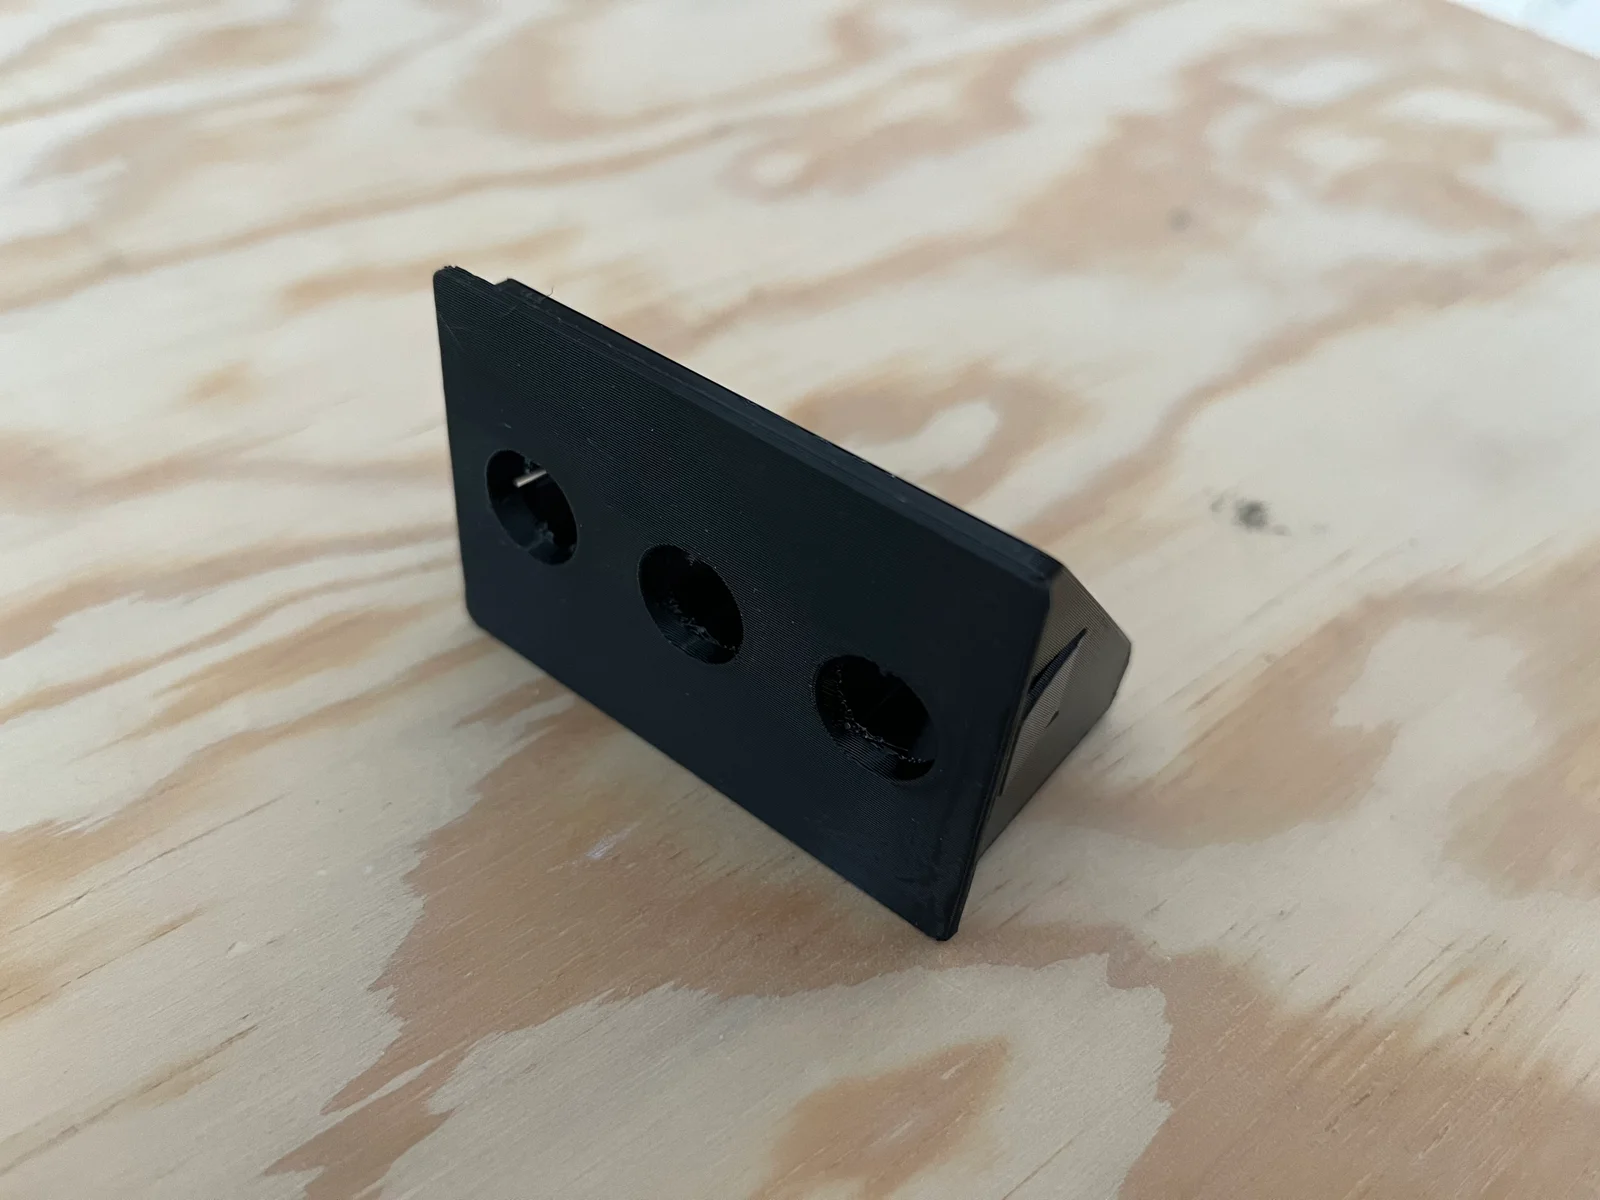
The holes for the switches are 12mm in size.
To print, position as shown in the image. Activate brim and support.
Material should be heat-resistant and non-flammable. (Don't use PLA)
Templates for cutting the iron plate are available with the original hole size and with small holes to mark the center point.
In general, it is recommended to cut the iron plate slightly larger to cover the plastic better.
I cut a stainless steel plate with a thickness of 0.5 mm and drilled the holes with a cutting drill bit.
If, like me, you don't have a laser cutter, I recommend using thicker plates, as these are easier to work with using a saw and drill than thin ones.
This is intended as an example only and is not a guide; wiring should only be carried out by authorized personnel.
Please note that there may no longer be a conductive connection to the rest of the housing, so you must add another protective conductor!
For the rest of the wiring, please check your logic carefully.
(With the GaggiMate mod, not much had to be changed, just one connection, insulating exposed areas and adding another protective conductor.)
ByZED4EverLikes313Downloads5.2K

 ByVC_DesignLikes721Downloads2.9K

 Byvc-designLikes0Downloads3.2K

 ByBasementLABLikes888Downloads1.5K

 Bydan-sabauLikes0Downloads2.6K

 ByUpcrid3D_1585693Likes808Downloads2.1K

 ByBrokentooth_designsLikes83Downloads454

 BySeppoTakaloLikes960Downloads1.9K

 ByTater_364200Likes486Downloads1.6K

 ByowlartLikes30Downloads231

 ByLadyCamille_261526Likes41Downloads192

 ByleonicLikes0Downloads1.4K