


New
SolderMate - Fully 3D Printed Desk Soldering Companion
 ByleonicLikes0Downloads1.4K
Build another version of this model.
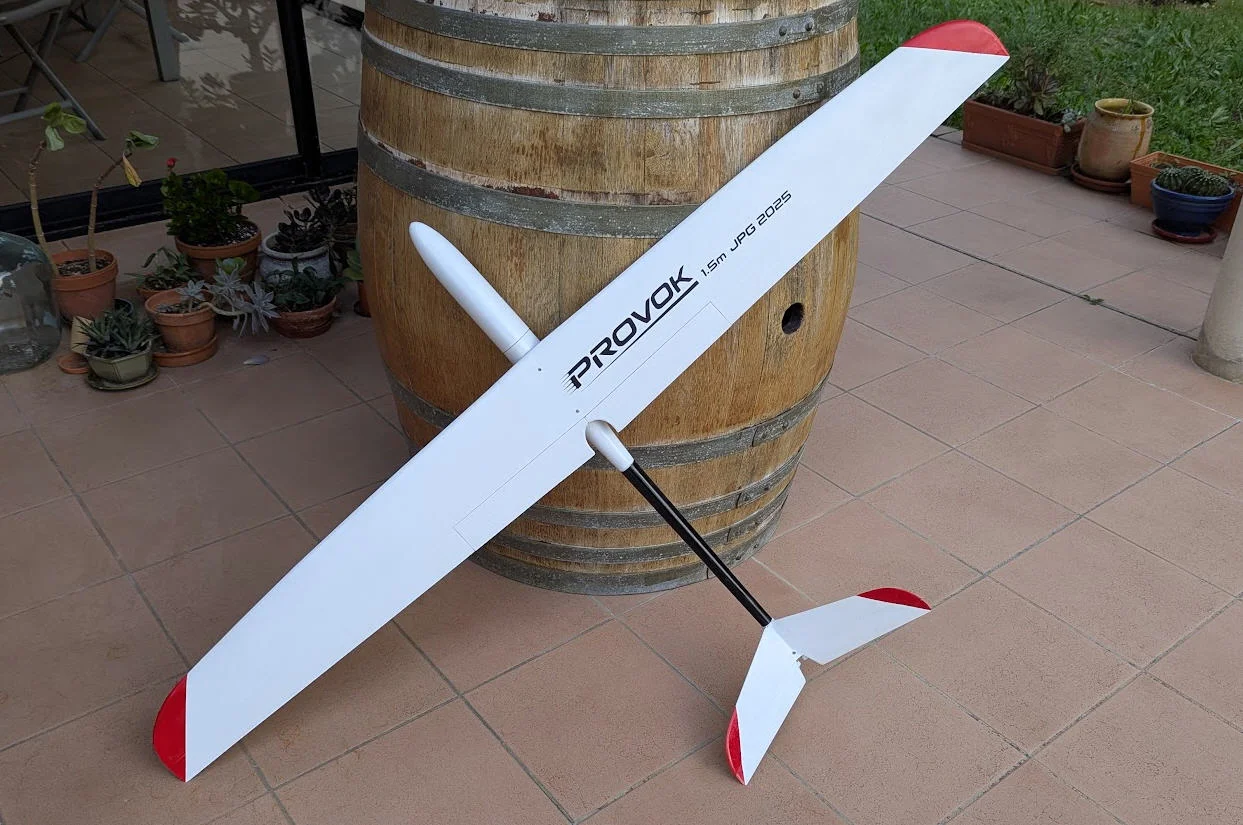
A few years ago Aeromod produced a famous 1.5m glider named : Prodij
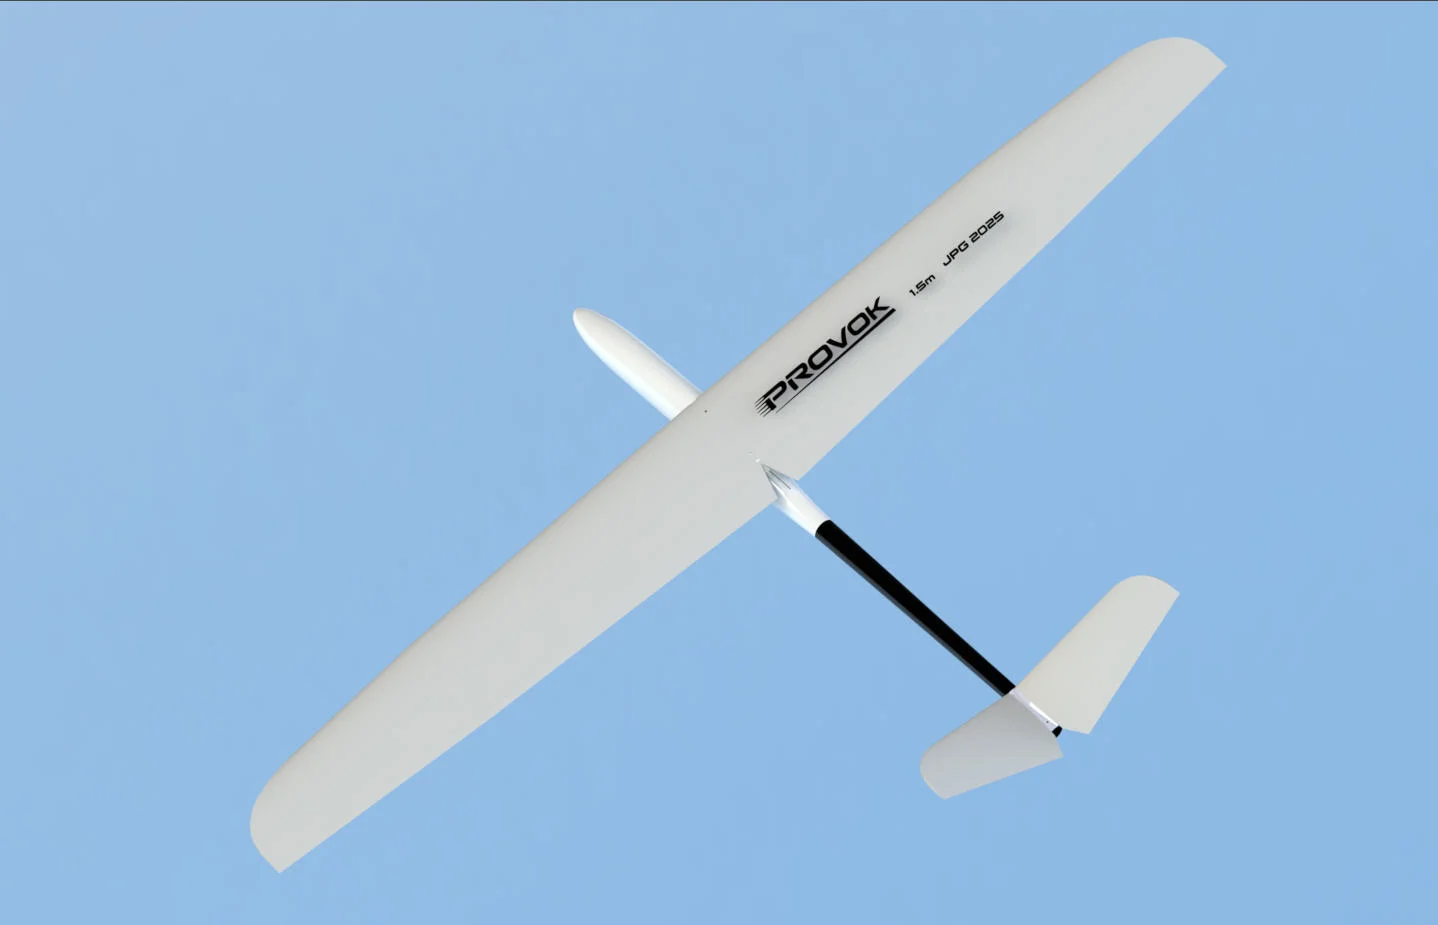
Unfortunately this plane is no longer produced. So I started to make my own design named “Provok”.
And I can't wait to show you the maiden flight !
In a few words, the Provok has the same overall shape than the Prodij but:
The Provok was designed with CAD software and optimized using the famous PredimRC excel sheet (available into the “files” section)
fuselage has been molded into a 3d printed “negative” mould. The mould itself was too big to fit my Prusa printer, so it has been divided into 3 parts and cut in half for top and bottom. (6 pieces to be assembled 3 by 3)
Here is the top side middle part: it's rough after printing (0.6mm nozzle with PLA)
Then you'll have to sand the mould, apply epoxy (or anything you want) to remove the filament “steps”, then sand again, then restart the process 3 or 4 times to get a glossy aspect.
Here is the second painting with epoxy :
and the final result after applying primer and demoulding wax:
Then the two halves are epoxied with 3 layers 80g/m2 fiber glass reinforced with carbon strips
Now trim the edges and cut the nose. You will get 4 parts. Replace them into the mould, add mylar to prevent epoxy to glue the nose sides (on the right below), then add two more layers of fiber glass plus carbon to build the servo cabinet.
When epoxy is cured, trim again the edges and glue the two halves together with a few drops of Araldite, then reinforce the inside with 2cm fiber glass and sand all this !
I must admit that it is not easy to explain with words. So a little video should do the job (sorry in french ) !
tail boom is fiber glassed on a conical shape. Its length is 400mm. Fuselage side inner diameter is 25mm, tail side inner diameter is 17.5mm. Again three layers of 80g/m2 fiber glass are applied together with carbon strips reinforcements.
A 3d printed part is inserted outside of the tail boom to fit the V stabilizer wings. (see file tail_BoomV.stl)
the core is extruded polystryrene foam. It's cut using hot wire technics (see here for details).
Jedicut free software is used to produce the Gcode for the hotwire cutter
Here are the main dimensions for cutting the stab
The two stab wings are then fiber glassed with only one layer 80g/m2 fiber glass.
They will stay 12h into a vacuum bag to cure the epoxy.
On the picture above you can see that “peel Ply” fabric t is positionned where the hinge will be. Don't forget it, it's so easy to make clean hinges with this technics.
Then the parts are glued on the tail boom and reinforced with top and bottom fiber glass at the joint.
fuselage, tail boom and V stabilizer can be assembled (but not yet glued !)
wings are composed of two trapezoidal sections glued together :
The wing central parts are reinforced with a 7mm carbon pipe scavaged from a broken arrow.
wing tip is easier as there is no carbon rod !
When cut, the two sections are glued together and properly sanded. The arrow is also glued and the slot is filled with micro balloon. Before gluing the carbon pipe, drill a slot where the servo wires will be …
PeelPly hinges are also added before vacuum bagging each wing.
Here is one half wing with hinges cut after vacuum bagging
Note that the PeelPly fabric is “hidden” into the foam. This is done by slightly sanding the foam before gluing the Peel Ply
A 2.5cm wide metal ruler is used with sand paper :
Note that a diedral angle of 1.5° on each wing is applied (2cm at wing tip on each wing) . If one wing is flat on a table the other one should be rised by 4cm at wing tip.
You must also cut manually a slot to allow the flaps to go down without being blocked by the fuselage. A template is provided (see file cutFlaps.dxf)
When fiber glass is cured, you will have to join the two sides together and reinforce the joint with 5cm wide fiber glass (two layers 80g/m2 fiber glass)
Before gluing the wing insert the wooden blocks where the holes will be.
These blocks are laser cut into 5mm plywood (see file wingJoiner.dxf). Their shape follows the wing profile and includes the diedral angle. Stack them and glue them with wood glue.
If you prefer you can 3d print them (see file wingJoiners.stl)
And when finished your wing should look like this:
Servo tray is laser cut. It can accomodate the battery, the receiver and 3 servos:
this tray can slide between 4 pieces of wood acting as a guide. It is fixed by the screw on the left side of the tray. It's thus quite easy to assemble the plane !
Two servos are also inserted into the wings for the ailerons.
the wires are hidden into the carbon pipe.
Use light coat of paint to avoid too much extra weight. Apply the decal (if you want) (see file ProvokLogo.dxf)
And here is the final glider ready to fly
Final weight of my Provok is 665g before centering. It should be Ok for maiden flight (who knows !)
CoG is given at 61.7mm from the leading edge with 3% margin. It has been checked on my CoGfinder device
I had been forced to add 20g of lead in the nose. So that the total weight is now 691g.
Here is the very first take off. She flies very well (but video is too short…)
ByleonicLikes0Downloads1.4K

 ByZED4EverLikes313Downloads5.2K

 ByfifindrLikes500Downloads4K

 ByVC_DesignLikes679Downloads3.6K

 ByDan Schwartz SchwartzLikes744Downloads3.4K

 Byvc-designLikes0Downloads3.2K

 Bythorin-oakenshieldLikes0Downloads530

 ByUpcrid3D_1585693Likes808Downloads2.1K

 ByWilko_SLOLikes935Downloads2K

 ByshoheiyLikes0Downloads427

 Bychubbs8697_2027893Likes585Downloads1.7K

 Byquibeck_3353173Likes965Downloads1.9K