
F3D
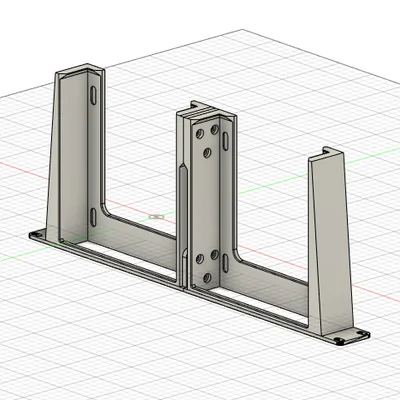
Giá đỡ rack 10" Lenovo ThinkCentre Tiny có ổ cắm Keystone 1

5 images

DIY

Giá đỡ rack 10" Lenovo ThinkCentre Tiny có ổ cắm Keystone

By timmi

Downloads
2,550
Likes
194
Views
11,164
Remixes
7

Files 10 21.7 MB

  • Tiny_Rack_Mount_no_Keystone_1766157376.stlSTL · 1.2 MB
  • Tiny_Rack_Mount_left_Keystone_1766157377.stlSTL · 4.7 MB
  • Tiny_Rack_Mount_right_Keystone_1766157379.stlSTL · 5 MB
  • Tiny_Rack_Mount_dual_Keystone_1766157380.stlSTL · 8.5 MB

Make a variant with AI

Build another version of this model.

Open Studio

Remix versions 7

See all 7 remixes

Description

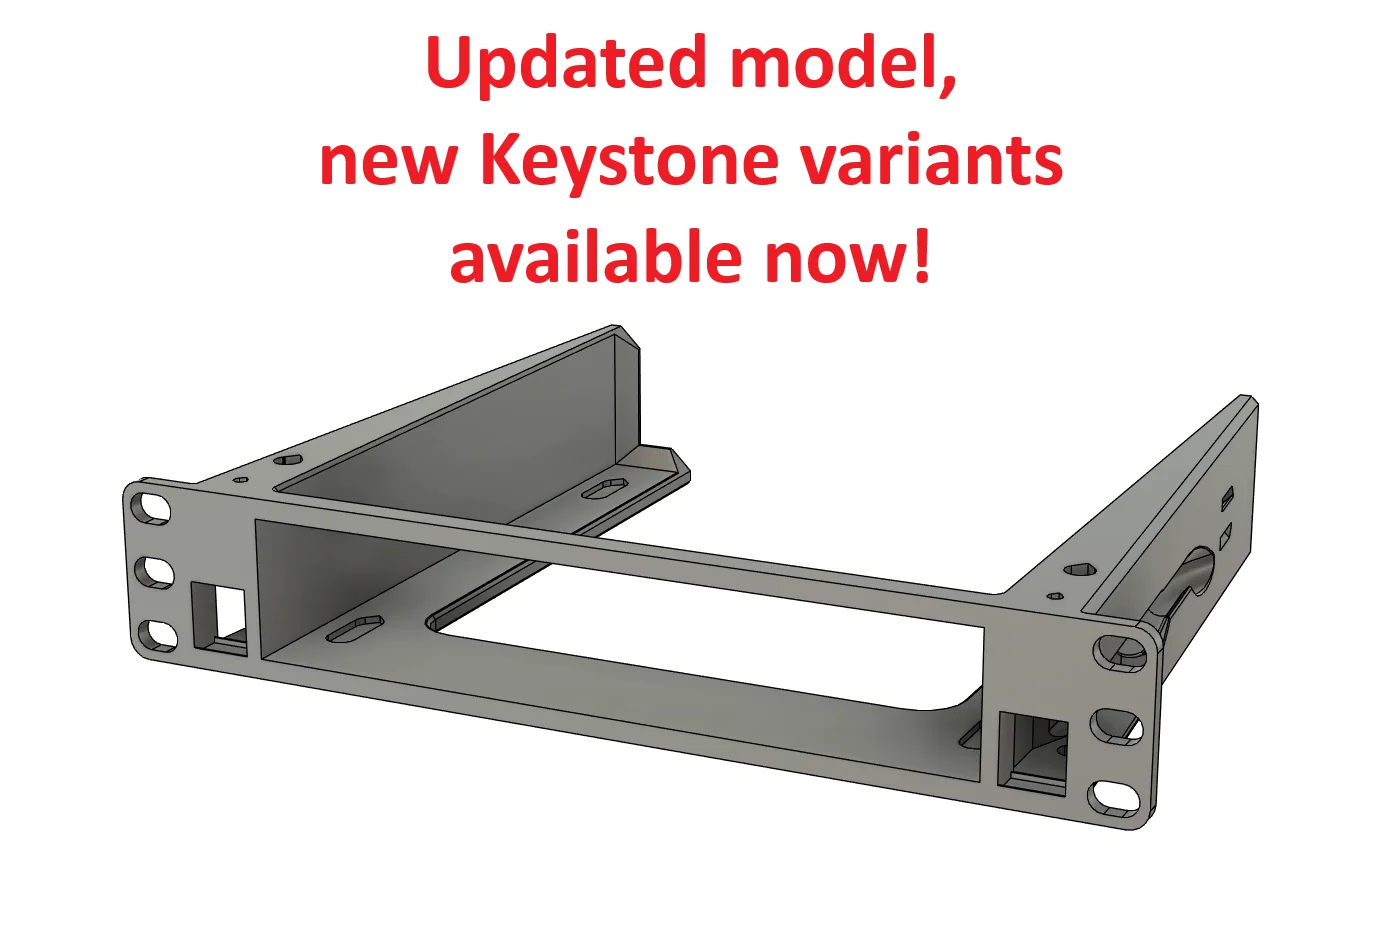
I updated my popular 10" rack mount for Lenovo ThinkCentre Tiny. It adds up to two standard keystone jack sockets, so you can bring Ethernet/USB/HDMI (or whatever keystone you like) to the front of your rack. I made some additional changes for quality of life based on previous feedback.

What’s new

  • Keystone-ready variants:
    • Dual: one keystone socket on each side
    • Right-only: one keystone socket on the right
    • Left-only: one keystone socket on the left
  • Maximum keystone width of 18mm fits most keystone variants
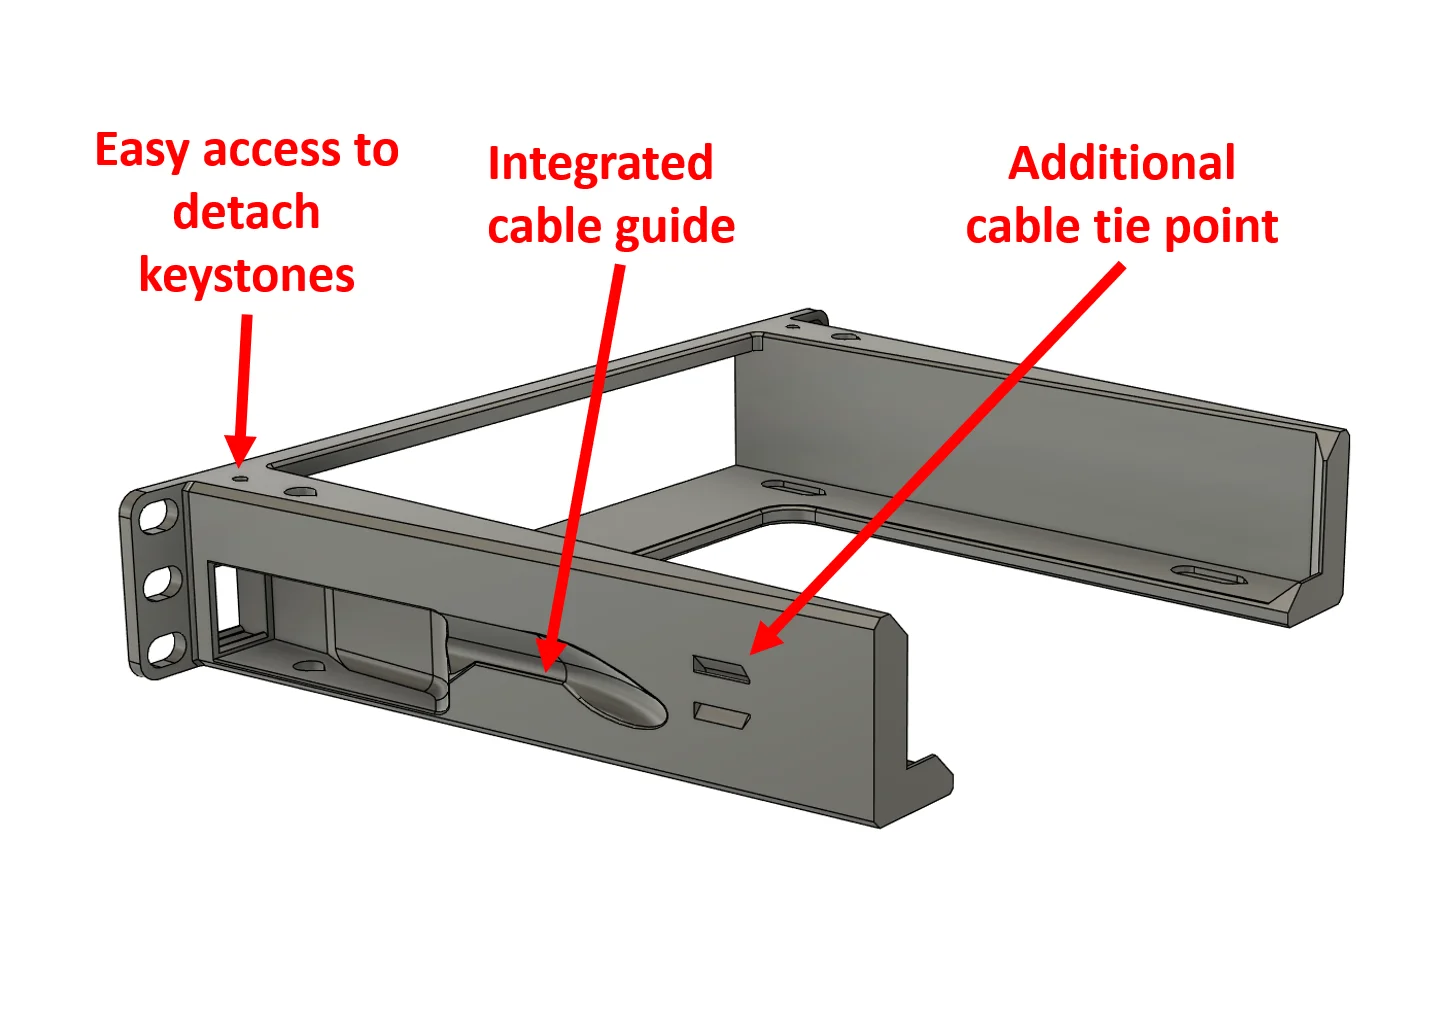
  • Cable guides to route cables from the keystones to the back
  • Easy removal of keystone jacks through small top hole
  • Easy disconnection of RJ45 cables though hole form top or bottom
  • Additional cable tie points to tidy up the cabeling 
  • General optimization of the design to minimize unsupported overhangs

compatible models

  • M720Q
  • M710Q
  • M910X
  • M910Q
  • M920Q
  • M920X
  • P320
  • P330
  • M715Q*
  • M600*
  • M900*
  • P340**
  • P350**
  • P360**
  • M70q**
  • M75q**
  • M90q**
  • P3 Tiny**

*with removed rubber feet

 **judging from datasheet and photos, please reconfirm before printing and feel free to share your results

Print Settings (tested defaults)

  • Material: PETG, ABS or ASA are recommended (good heatresistance & toughness). PLA works, but may get soft in in enclosed racks (>50°C).
  • Perimeters/Walls: 3–4
  • Infill: 20–30% (cross hatch/gyroid)
  • Top/Bottom: 4–6 layers
  • Supports: none
  • Orientation: Front face down on the bed for the cleanest front finish and strongest keystone snap ledges (the STL files are pre oriented).
  • Brim: Optional 3–5 mm if your bed adhesion is iffy (especially with ABS/ASA).

Hardware / Assembly

  • Keystones: 1× or 2× standard keystone jacks (snap-in from the backside).
  • PC mounting: Same as the previous model. Slide the Tiny in from the top rear before you install it in the rack. Cable tie points are included to tidy the internal patch leads.
  • Rack screws: Use the screws that match your 10" rails (M5 or M6, depends on your rack) + cage nuts if needed.

Tips

  • If your keystone feels tight, lightly deburr the window with a hobby knife. tolerances are set snug on purpose.
  • A 30cm / 12" / 1ft Ethernet cable should have the perfect length to route the Ethernet port of a M720q to the front without excessive bending of the cable.
  • For PLA prints near warm gear, keep some airflow; PETG/ASA is safer for warm network cabinets.

Read more Show less

Print spec

Formats
stepstl
Model files
10
Total size
21.7 MB
Largest file
8.5 MB

0 comments

See all