



Ngàm gắn iPhone lên Tripod - Có ren xoắn
 BykyleschiefferLikes35Downloads395
Build another version of this model.
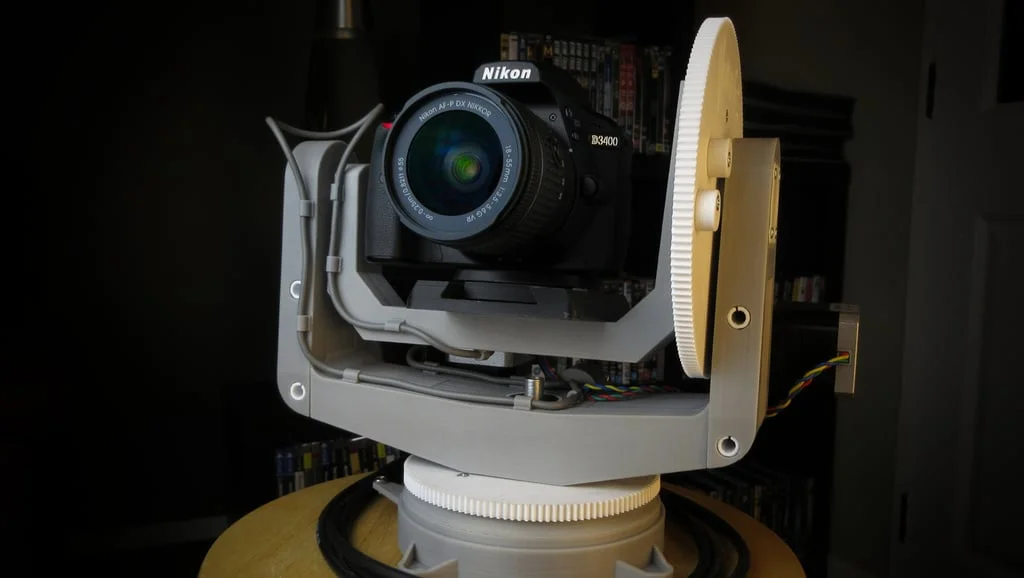
Simple camera gimbal for timelapse and stop motion photography, or motion control.
Let's you accurately position your camera in two axis or move through a pre-programmed sequence. Home switches make position control repeatable even after loss of power.
Supported cameras (as reported by makers):
Nikon D3400, D850; Canon 70D, 5DmkIV
I am controlling my Gimbal using an Arduino Nano running Grbl (free CNC controller) and a Raspery Pi as a terminal to send gcode to the it.
Some assembly required.
Motion control components
Hardware and fasteners
Most parts should print without supports (except cableJunction and motorMountA). Some larger parts can benefit from a small brim though, depending on your print setup.
I printed most structural parts with a wall thickness of 2mm and 1mm top/bottom to get the desired rigidity. This can be tweaked depending on your requirements and application.
Use a good epoxy to join the parts that are printed in multiple parts. (Tip: leave one or both arms unglued for easier assembly)
The small, printed pinion gears (SpurGearM1x16) work but not for very long, at least not in PLA, forces on these are quite strong. They will get you going but metal versions of them can be had for extremely cheap from China/Ebay (search for M1T16 pinion gears).
I switched mine out after a while and it's working very well ever since.
Originally this was designed to fit my D3400 with cables sticking out. I don't have a full frame camera so am not sure what other models will fit on it. Let me know if your camera fits and what model it is.
Enjoy! And let us know about anything cool you do with it.
BykyleschiefferLikes35Downloads395

 ByckthLikes148Downloads2.4K

 ByvideograndpaLikes36Downloads281

 ByNK01_3850118Likes13Downloads211

 ByRedeyeLikes41Downloads219

 ByBaGooNLikes64Downloads140

 ByBrokentooth_designsLikes30Downloads223

 ByJaronLikes310Downloads1K

 Byw3rN42Likes127Downloads930

 ByTomDDLikes89Downloads573

 BykukulinLikes77Downloads513

 ByAustin Wolt WoltLikes162Downloads377