

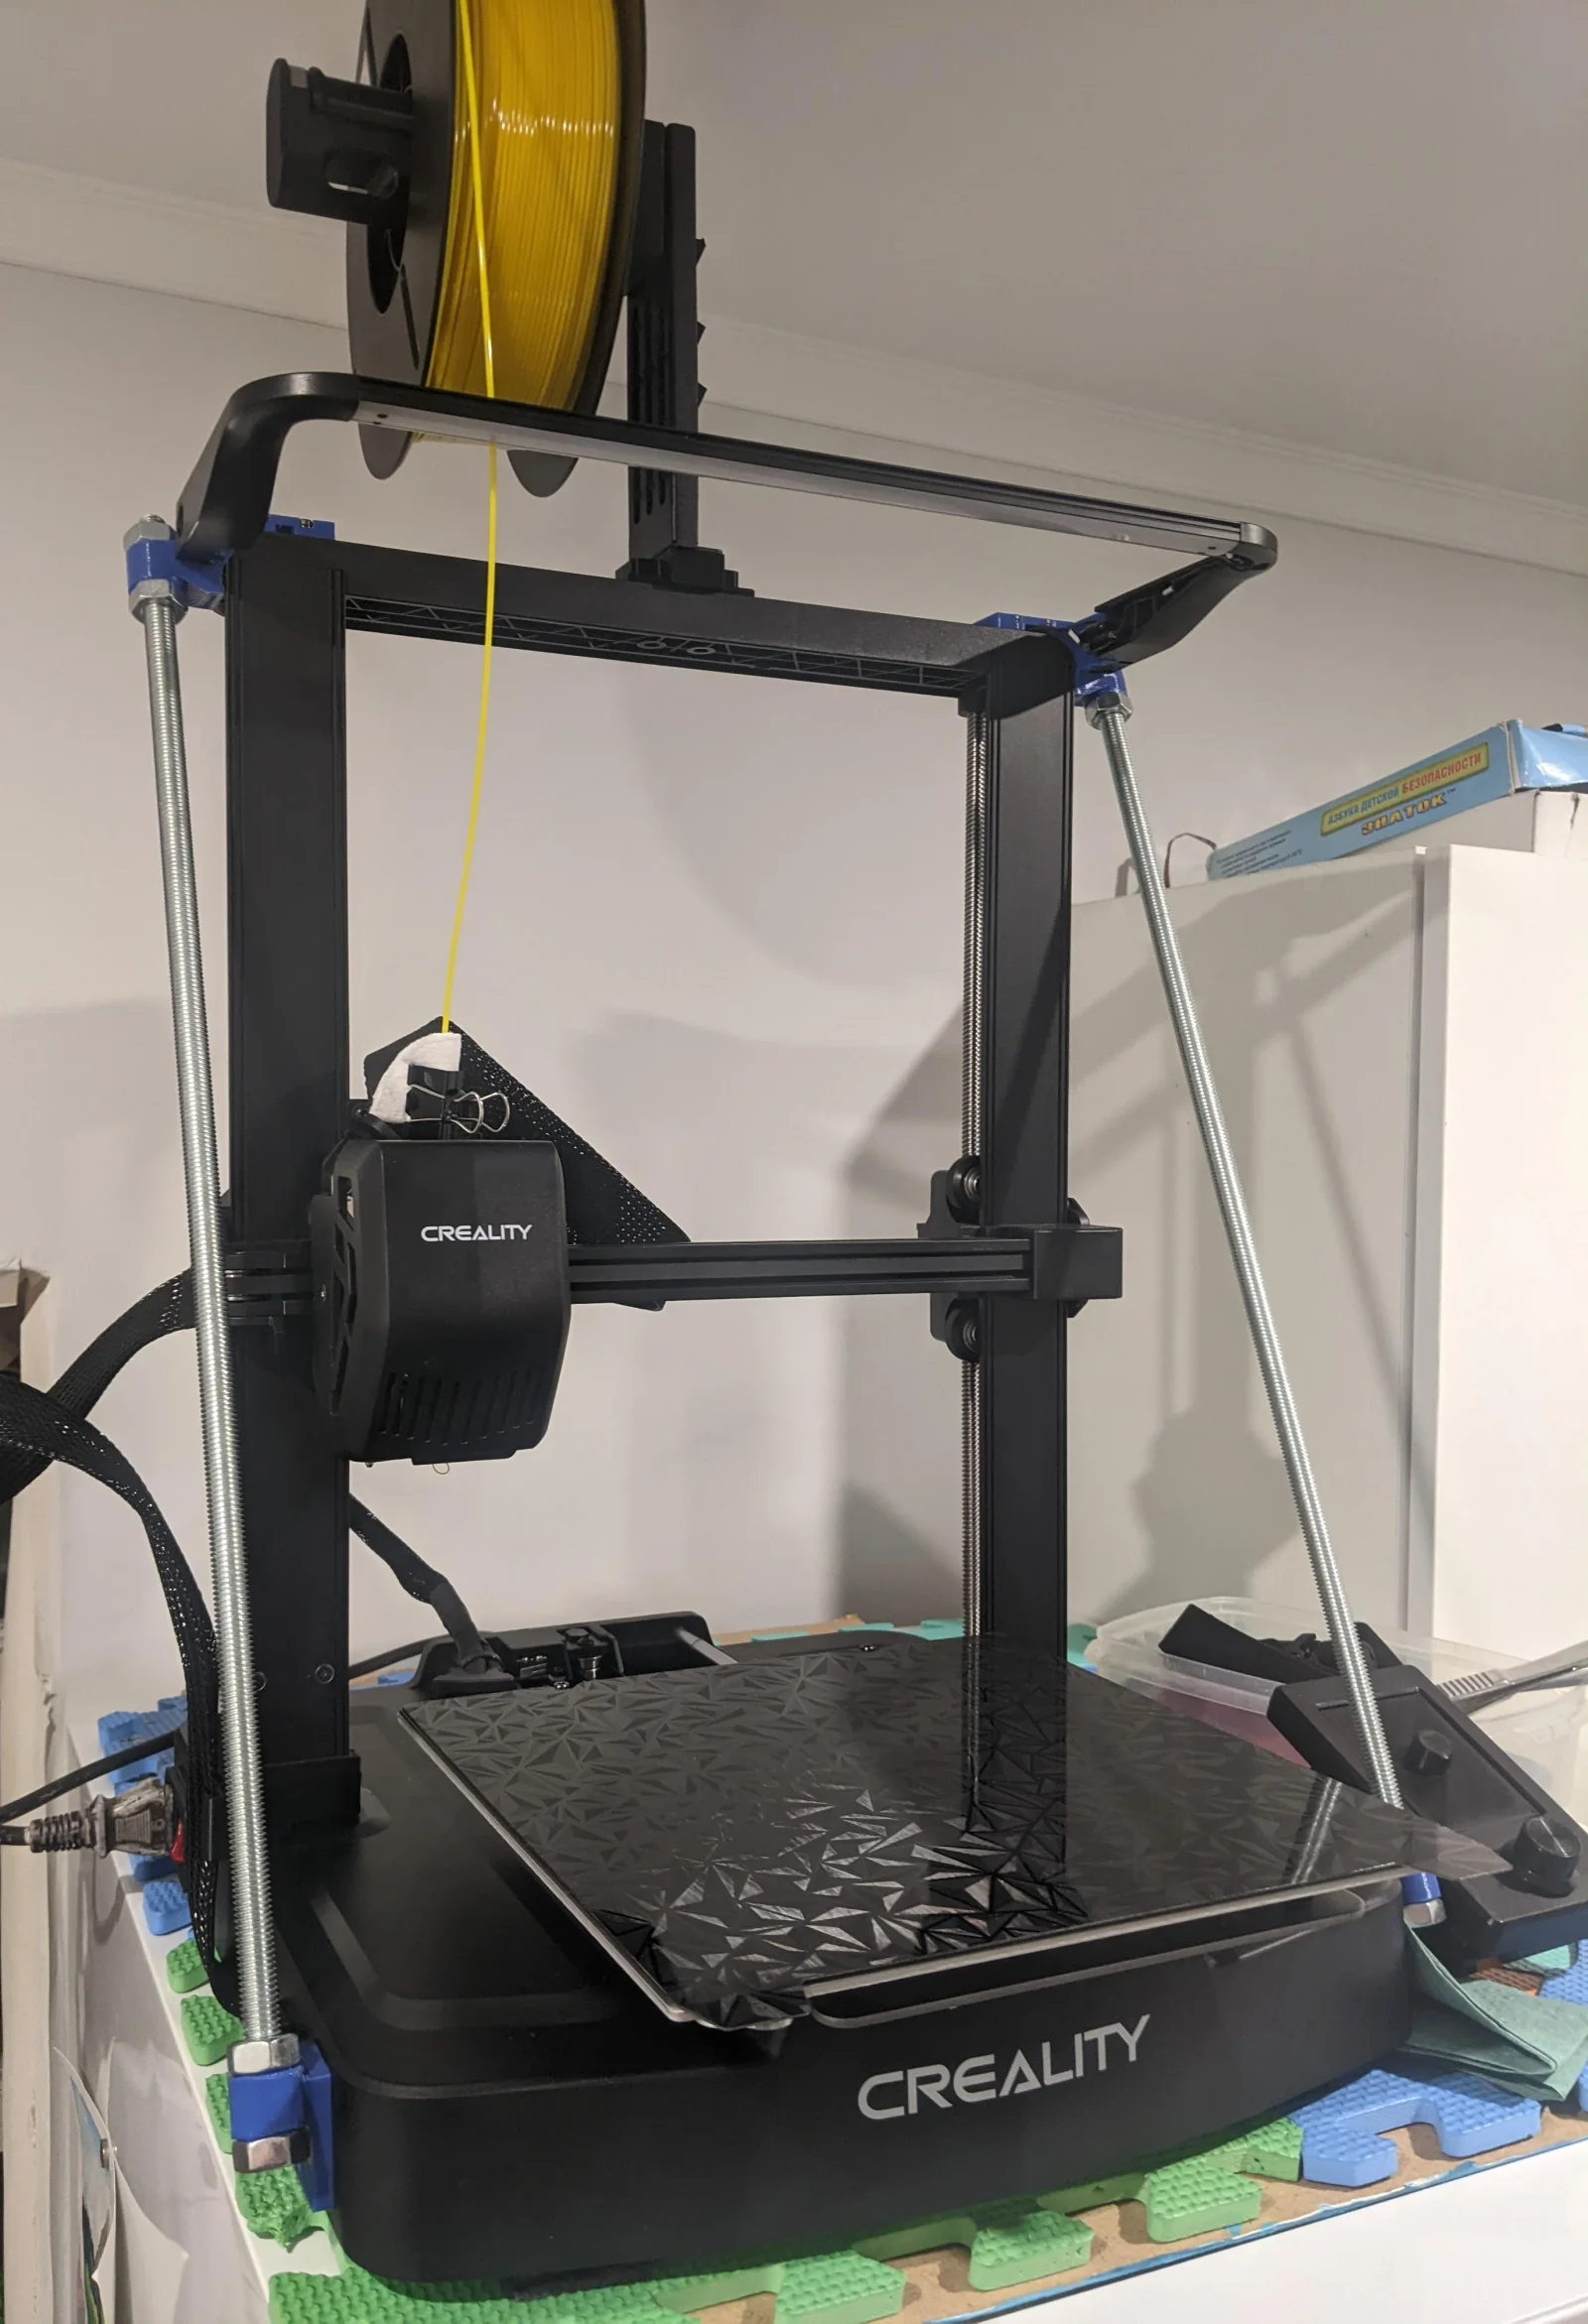
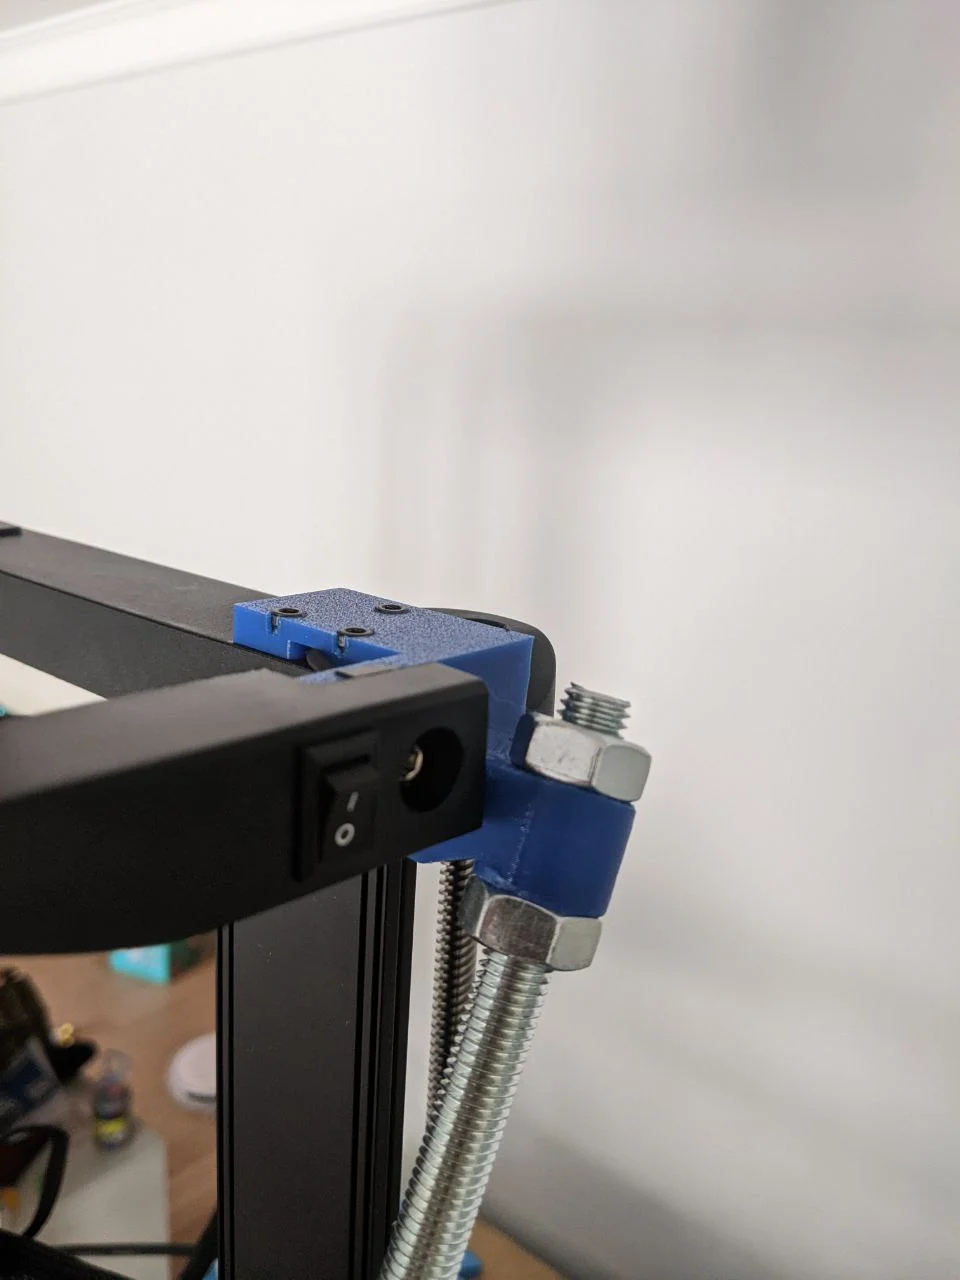


Kẹp giữ sợi Filament
 Bytinx_1344834Likes1.2KDownloads6K
Build another version of this model.
 Tấm gia cường pát dưới trái (Ender 3 V3 SE/KE Gantry support)ByGF_1990042 · 11/05/2026
 Pát Đỡ Gầm Ngang Màn Hình Ender 3 V3 SE KE (cho Guppy Screen)By3dMcPrinty_1887995 · 11/04/2026
 Giá đỡ trục Z cho Ender 3 v3 SE/KE - Tăng ổn định, không cần khoanByPesic_3040698 · 07/13/2026
 Thanh dẫn hướng sợi nhựa Filament Guide cho thanh ren 3/8ByBilld · 06/03/2026
UPD:
JAN - added models without led bar, without screen (for regular and hidden bolts)
Hello community!
Like many of you, I was shocked by the weakness of the frame and made some attempts to fix it.
Adding dampers under the printer - helped with noise
Rotating spool - helped a bit, but was not a silver bullet
Removing the spool out of the frame - IMHO did not help
I even wanted to stop my experiments, but discovered a significant angle of the frame (You should definitely check yours!)
Also check Y axis rods! Screws weren't even touching rods. Replaced with a bit longer bolts
So the solution was pre-defined: add metal gantry supports! I have found only one implementation and did not like it, so created my own.
You will need:
How to print?
Mount tips:
Possible improvements:
Also, if you know other ways to improve stability, raise quality and want to share your experience - welcome to comments,
Bytinx_1344834Likes1.2KDownloads6K

 Byprusa-researchLikes0Downloads2.7K

 Byarhi_585078Likes64Downloads541

 ByHanzo3dLikes155Downloads414

 BydarienLikes0Downloads1K

 ByGeek5DLikes147Downloads485

 ByBrokentooth_designsLikes23Downloads407

 BynozeLikes0Downloads130

 Byla-cave-au-chatLikes0Downloads965

 Bycrawler-3903250Likes0Downloads906

 ByvertigomakesLikes0Downloads562

 By3DSourcererLikes48Downloads377