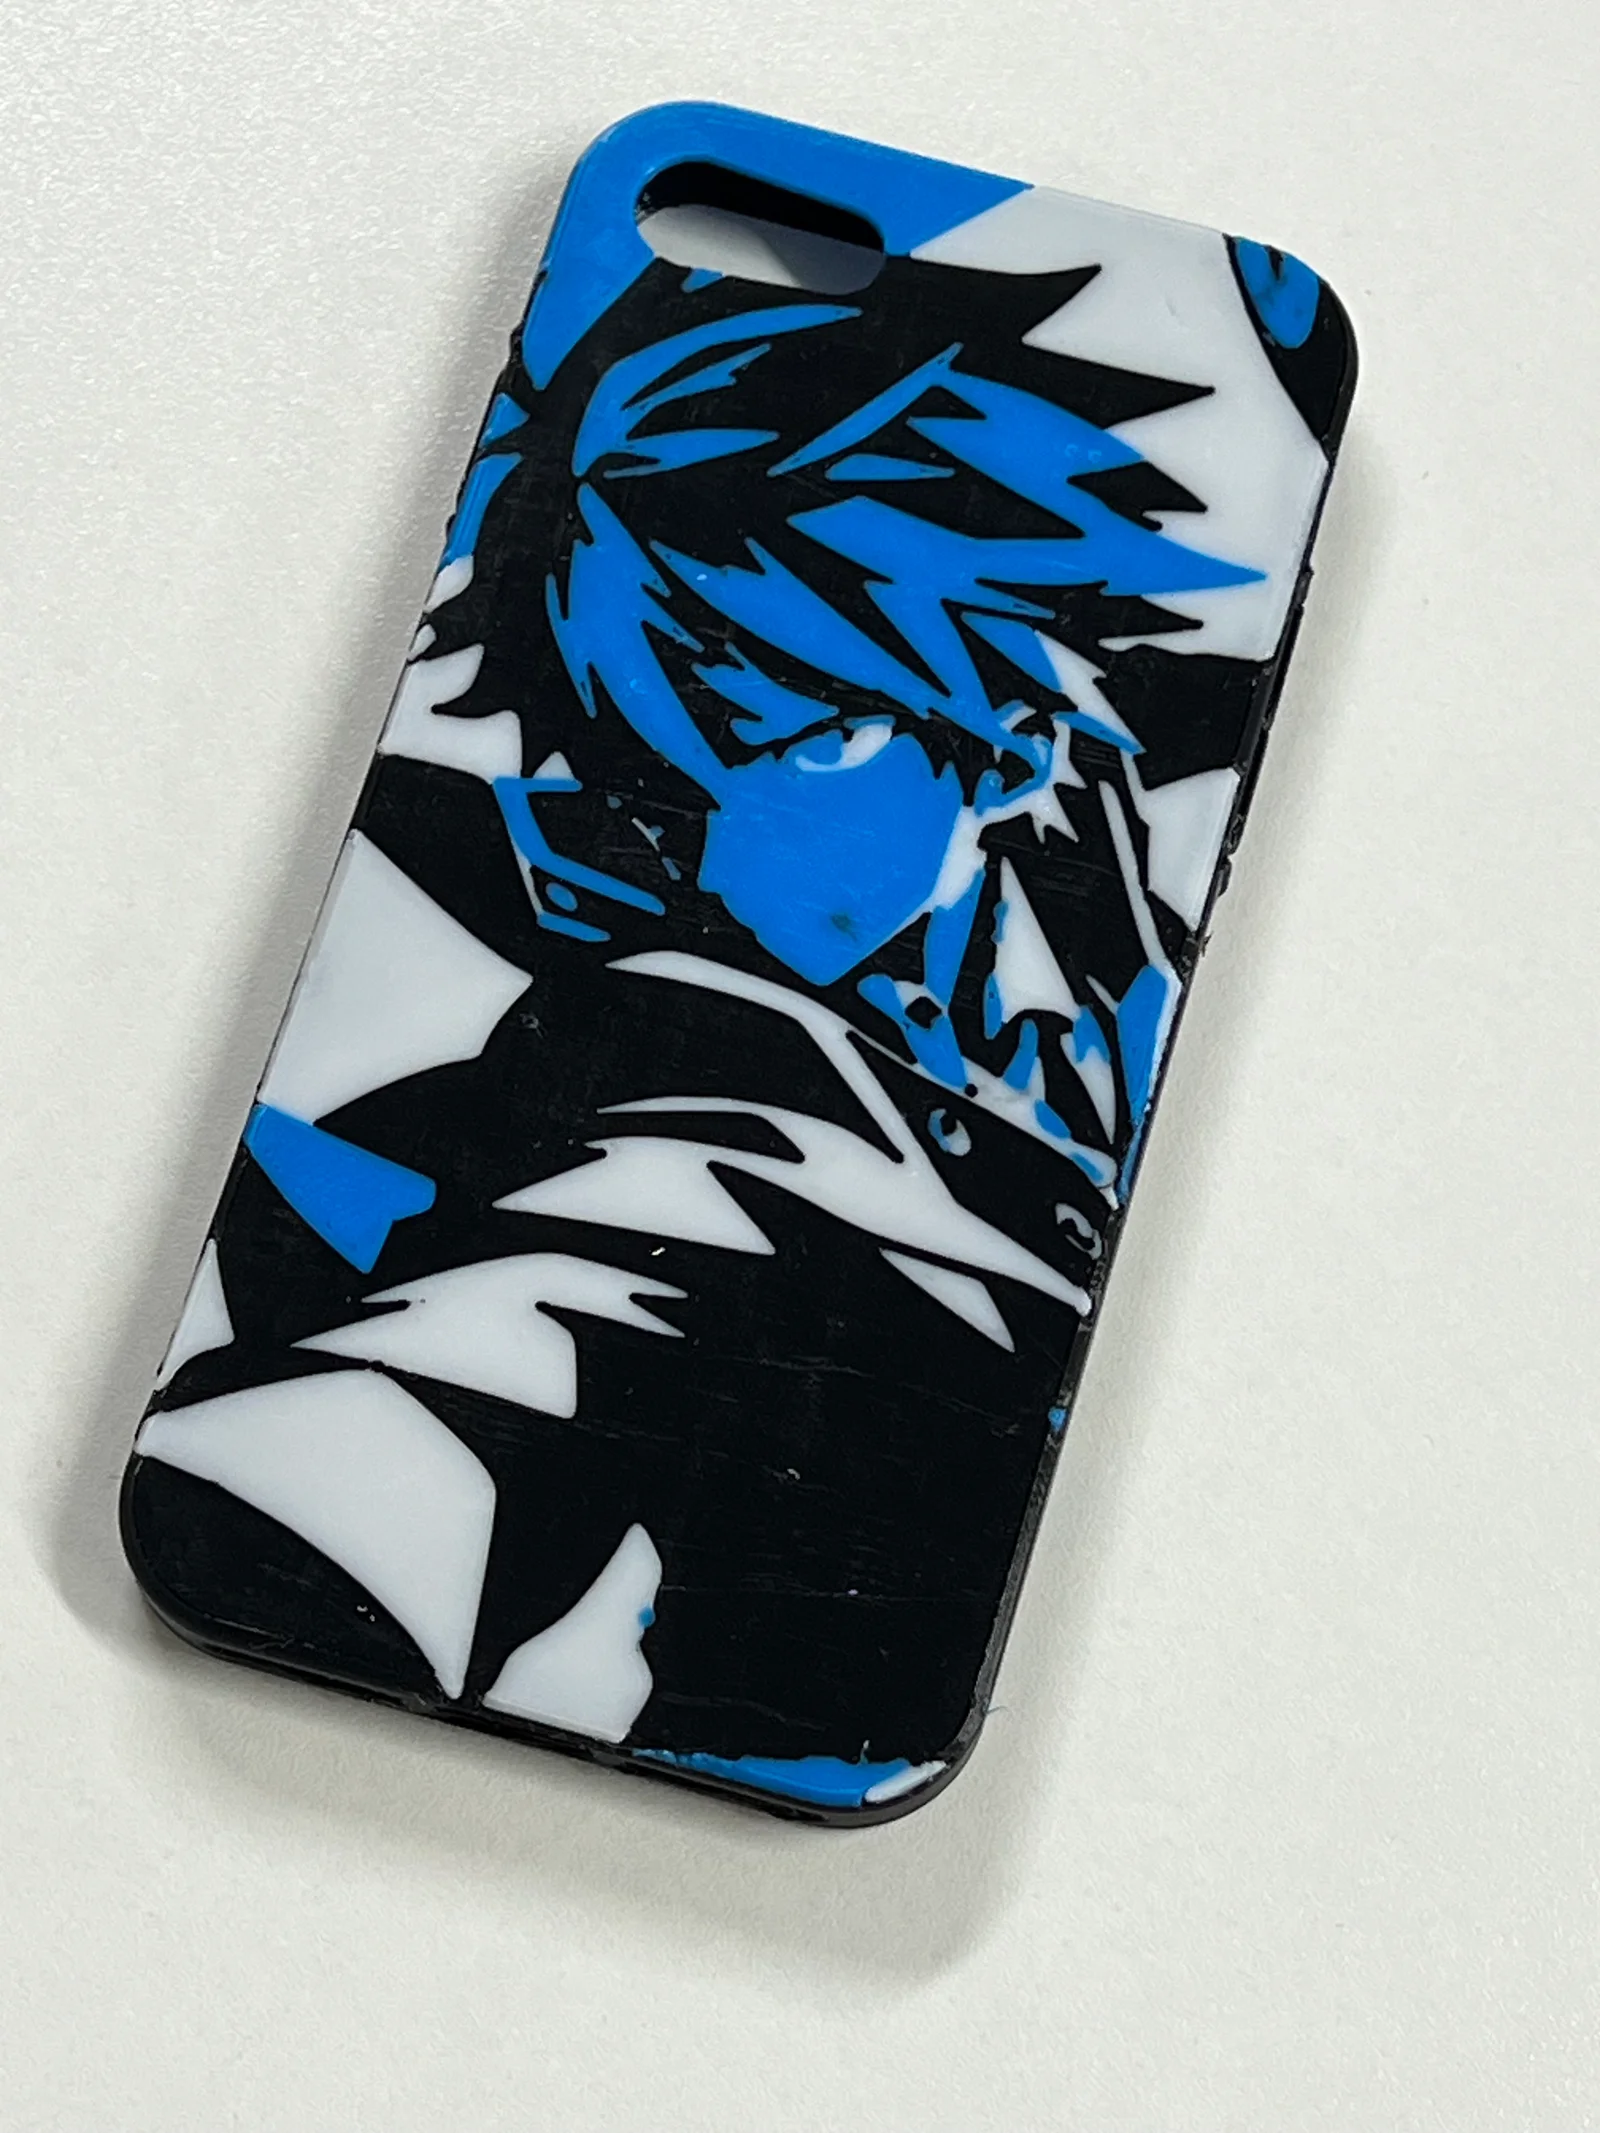
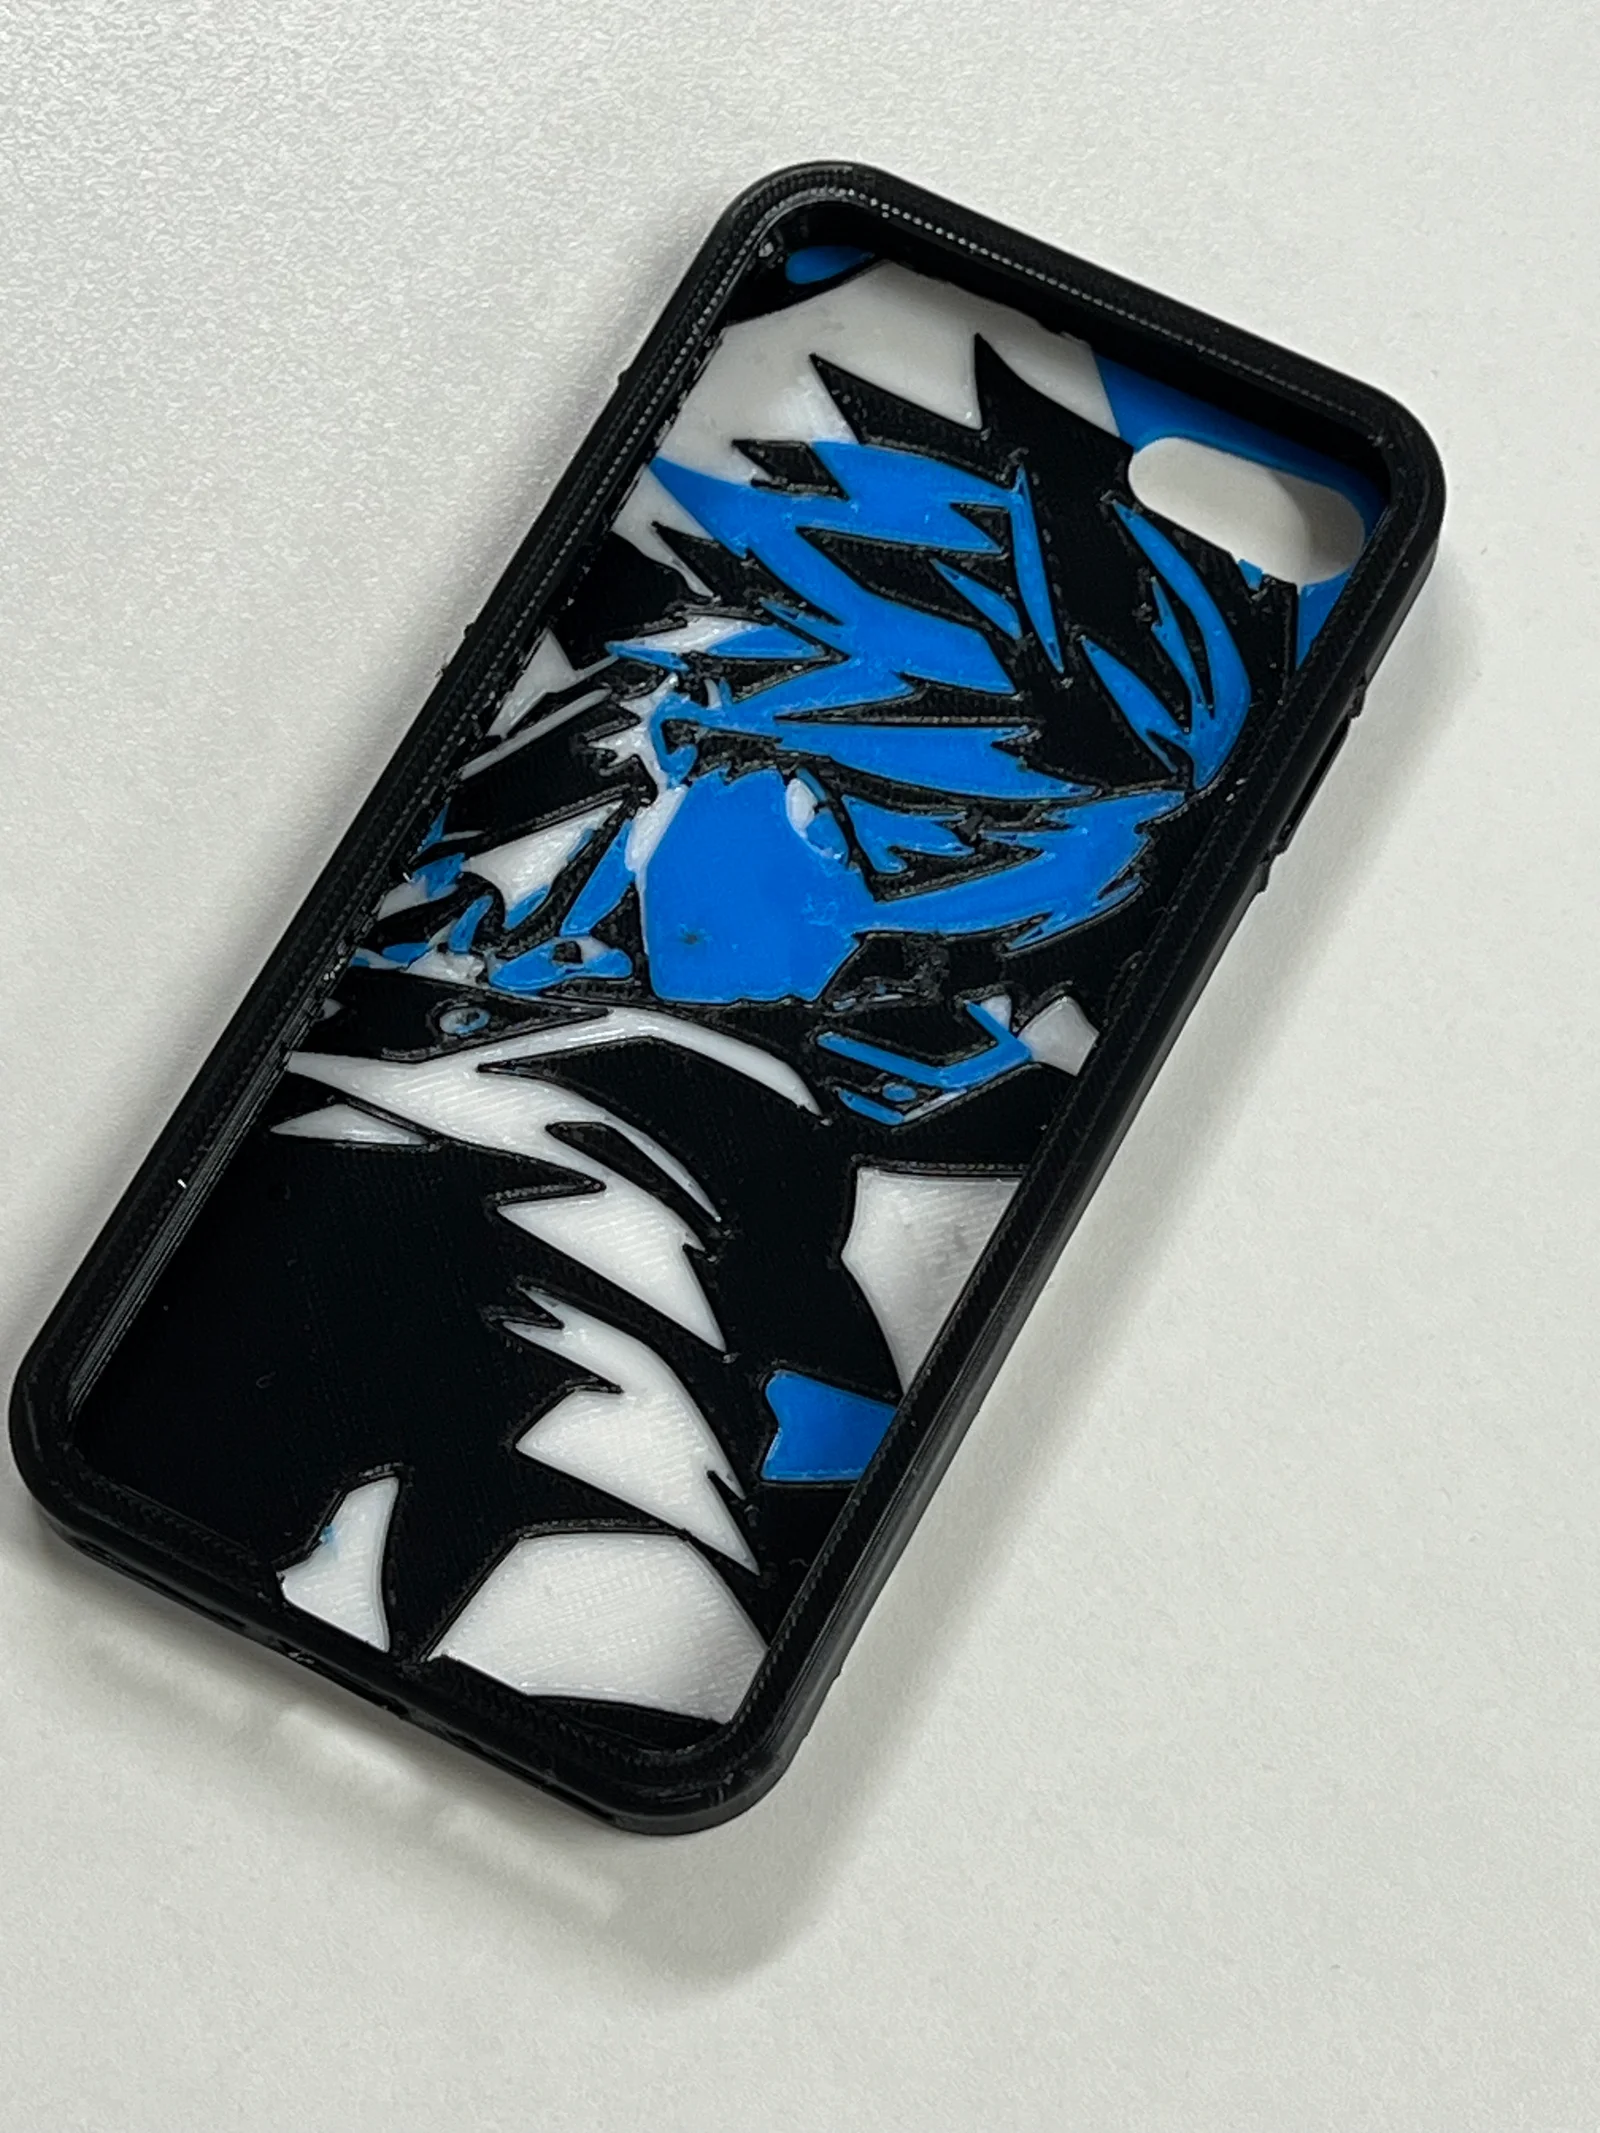
I've been itching to do a multi-color TPU print on my Prusa XL, and, since my son needed a phone case for his iPhone SE/8, I thought this would make a nice project to try.
The artwork is original (generated by OpenAI's Dall-E and a bunch of my prompts), designed specifically for the 3 colors of TPU I have on-hand: black, white and blue (all Overture TPU).
The whole process goes like this:
Adobe Illustrator:
- Use the Image Trace function to convert a pixel-based PNG/JPG to vectors.
- Use the “Select" > “Same” > “Fill & Stroke” to select each color in-turn and save them to its own layer.
- Adjust the Artboard to exactly match the desired framing of the artwork.
- Export the white and blue layers as SVG files by themselves, using the “Use Artboards” option so that each export will be perfectly aligned with the others.
SVG2STL.com (or other):
- Use an online SVG to STL (svg2stl.com, for example) to produce an STL of the white and blue color STLs. Choose a 15mm thickness. Download the resulting STLs.
Fusion 360:
- Import the phone case STL file into Fusion 360.
- Use the “Modify” > “Convert Mesh” function in the “Mesh” workspace to convert it to a solid.
- Use “Insert" > “Insert Mesh” to load the White and Blue" STLs into the same project
- Make 2 additional copies of the Phone Case model itself, rename them to “Black”, “Blue”, and “White”. Keep them all precisely aligned with one another.
- With at least one of the phone cases displayed (but not selected) so that you an see it, select the white and blue meshes together and move them so that the image is how you'd like to see it on the phone case. Use the “Move” function and the “Modify" > “Scale” function in the Solid workspace. Make sure that the meshes intersect with at least the front face of the phone model. You can let the design pass through the entire phone case, but if any of the colors change on any of the many bridges for the phones on the edges of the phone case, you'll have to use supports or risk your print failing. I chose to let it pass through the whole case, but used PrusaSlicer to ensure only the ”face" of the case had the design.
- For White:
- Use the Mesh workspace and use the item “Modify” > “Convert Mesh” to convert the White design mesh into solids – there will be a number of them.
- Select (only) the White phone case model
- Use the function “Combine”, choose the “Intersect" icon. For the tools, select all the solids created from the White design STL mesh.
- You should now have a number of objects in the shape of the phone case for the white parts of the design.
- Select all these and nothing else, then right-click on your project to “Save as Mesh” to an 3MF named “White.3mf” or similar.
- Repeat all of the above for Blue.
- Export the “Black” phone case as-is.
Your printer (Prusa XL):
- Configure your printer to have Black TPU in Tool 1, Blue TPU in Tool 2 and White TPU in tool 3. You can, of course use different tools, but I promise you that you want your darkest colors in the lowest numbered tools for this.
- Use a Smooth PEI Steel Sheet for best results, but IMPORTANT, apply glue stick to the whole surface just in case one or more of the bed-leveling probes touches an area you didn't anticipate. TPU adheres exceedingly well to PEI, you really don't want to risk it. Ask me how I learned this lesson…
PrusaSlicer
- Import the “Black” phone case model you just exported
- Right click on it in the window on the right and “Add Part” > “Load …” to bring in each of the other 3MF files for the White and Blue parts.
- Configure your tools to use your favorite TPU settings and with the tool color assignments you made above.
- Choose your TPU filament for each tool. On my setup (which uses 0.4mm DiamondHead nozzles), I ended up using a hotend temp of 210°C and a “idle temp” of 50°C to control ooze getting dragged over other colors. My bed temp is also set to 50°C. YMMV.
- I used the 0.15 SPEED preset for this. (Oops, I should have used STRUCTURAL, but it still came out great!)
- In order to ensure quality, I reduced the “Max volumetric speed” to only 2.5 mm^3/sec. (Probably why 0.15 SPEED came out great!)
- Do a test slice and choose the “Color Model” display to make certain your colors are in the right places. If all you see is black, make sure that the black layer is the highest in the list for your model. Once you re-slice, you should see all the colors.
- When you're happy with it, slice and send to your printer.
While it prints, I recommend you keep an eye out for stray bits of anything in the area that your phone case will be printed and remove it while you wait for “Absorbing Heat” or tool changes, or whatever. In my case, this was nearly a 3 hour print, I baby-sat the first 2 layers to ensure it was going smoothly.
Tips
Because this model has a significant overhang, you will likely have some filament strands loose in the final print. I just snipped them off with some flush cutters.
I strongly recommend that you fully wash your build plate between prints. The reason is that the print comes out beautifully when the glue stick is freshly applied and perfectly smooth. (The photos attached did not heed this advice and it shows!)




 ByckthLikes148Downloads2.4K

 BynasikLikes0Downloads273

 ByftoerringLikes79Downloads186

 ByFosphorLikes20Downloads239

 ByDiscotehkLikes35Downloads156

 ByjoranLikes0Downloads212

 ByJaronLikes310Downloads1K

 Byw3rN42Likes127Downloads935

 ByfryseeLikes0Downloads144


 ByNoahLikes0Downloads204

 ByTomDDLikes89Downloads574