



Fidget Mini Claw Machine - Mô hình máy gắp thú nhỏ gọn
 ByRedfully_1701430Likes717Downloads3.3K
Build another version of this model.
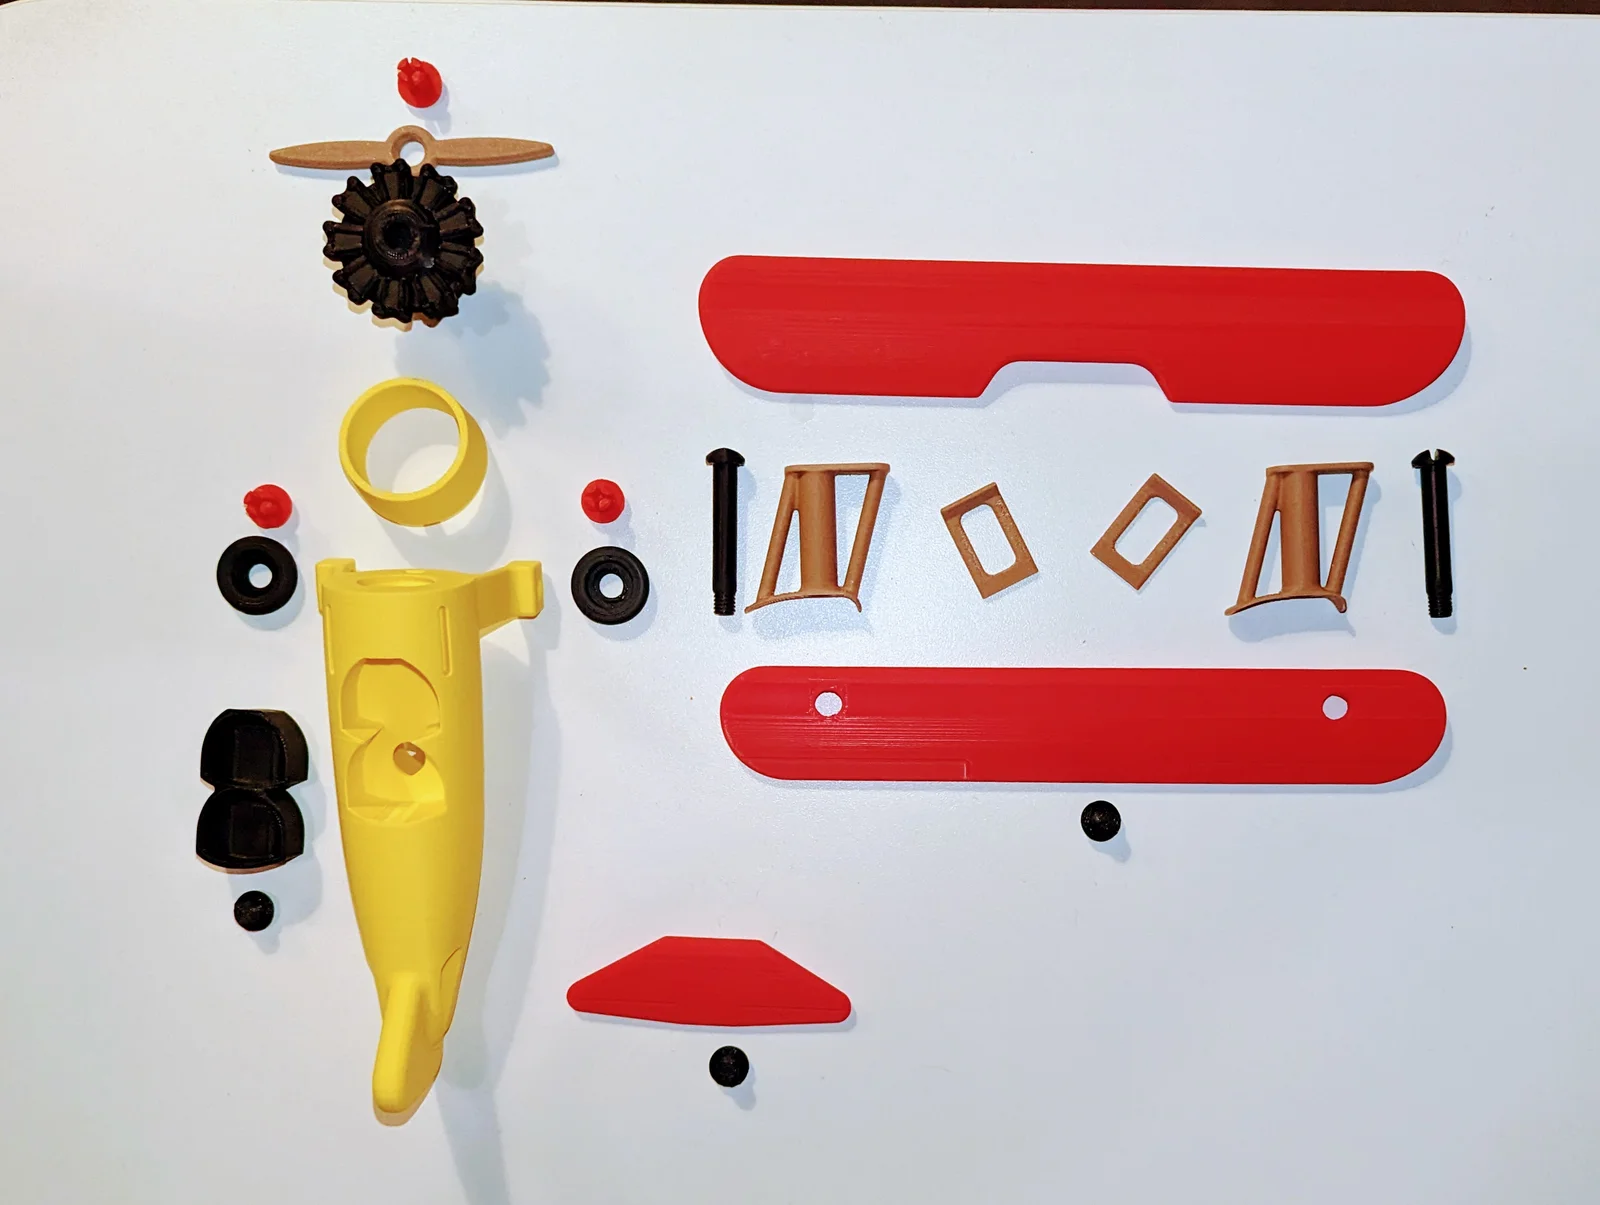
This is a toy plane that is based on the famous Boeing Stearman Model 75 biplane.
https://en.wikipedia.org/wiki/Boeing-Stearman_Model_75
The toy plane has a wingspan of 240mm and a length of 196mm. It can be completely assembled without using glue. All necessary clips and bolts are printed. I even included a small screwdriver.
Use the following settings for the wings: 0,12 layer height, 4 walls, 4 bottoms, 8 tops, 16% gyroid infill
The rest can be printed with 0,2 layers, 4 walls, 4 bottoms, 5 tops, 6% gyroid infill.
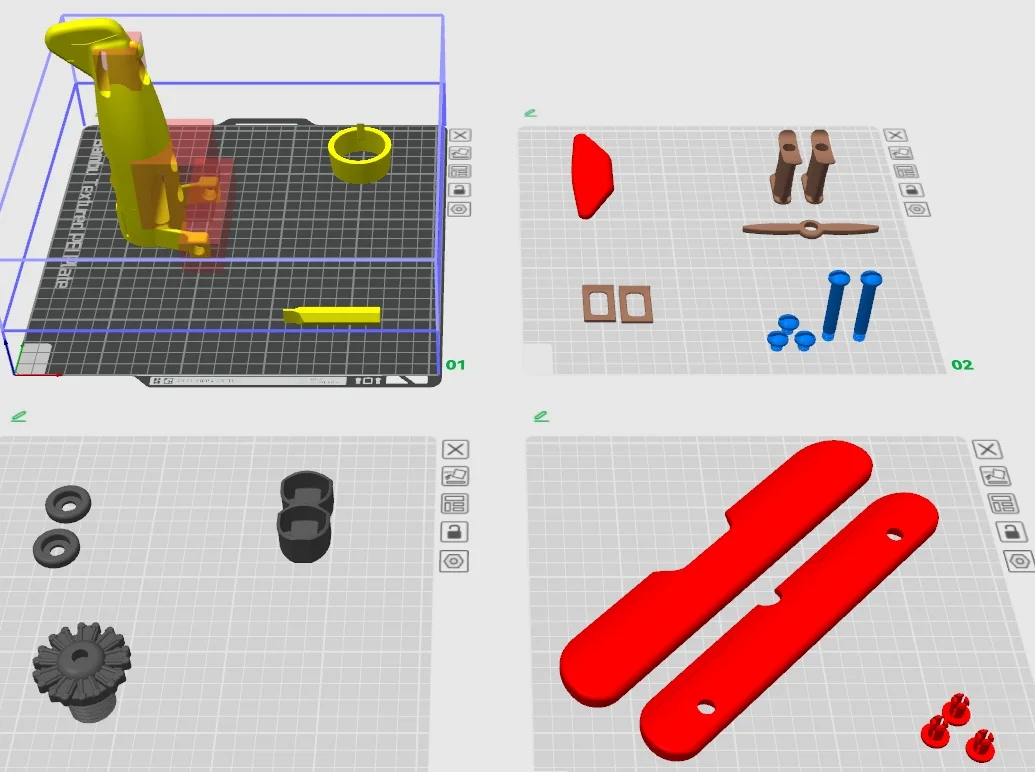
I recommend a brim only for the bolts. See my 3mf for more details and how I positioned the parts on the build plates. The 3mf file can be used with OrcaSlicer or Bambu Studio. I added a picture so you can see the orientation of the parts on the print bed.
Print the following parts with support:
Do not use support on the threads.
All parts will fit into a 200x200x200 build space.
Users with a smaller printer need to split the wings into two parts (can be done with the slicer) and glue them together after printing. Alternatively the model can be scaled down a little bit. I did not try this myself but I know there is a print that has been scaled down to 82%.
For assembly follow these steps:
Disclaimer:
This work by blecheimer is licensed under CC-BY-NC-ND 4.0.
You are not allowed to copy this model to other 3D printing websites without my permission.
ByRedfully_1701430Likes717Downloads3.3K

 ByChristianS_2237751Likes502Downloads3.7K

 Bymtakashi_164009Likes176Downloads492

 ByHugoS_588209Likes108Downloads1.4K

 ByLimitSwitch_4355441Likes102Downloads291

 ByDennisMLikes189Downloads1.7K

 Byjose-pedroLikes0Downloads135

 ByJona32u4Likes82Downloads680

 Bythall72Likes30Downloads524

 Byderek-j-sLikes0Downloads150

 ByGhostmanta_3143708Likes187Downloads342

 ByQuangCao_1194537Likes73Downloads244