


Kẹp giữ sợi Filament
 Bytinx_1344834Likes1.2KDownloads6K
Build another version of this model.
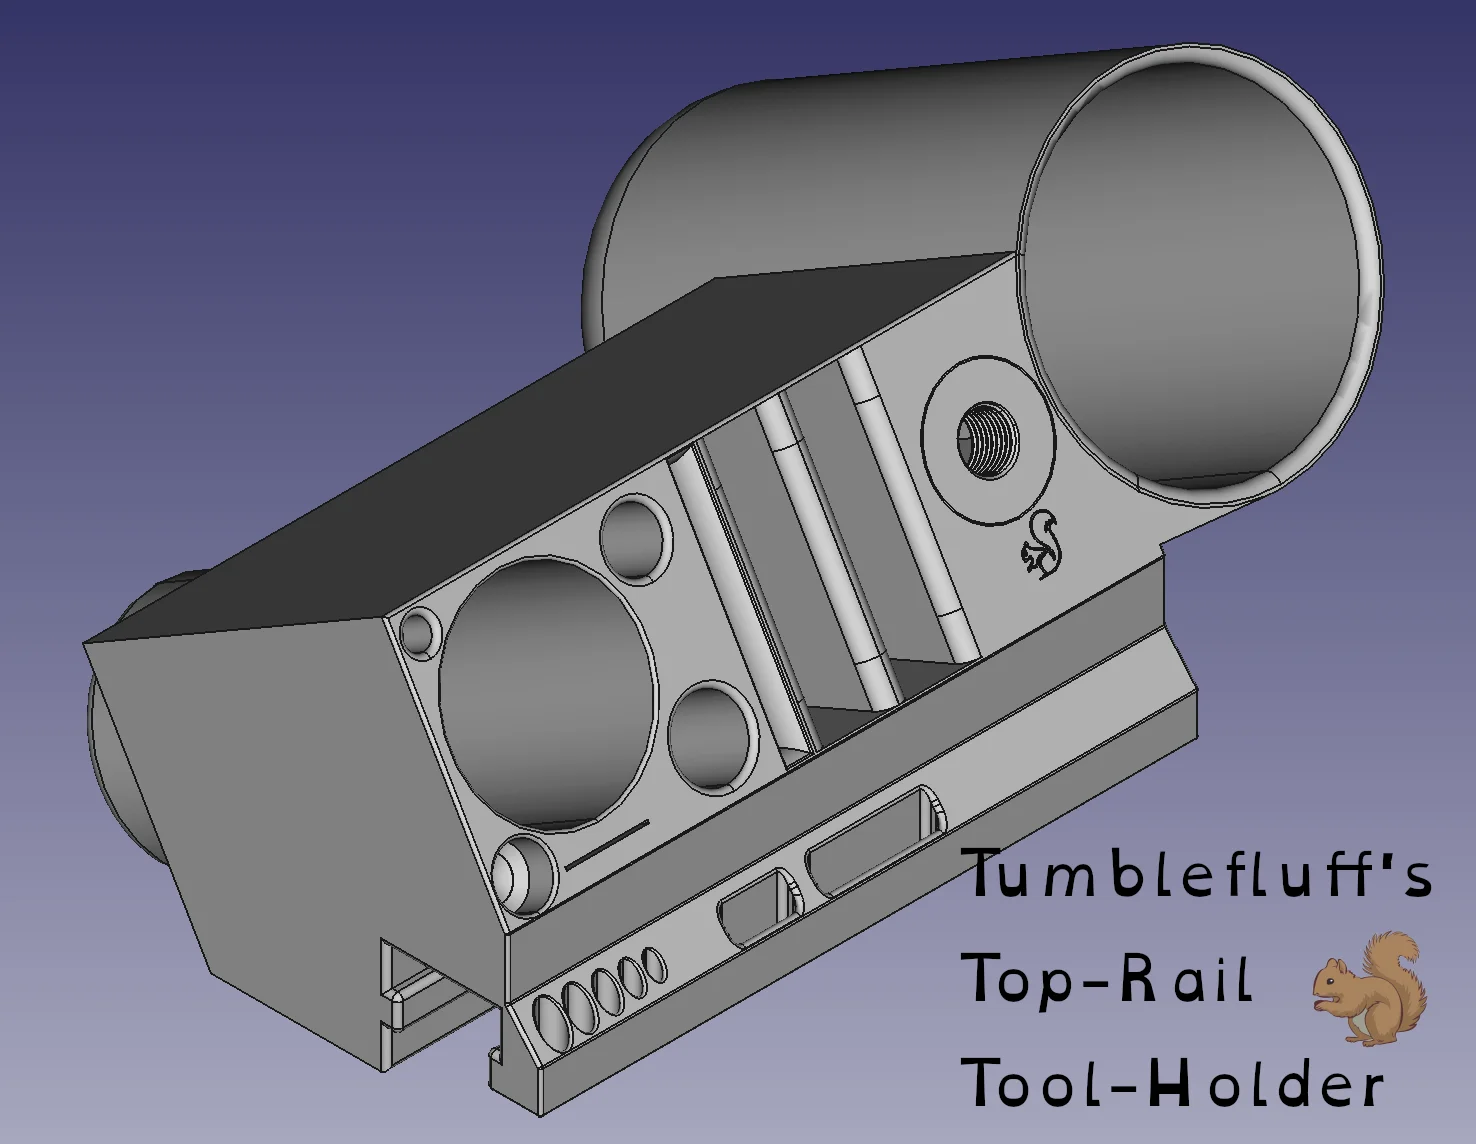
Holding all your Tools, and Shedding Some Light on your Workspace
Updated 12/11/2023 (added a combination of chamfers and fillets to the feeler gauge slot)
Storage Slots for:
All the Tools that come with the Ender 3
Common After-Market Tools
Bonus Features
If you're generating your own gcode file, for best results, rotate the part to print on it's face (see provided gcode file for reference). To provide sufficent strenght for mounting a gooseneck lamp, it is recommended that you print with a minimum shell thickness of 5mm. You can see the settings I used for my gcode below.
Before you print the tool-holder, please print the thread test to ensure the threads on your lamp-pipe match. If they do not, please feel free to reach out to me and I'll work with you for free to make the alternative stl files (Tool-Holder and Thread-Tester) for your lamp (while it should be a quick fix, please be patient, this is not my occupation).
Anyone is free to print these for any purpose. This model may be printed for sale/profit with proper attribution. If you sell completed (with lamp) copies of this object, you assume liability for your work (I assume no liabilty for the craftsmanship of others).
Disclaimer - I am NOT a professional electrician.
When my printing of the model is complete, I will record my installation and share a video link. You may need to use an alternative method depending on the lamp you're attaching to the model.
The process I used (or will use)
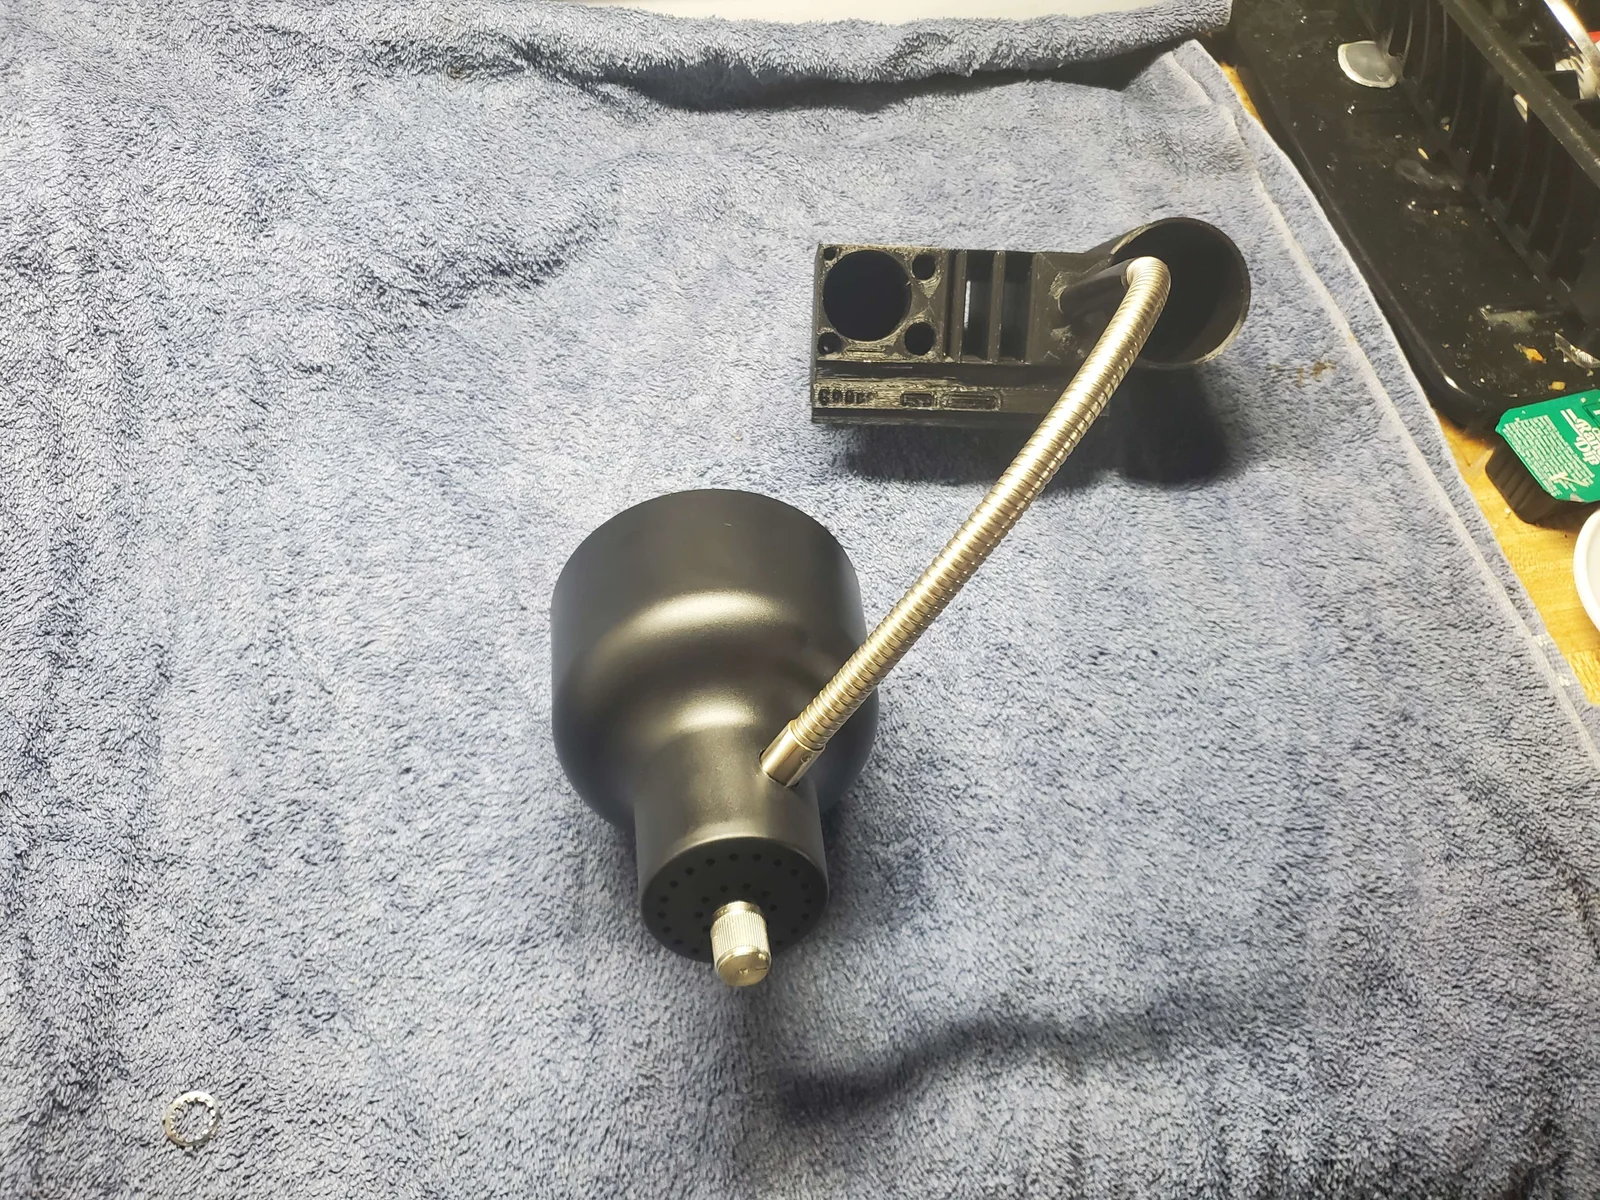
I removed the base and snipped the wires from the gooseneck as close to the wire crimps as I was able. I fed the wall cord through the back of the threaded hole on the model, split the 2 sides and slid a heat-shrink tube over each branch. I Soldered the wires together so as to match the original polarity and hit the shrink tubes with a heat gun to protect the solder joints and bare metal. I fed the wires back through the hold and screwed in the lamp pipe to the hole.
Bytinx_1344834Likes1.2KDownloads6K

 ByBrokentooth_designsLikes17Downloads148

 Byprusa-researchLikes0Downloads2.7K

 Bydet-manLikes0Downloads173

 Bygummiegecko8477Likes0Downloads164

 BydalleLikes0Downloads149

 Byarhi_585078Likes64Downloads545

 Bygafyx3dLikes0Downloads122

 ByHanzo3dLikes155Downloads417

 BydarienLikes0Downloads1K

 ByGeek5DLikes147Downloads490

 Byla-cave-au-chatLikes0Downloads969