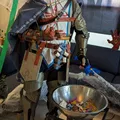
Tears of the Kingdom Haloween Costume with Ultrahand

Một bộ trang phục/cosplay Halloween đầy đủ cho Link trong bộ giáp của người lính từ nước mắt của vương quốc. Đây là một công việc đang được tiến hành!


Mô tả
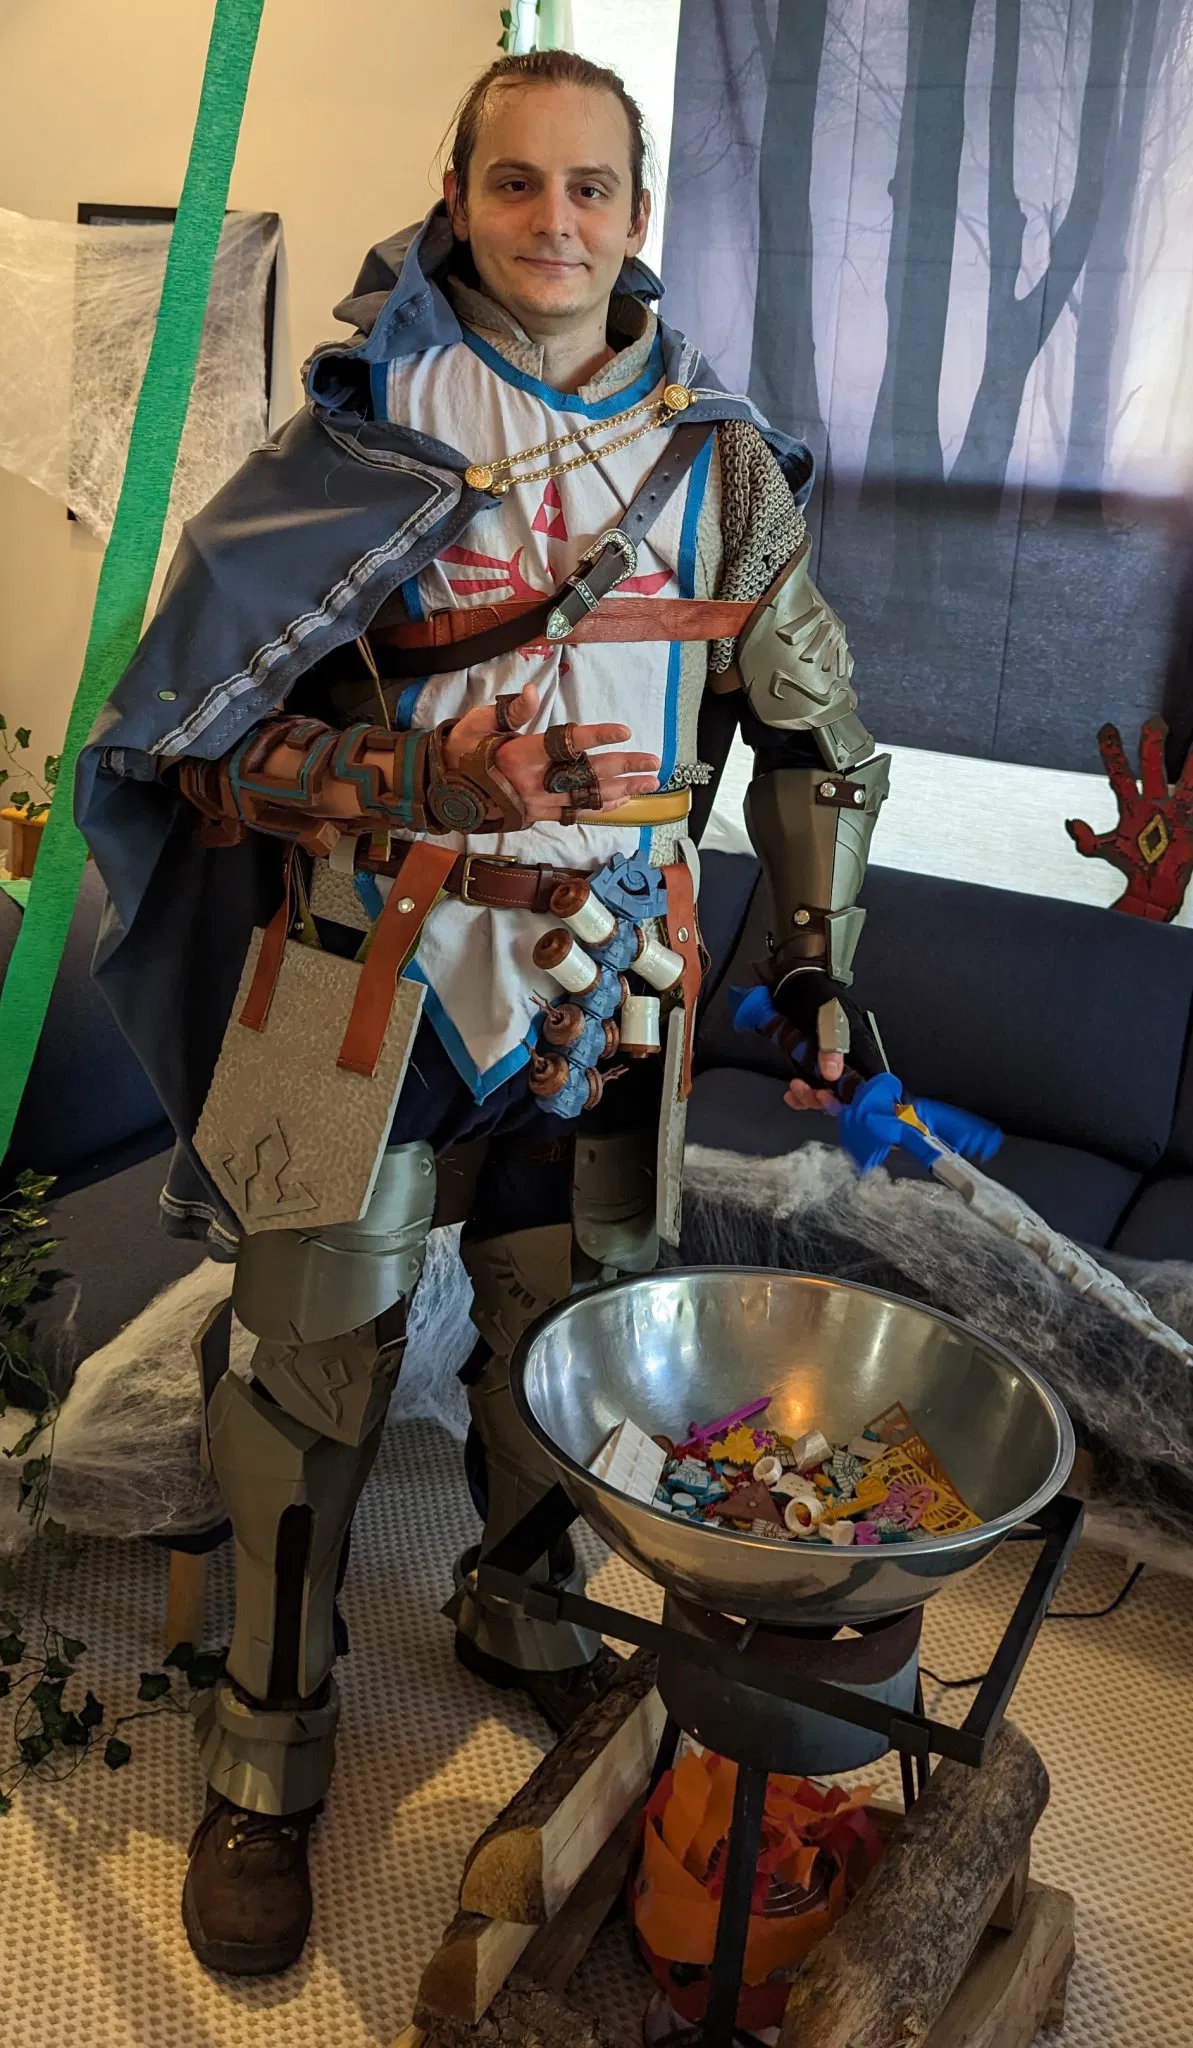
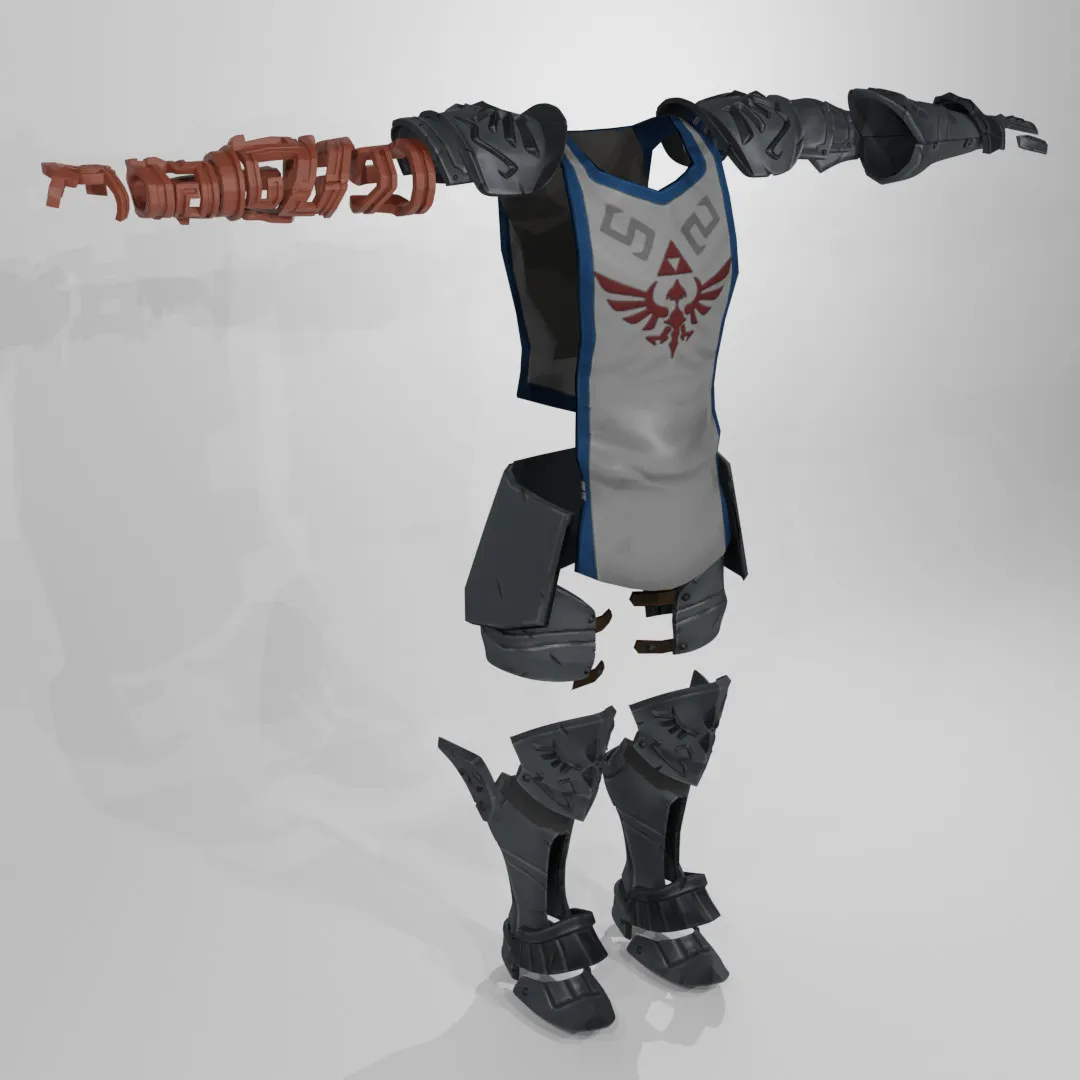
Work in progress! A full Halloween costume/cosplay for Link in the Soldier Armor from Tears of the Kingdom, including the Ultrahand. I made every piece from scratch in Blender based on in-game models. More pictures and more detailed instructions to come soon. To complete the costume, I recommend this Master Sword and these Ultrahand Rings.
This is an advanced project; making everything as I have requires a 3d printer, a sewing machine, a soldering iron, a hot glue gun, fabric, EVA foam, fasteners, and a laser cutter. However, plenty of variations and substitutions are possible. I tried to make the parts as easy to print as possible, and I'm working on improving them based on what I'm learning as I make them, but these are weird shapes with a lot of overhangs that will require good support. The Zonai must have some incredible part cooling.
The printed parts all fit on an Ender 3 with some splitting for the larger parts. You can slice the STLs directly, or the 3mf files have the exact orientation, settings, support, and cuts that I printed them in. In the 3mf, separate parts are designated with numbers (Shoulder1, Shoulder2, etc.). Parts that have been cut and should be connected together when complete are designated with lowercase letters (Calf1_a, Calf1_b, etc). To connect parts, I found using a soldering iron set to low will “weld” the back of a part nicely, with a minimal gap. To do this, I sand the mating surfaces flat as needed, hold them together tightly, then make a few spot welds to tack them together. Then I run the iron across the entire backside of the seam, making a channel. The channel can then be reinforced with a length of PLA melted on top with the iron.
I used 10mm metal snap buttons on the armor as attachment points. I use the soldering iron to melt them onto the back of a plate, then make a fabric strap with the other side of the snap. I'm using this printed buckle to hold them in place, but any buckle will work. Also, I have hot-glued velcro to the plates and sewn it into the pants and shirt to better hold them in place even better. I've only included STLs for one side of the armor plates, you can mirror them to get the other side.
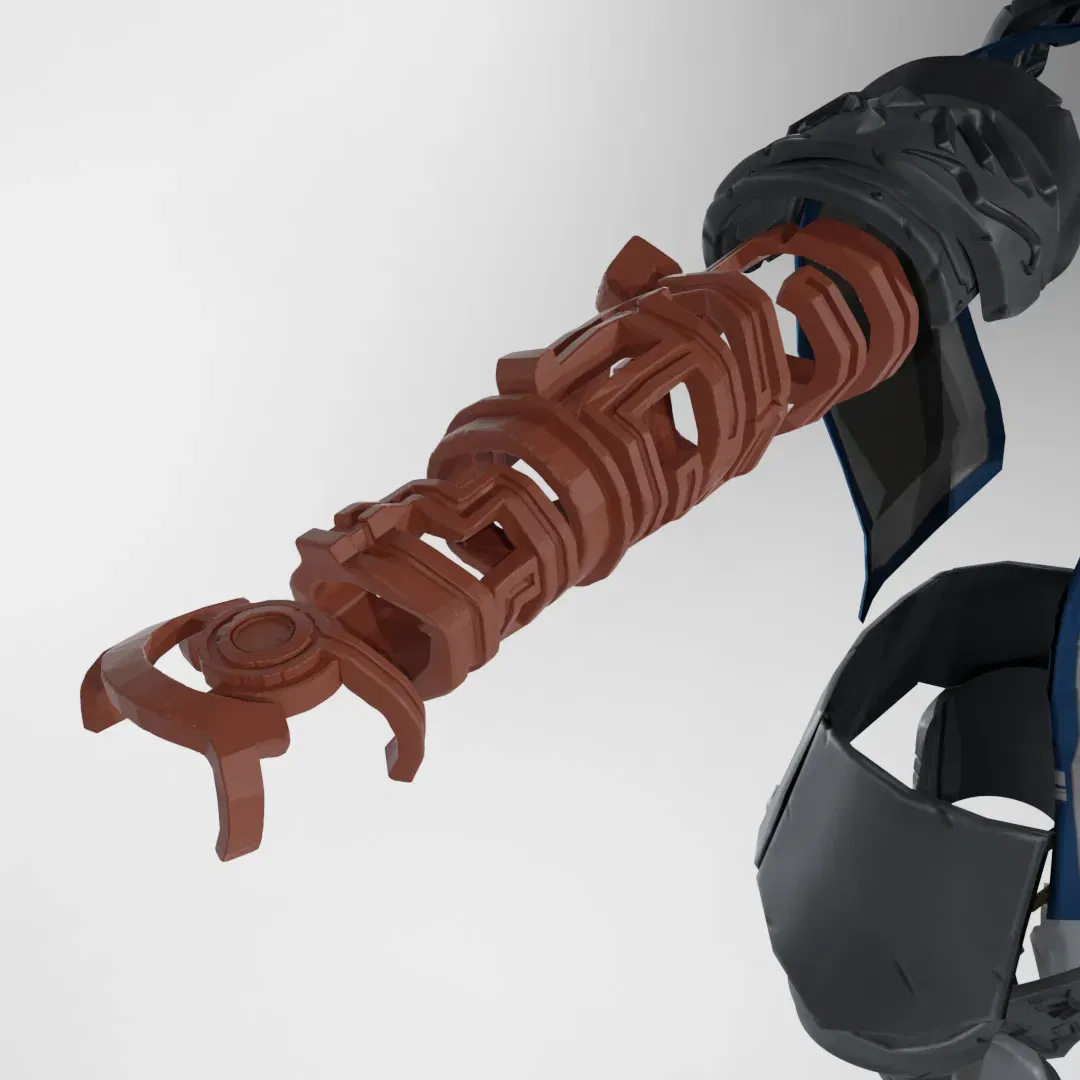
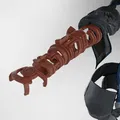
The Ultrahand is a tough print. I've seen a few versions online, but I wanted one that looks rough and chunky, like it was hewn out of stone. That's the vibe I get from the in-game models. I made it in Blender and used Geometry Nodes to make the edges scratched and damaged, but it doesn't come out super well in an FDM print. I'll include the original .blend files once I clean them up a bit. I've included versions with and without cutouts for LED strips, they are sized to fit the Adafruit NeoPixel strips, but they also fit a cheap strip I found. I recommend using the eSlicer Cut tool to make 1mm slices of the front and back of each piece and doing a test print of that first to make sure it fits your arm. For me personally, I could fit everything over my hand in a single piece except the wrist, which I used the Cut and Dowel tool to cut in half and add holes for 2x6mm magnets I superglued into place. If a piece doesn't come out perfectly sized, you can use a heat gun to get it pliable, put it on (being CAREFUL not to burn yourself) and squeeze it into shape. I wanted to model a ring joint system for the middle part of the forearm so it could connect the two other parts and still spin freely, but I didn't finish it yet. It seems fine without it.
The cuirass/chest plate is made out of 6mm EVA foam, cut using the PDF pattern and glued together with barge glue or contact cement. I hot-glued velcro to the front seam to make it easy to get on and off. I also used a spherical bit on a rotary tool to give the surface a hammered metal look.
The chain mail is a remix of this pattern, rearranged to fit the bed of a Glowforge. I used 2mm EVA foam. As per the original instructions, cut the pattern and knit the rows of links together using a crochet hook or similar tool. If you don't have a laser cutter, you can 3d print chain mail (which would take a long time), make it from real metal links (ditto), knit it from thick yarn (which is how prop chain mail for movies used to be made), or get a gray garment from a thrift store that looks close enough. Once you have enough courses, cut to fit as per the PDF pattern to make the arms. Make the first several courses longer or shorter to fit your arm. Once you have the fit pattern, use yarn or string to stitch the left and right sides together to make a sleeve, flip it inside out, then hot glue it to the arm hole of the cuirass. Then, make a straight rows of the chain mail about 6 inches tall and of a diameter equal to your waist and hot glue that to the bottom of the cuirass to make the hip/belt area.
I also made the hip plates out of 6mm EVA foam and glued the part called “Butt Insignia” to them. I didn't use a pattern, I just eyeballed it to fit me.
I will post a sewing pattern I made for the tabbard soon. I have included and SVG and a STL for a stencil of the Hyrule crest to paint on the tabbard with fabric paint, or you could print it out as an embroidery pattern.
Finally, I modified this pattern to make a Hylian Hood.
You will also need an under-layer like a shirt and pants, boots, a single glove, and a ton of belts. I got all those things at a thrift store. Happy adventuring!
Giấy phép

File mô hình


Chưa có bản in nào được khoe. Hãy là người đầu tiên!

Chưa có bình luận nào. Hãy là người đầu tiên!