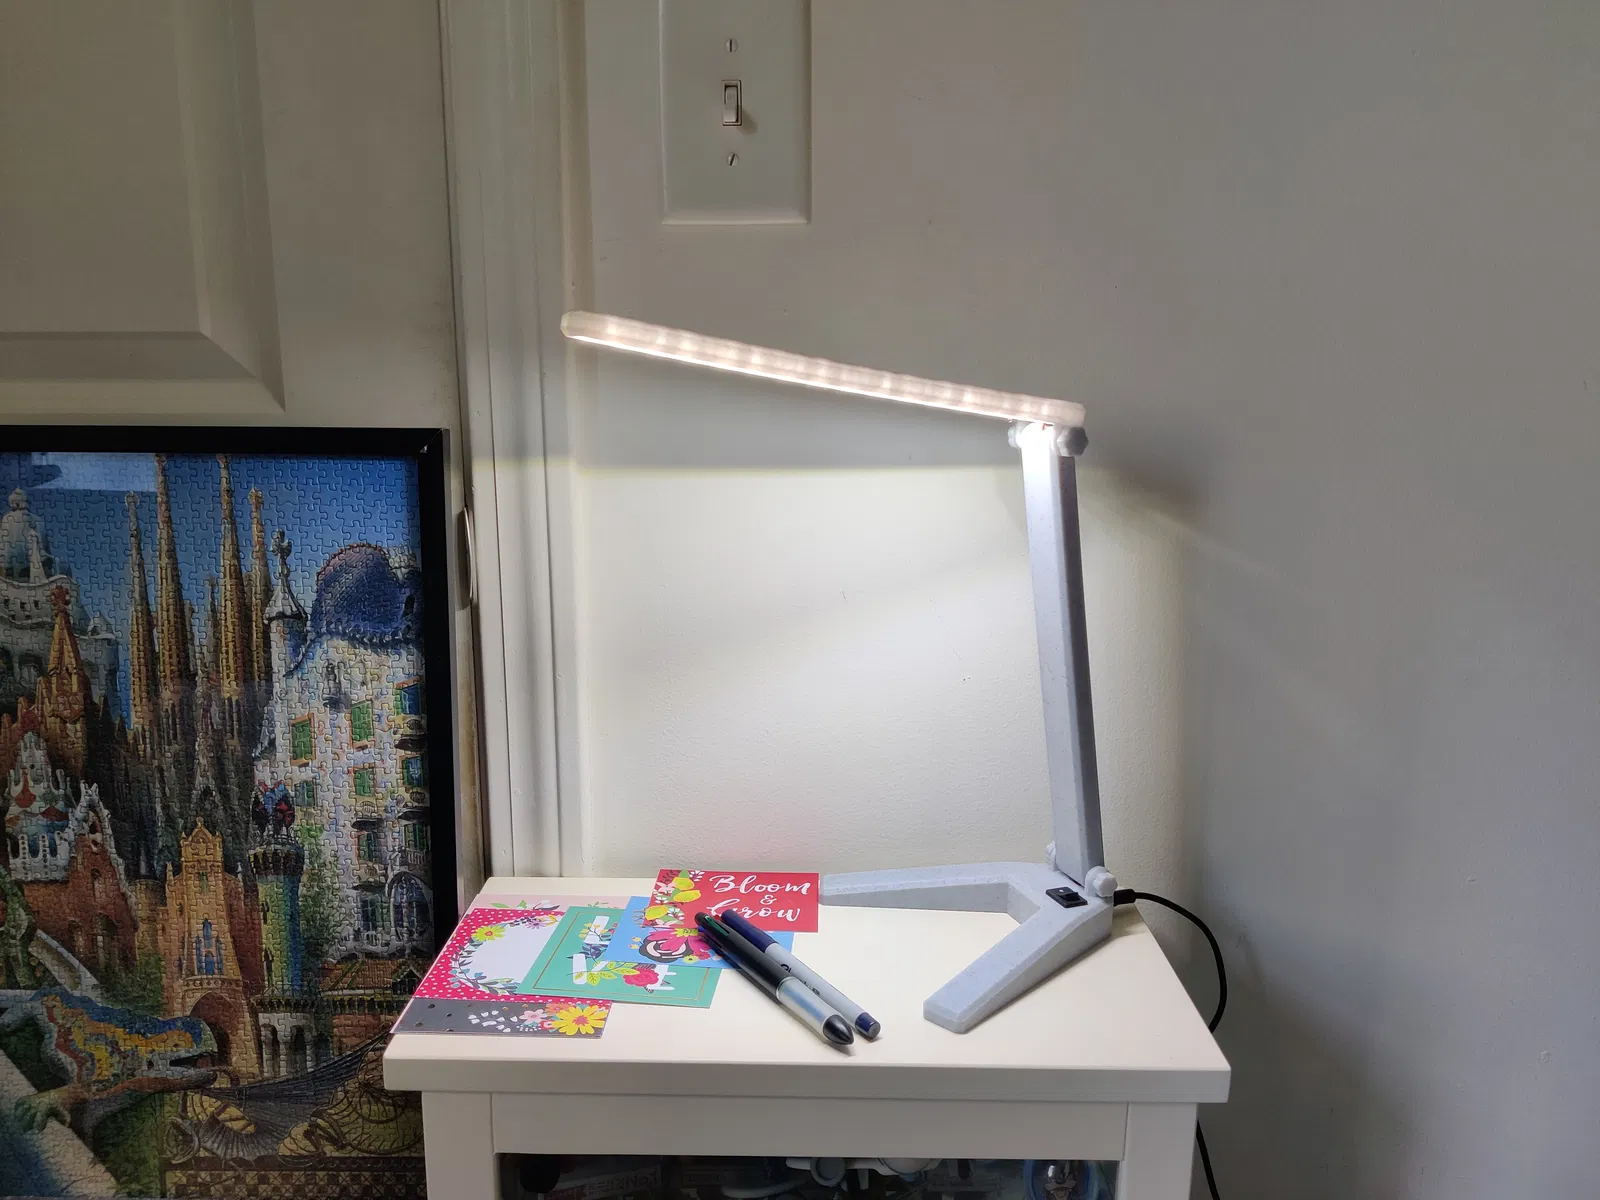
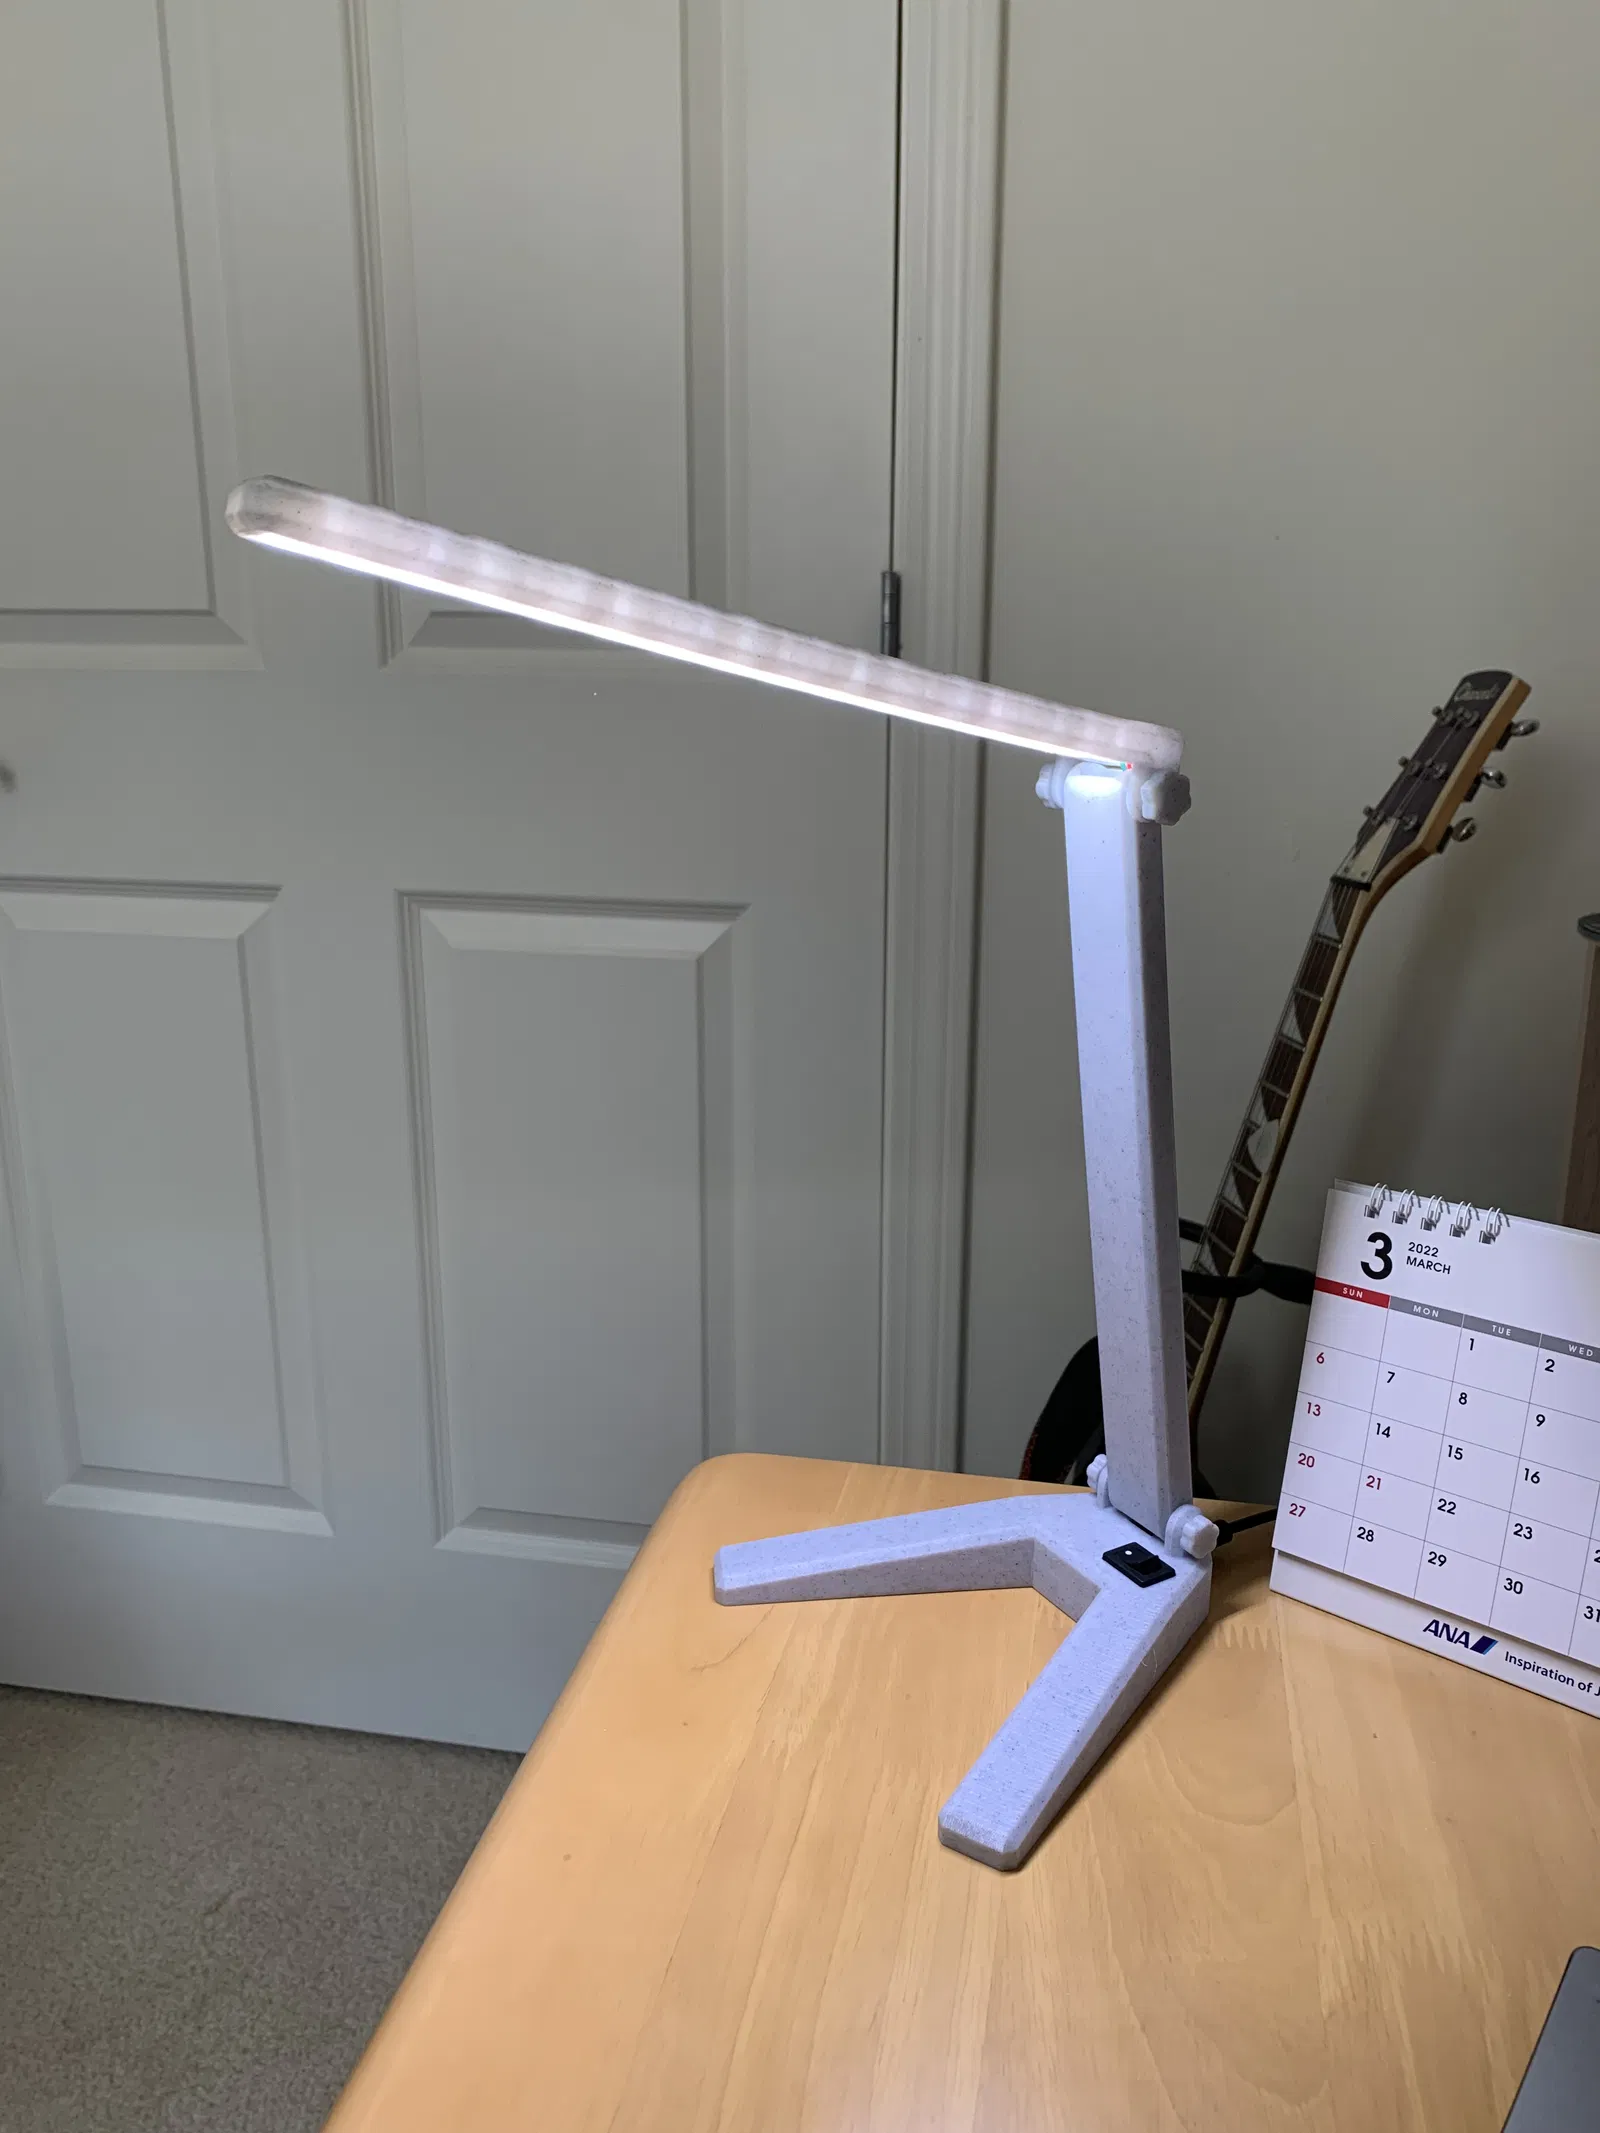
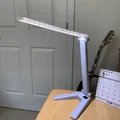
Đèn LED để bàn đơn giản

Tự làm đèn LED để bàn đơn giản cho không gian làm việc của bạn với công tắc bật tắt. Cần lắp ráp các bộ phận điện tử. Sử dụng vật liệu chịu nhiệt như PETG, tránh PLA vì có thể bị biến dạng do nhiệt từ dải đèn LED.

Mô tả
Nếu thấy thiết kế này hay ho, anh em ủng hộ mình ly cà phê nha!
A simple and basic LED desk lamp for your workspace with a power switch. You need to assemble electronic parts.
Background
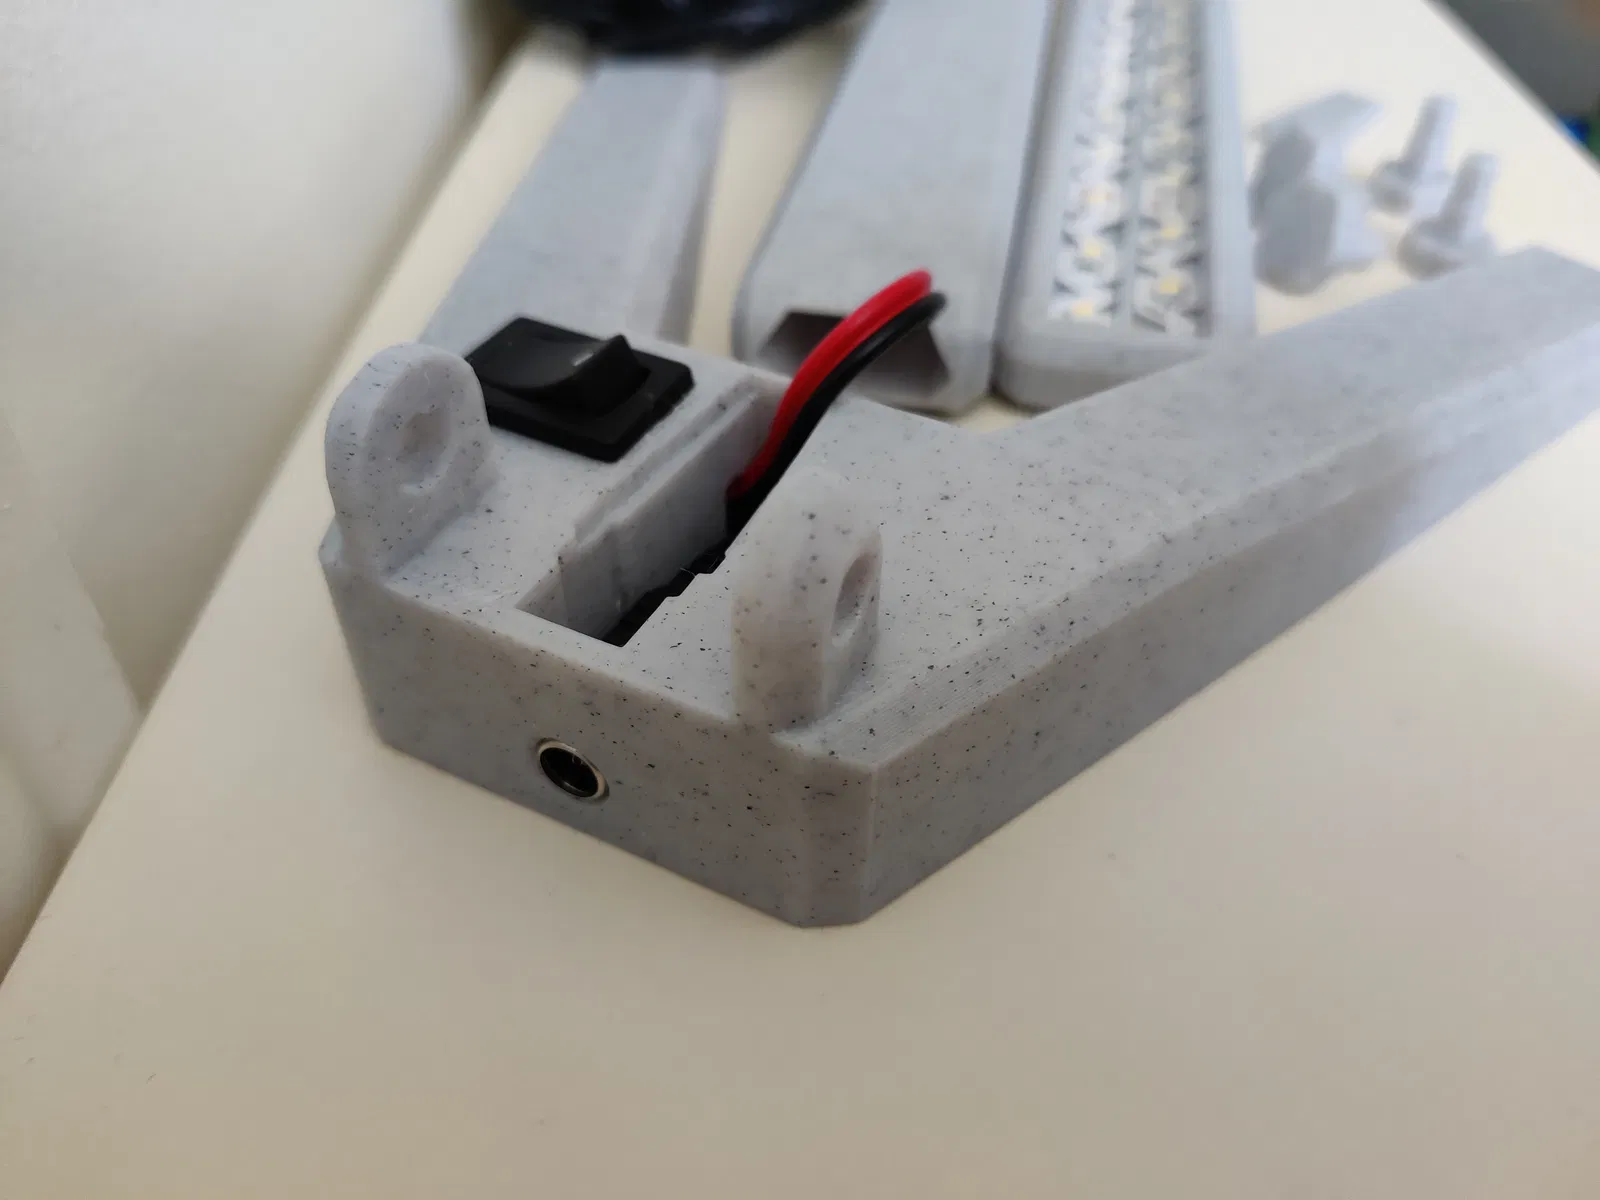
I had some spare parts at home, unused LED strips, hookup wires, heat shrink tubes, a rocker switch and AC/DC power supply. Then my desk lamp broke so decided to make one myself! Have some ideas to enhance the joint as twist, make it foldable for the travel portability. So far this is good enough for what I need on my desk.
Use PETG or other heat resistant materials. PLA will warp overtime with a heat of the LED strips and should not be used.
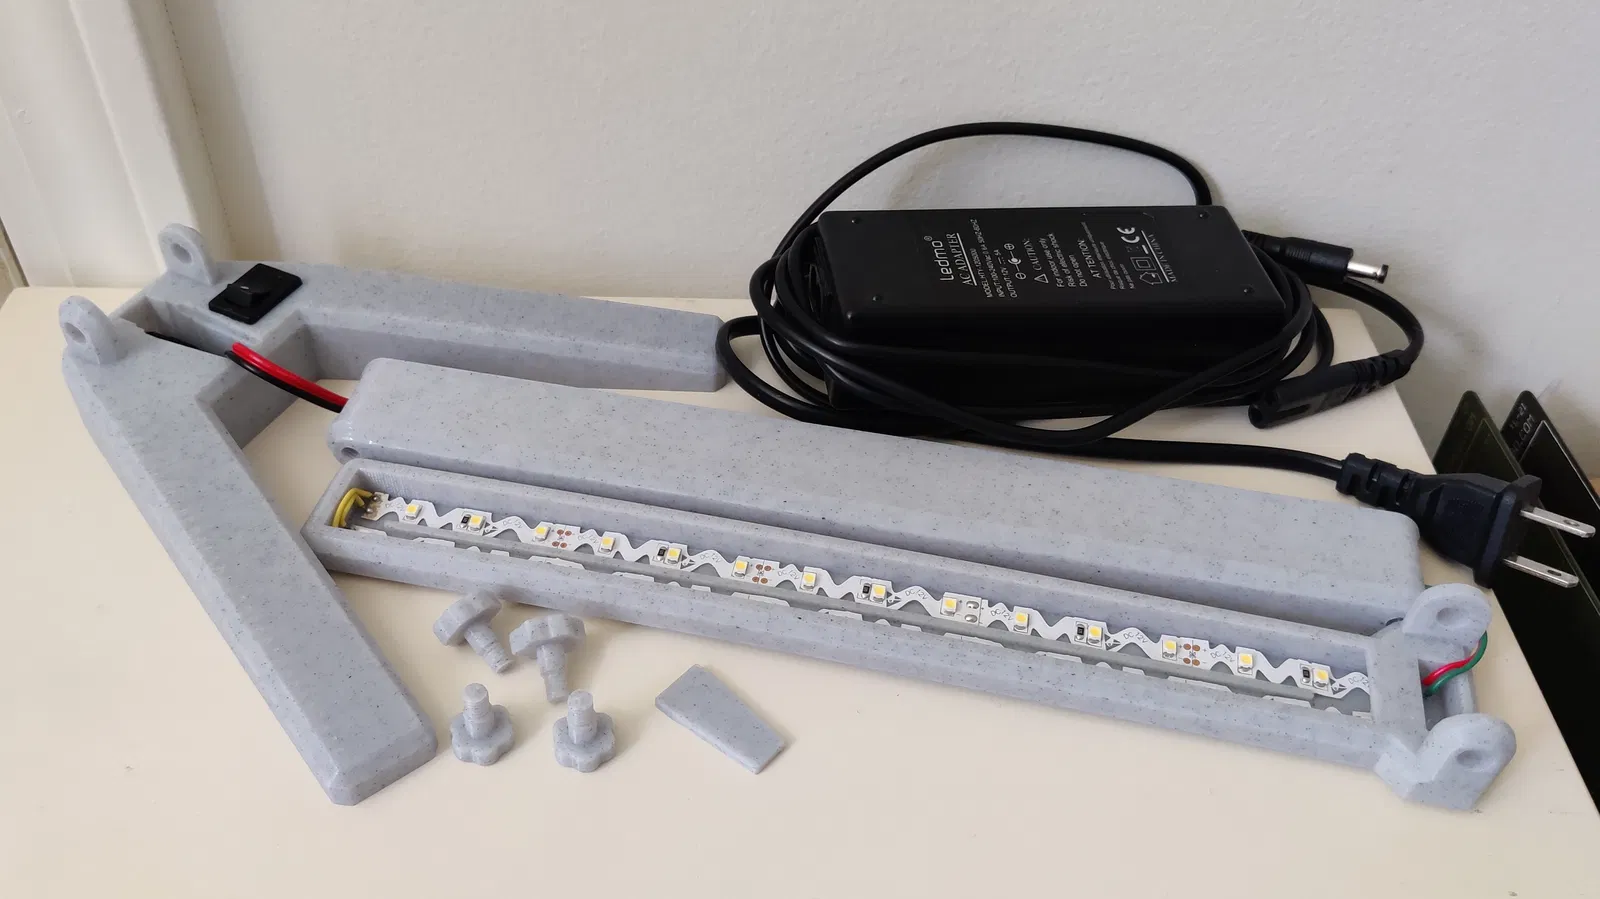
Required items
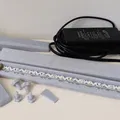
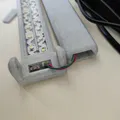
- 12v LED strip (240-250mm long, 9mm width) [2 pieces] - Any 12v LED strips should work, I used this https://amzn.to/3vRIvIv
- 12v AC DC power supply
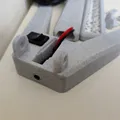
- Rocker switch [1 piece] - https://amzn.to/3MWZgaR or equivalent
- 12v power cable [1 female] - https://amzn.to/3yoQGgW or equivalent
- Hookup wires [2 colors]
- Heat shrink tube
- Soldering iron
- Soldering wire
- Double sided tape
Assemble
- Print all parts. Make sure to print 4 M6 bolts.
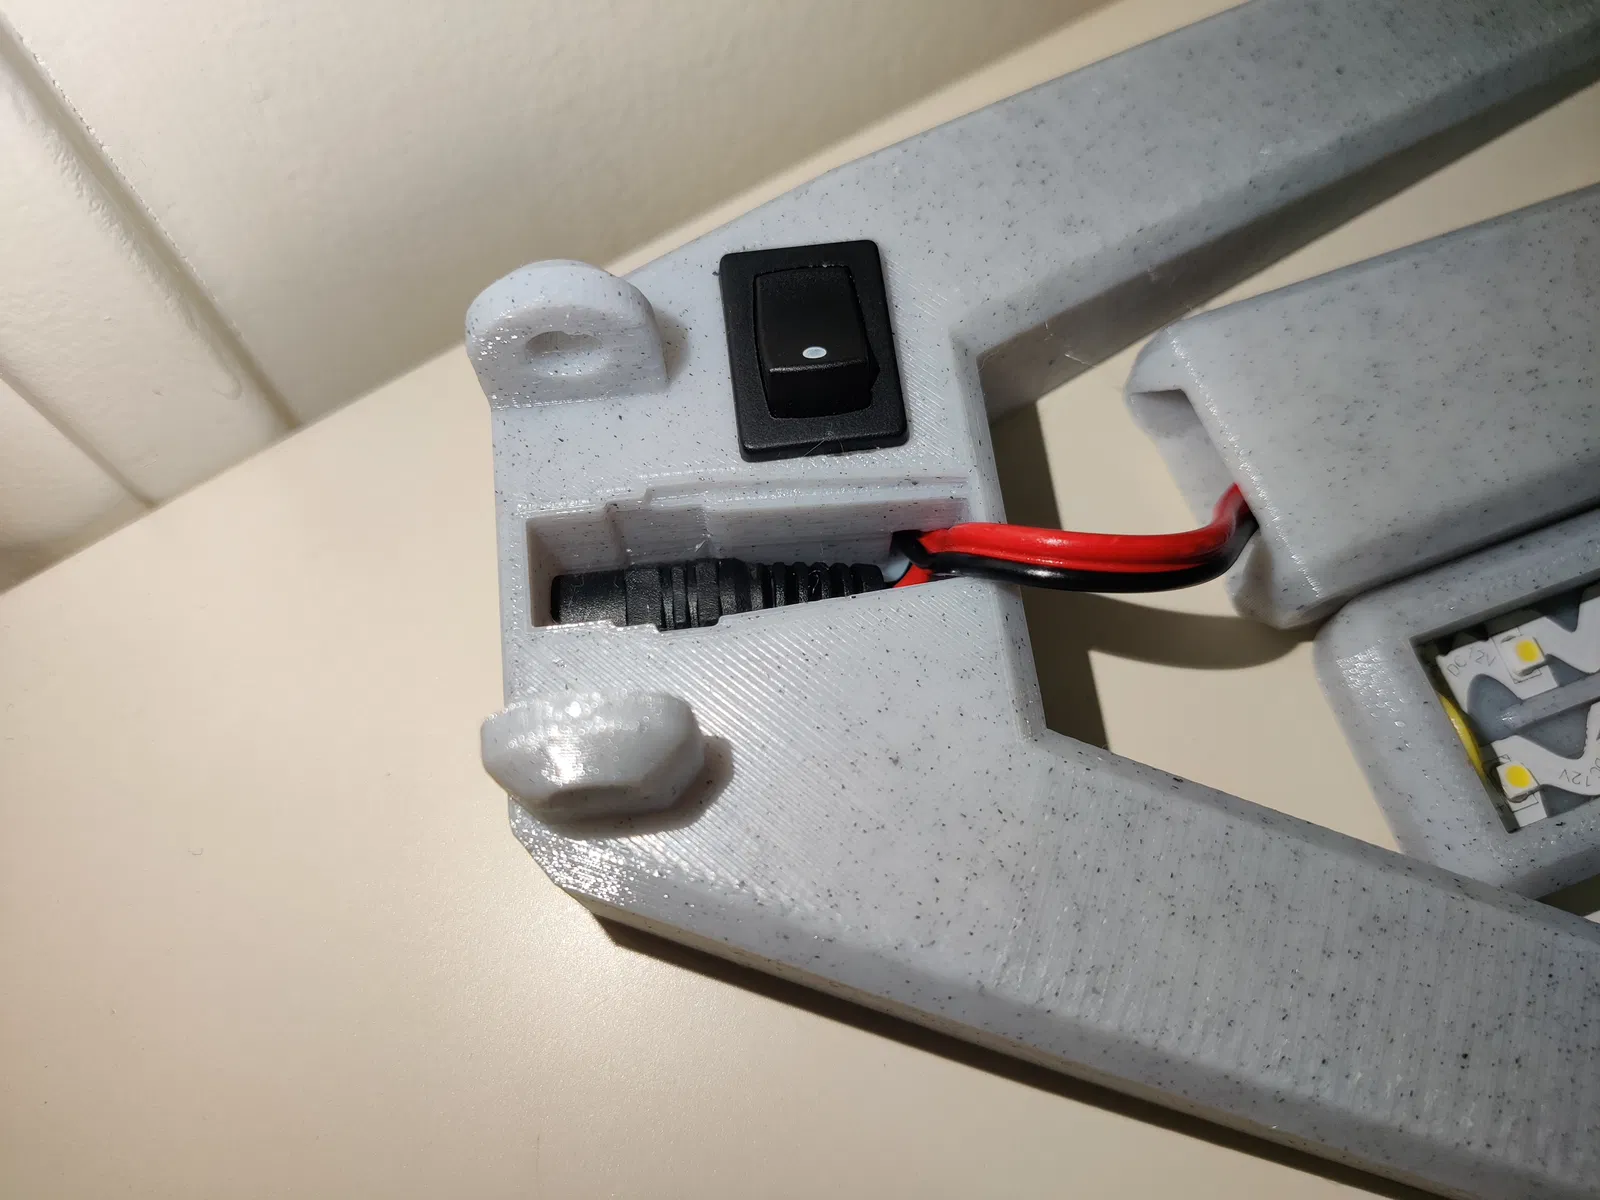
- Gently bend a female power cable, put through the hole of the base part, cut one line of the wire then solder each end with a rocker switch.
- Install the rocker switch into the square area, push to the end.
- Put the female power cable connector to the back of the base part hole for the 12v AC DC power supply.
- Place the cover part on the center of the base. Use -0.1mm if the regular size is too tight.
- Solder both red and black wire of the female power cable with hookup wires. Put the hookup wires through the arm part.
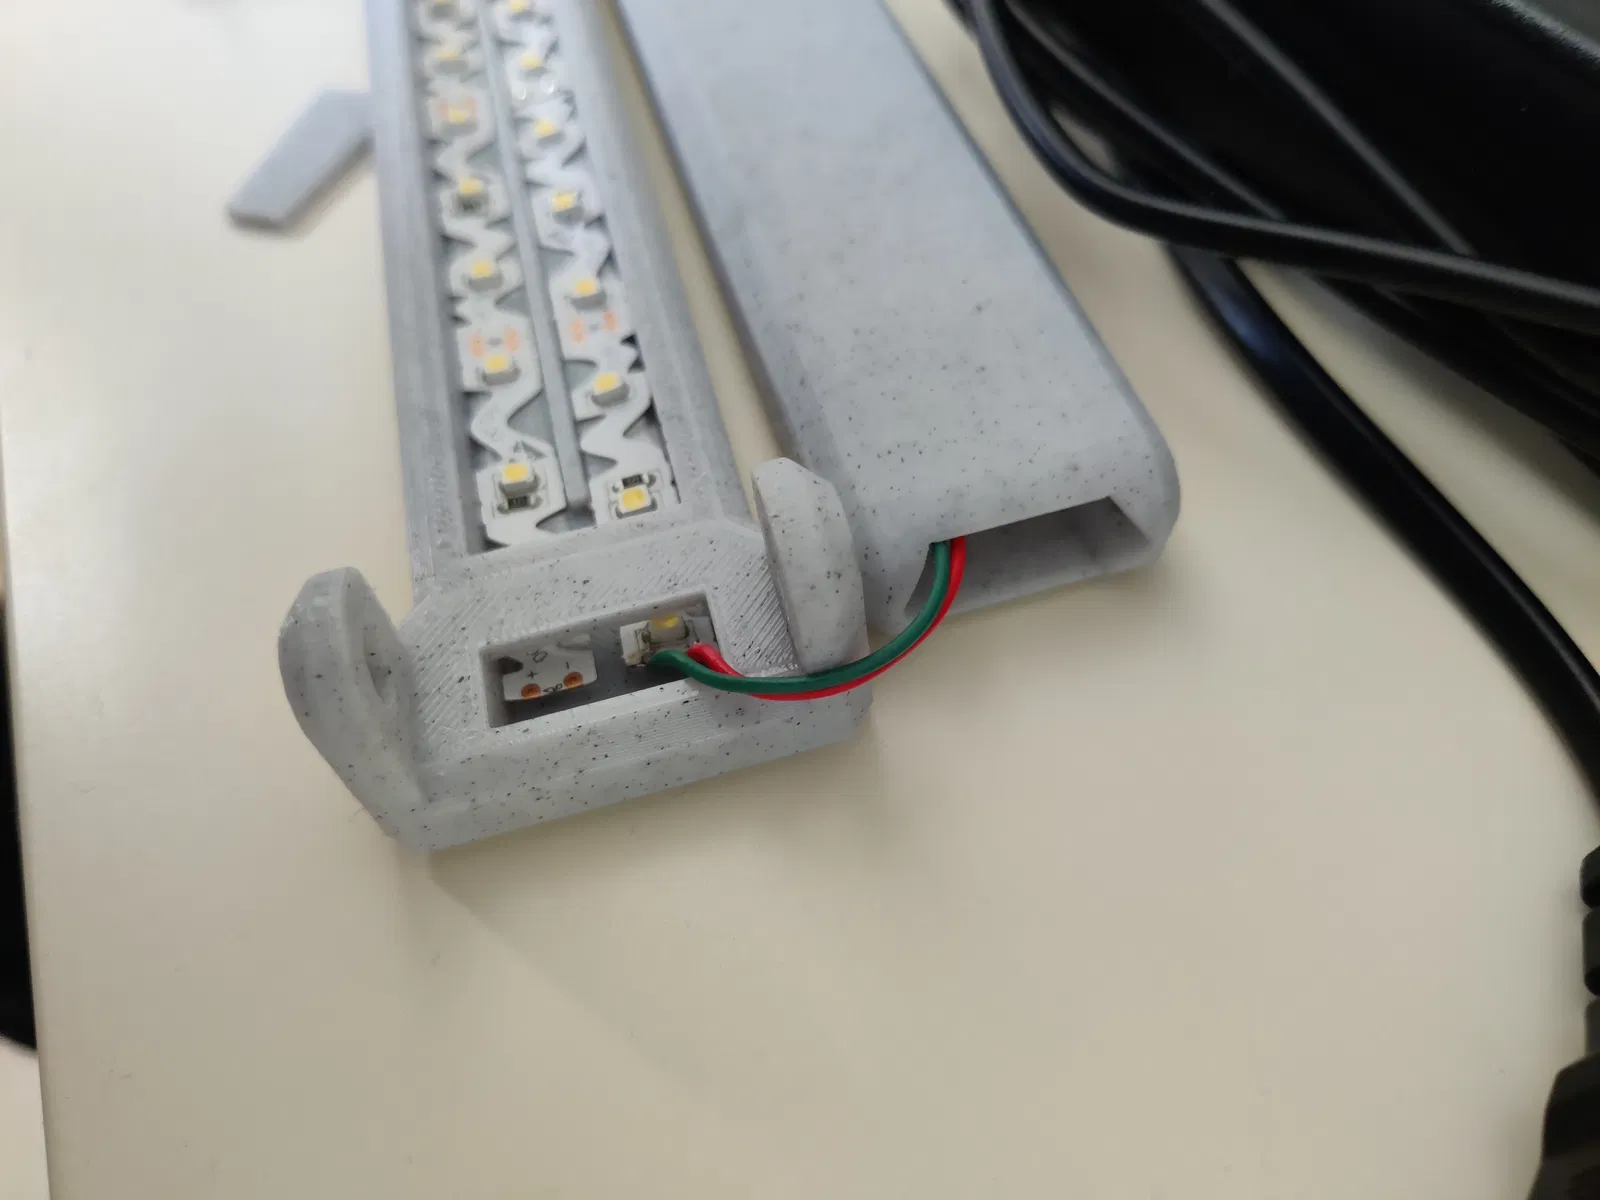
- Solder two 12v LED strips.
- Adhere two 12v LED strips to the head part, keep one end slightly open without adhering to the surface so you can solder with hookup wires coming from the arm part.
- Solder hookup wires from arm part with one side of LED strip. Make sure to connect the right wire to + and - of the LED strip.
- Use the bolt thread parts to joint the head part and the arm part, as well as the arm part and the base part.
Giấy phép
Tác phẩm này được cấp phép theo
Creative Commons — Attribution — Noncommercial — Share AlikeCC-BY-NC-SA

File mô hình


Chưa có bản in nào được khoe. Hãy là người đầu tiên!

Chưa có bình luận nào. Hãy là người đầu tiên!