



Teleprompter - Thiết bị hỗ trợ đọc lời thoại cho PolarPro BaseCamp
 ByNK01_3850118Likes13Downloads210
Build another version of this model.
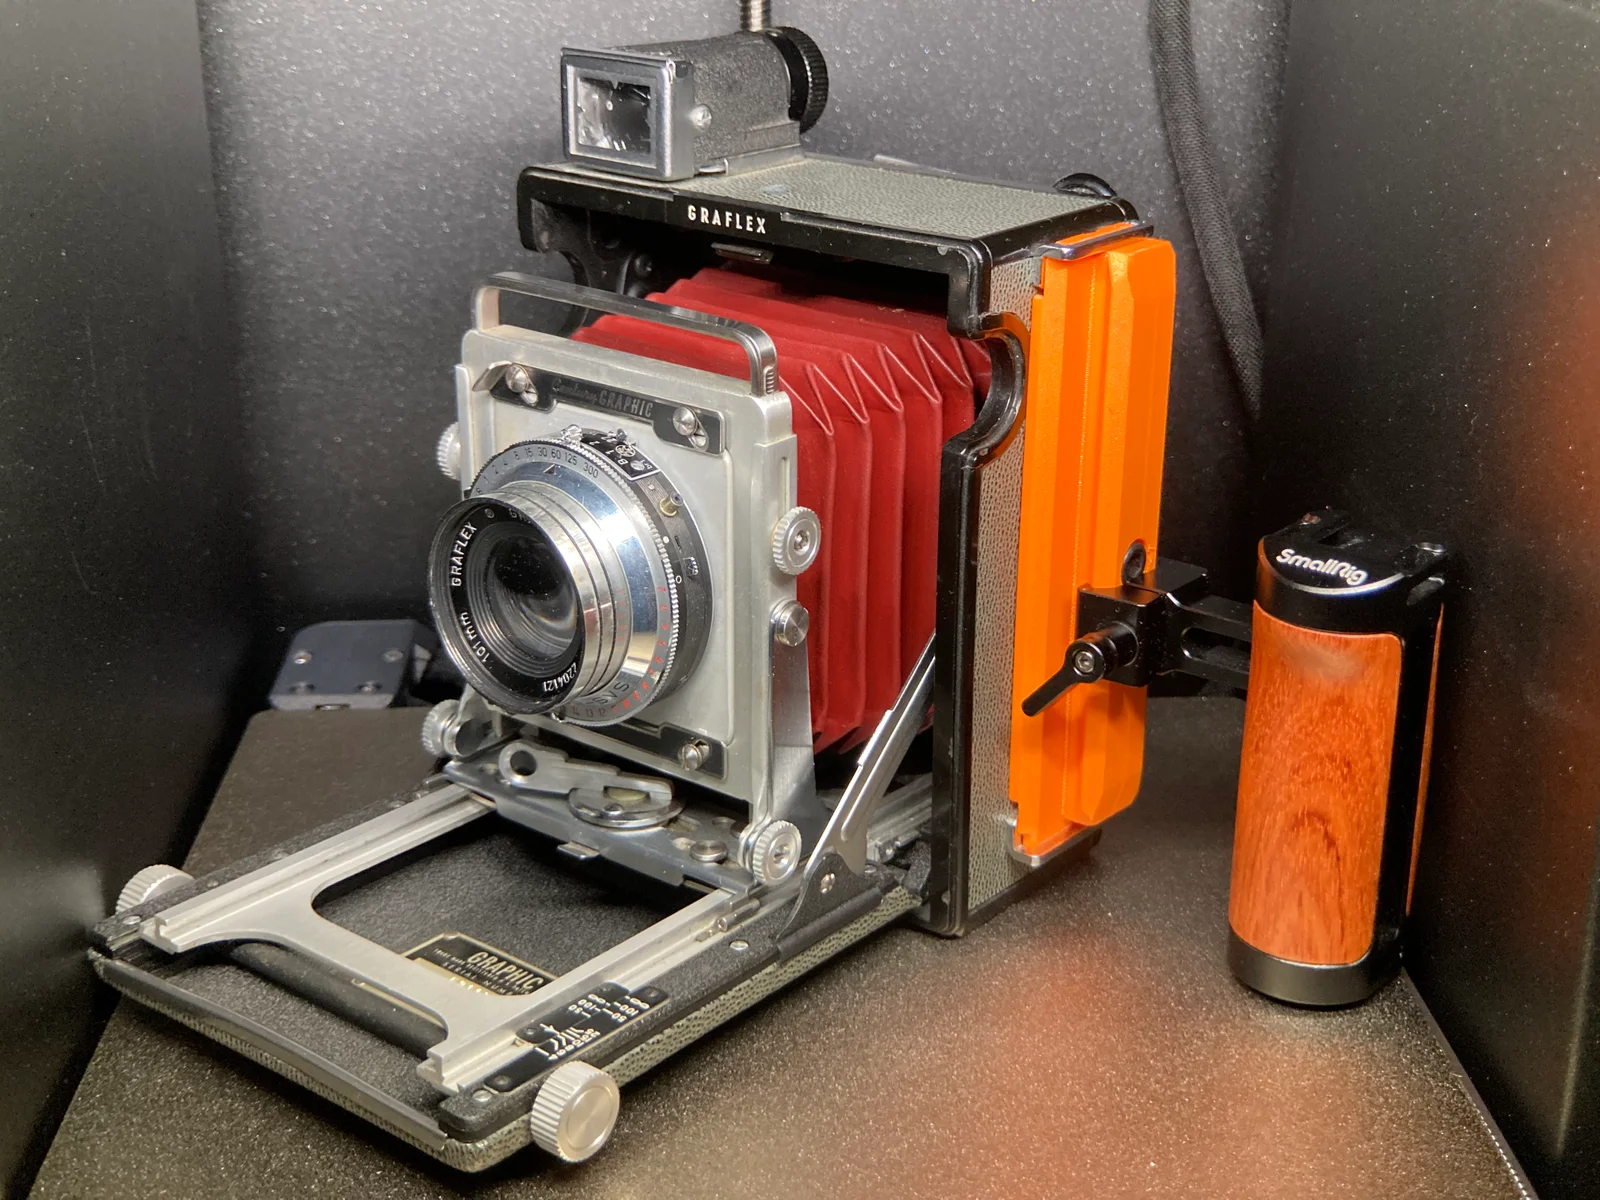
This model adds a NATO rail to a 2x3 Centruy Graphic, using only existing strap lugs and one Socket Head 1/4-20 UNC x 3/4 bolt in the tripod socket. The tabs at the ends engages the factory strap lugs and 1/4"-20 bolt pins the rail in place, no modification to the camera is needed. This 1/4"-20 bolt only needs to be finger tight, do not torque down.
The addition of NATO rail allow the use of accessories popular with videographers made by company such as ARRI, BrighTangerine, Smallrig, Tilta and Kondor Blue. Some possible accessories are Handles, Cell phone as Auxiliary Viewfinder or Rangefinders, Exposure meters, or even a Pocket Calculator for working out Reciprocal Failure, Exposure and Bellow Draw. The possibility is only limited by your imagination.
3 Versions are available:
Simple: Works for most people. Try this first if you just want to add a handle.
Endstop: Has 4 additional Socket Head #4-40 UNC x 5/16 bolts as end stops on both ends. This will hold most NATO clamps captive if they slip. Try this version if you are not confident of your NATO clamp and need extra peace of mind. The bolts will simply screw in as printed, no tap needed.
Cheesy: Has #4-40 Endstops and 1/4-20 UNC holes at 9mm cheeseplate spacing, significantly expending your accessorizing opportunities. This is untested, experiment at your own risk. You will also need a 1/4-20 UNC tap to clean up the holes.
A note about the Smallrig NATO Clamp handle you see in the cover photo. It is usable but too small, it's what I have on hand. If you go out and buy one, get a bigger one with an offset so that the handle is closer to center of gravity.
Printing suggestions:
ORIENTATION: VERY IMPORTANT. Print in the orientation shown in the last photo showing the full bed. This redirects the tensile forces away from the layer lines. The 3MF files should already have this setup and ready.
0.20mm Layer height.
Use thick bridges, no supports needed.
4 perimeters for strength.
Cubic infill.
Use aligned seams and scarf joints
Tested with Sunlu PETG
ByNK01_3850118Likes13Downloads210

 BykyleschiefferLikes35Downloads394

 ByckthLikes148Downloads2.4K

 ByvideograndpaLikes36Downloads280

 ByRedeyeLikes41Downloads217

 ByBaGooNLikes64Downloads138

 ByJaronLikes310Downloads1K

 Byw3rN42Likes127Downloads930

 ByTomDDLikes89Downloads571

 ByJustin Miller MillerLikes0Downloads4

 BykukulinLikes77Downloads510

 ByJwidessLikes34Downloads372