



Thùng rác in Vase Mode
 BybobmakesLikes2.5KDownloads17.5K
Build another version of this model.
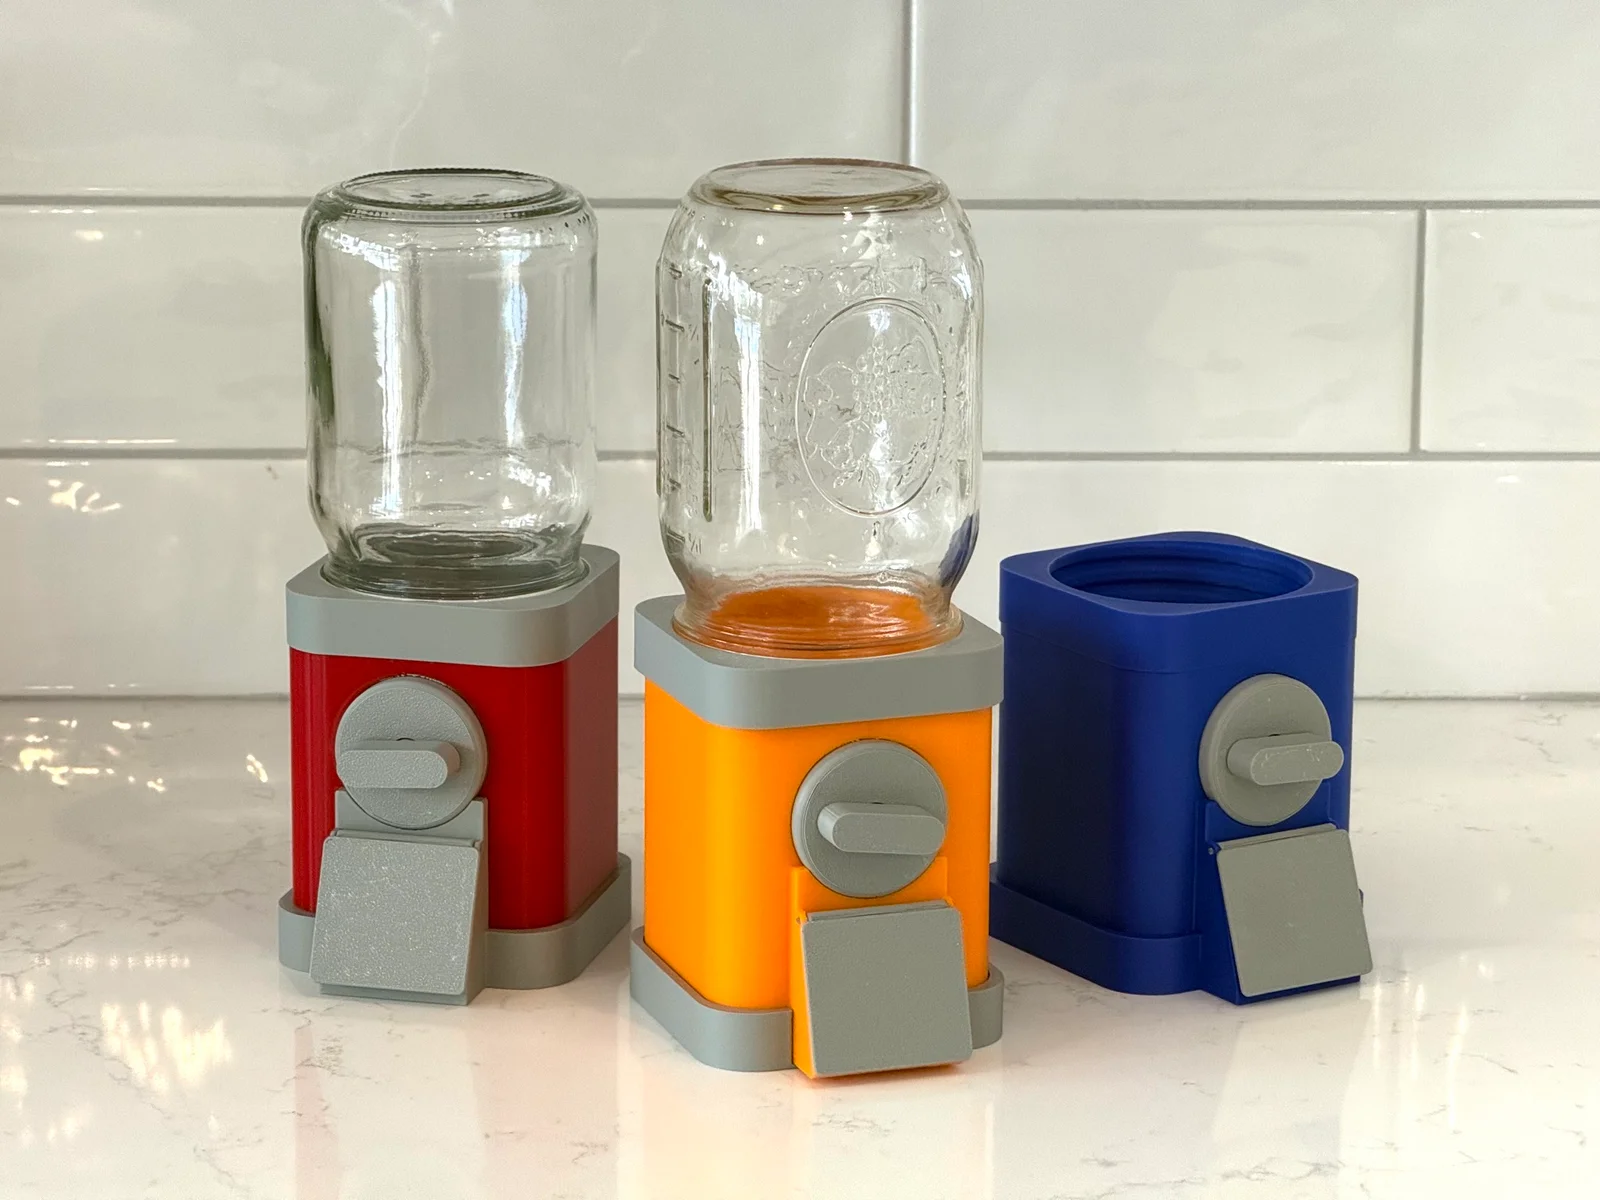
Candy Dispenser that uses a threaded Mason Jar. Assembles easily, no glue. All pieces snap together.
Works great with M&Ms and Skittles. Should work with other similar sized candy. Dispenses about 7 pieces of Candy with each turn.
Updates:
Version 2 : Created new version with separate top and bottom caps. Allows you to have the 2 tone look without needing an AMS or Dual Extruder 3D Printer. Print times are significantly faster for this version versus the original 2 color model.
Version 1 : Initial release of 2 color and 1 color Candy Dispenser.
Print Instructions:
3 Different Models.
Single Color Model
2 Plates
Single Color Body
Moving Parts
Two color Model (requires an AMS or dual extruder 3D printer)
2 Plates
2 Color Body
Moving Parts
V2 : Separate Caps for 2 Color Model (No AMS)
3 Plates
Body
Moving Parts
Top / Bottom Caps
Assembly Instructions:
1. Print out all pieces
2. For V2 version with Top & Bottom caps. Firmly push caps onto top and bottom until firmly seated.
Skip this step for older V1 version.
3. Insert candy drum into body of the dispenser. Make sure the slot for the knob faces out.
4. Snap in circle face cover
5. Line up knob with candy drum slot. Insert knob and press firmly until it is fully seated. You may need to squeeze candy drum into the knob to get it to fully seat.
6. Line up door with opening. Insert piece of 3D printer filament into holes. Trim excess filament with wire cutters. About 40mm of filament is needed.
7. Attach jar. Pictured jar is a threaded 12 oz Mason Jar
Check out my Jam Jar Version (4 Lug / Twist off lid jar)
BybobmakesLikes2.5KDownloads17.5K

 By178222178222_2484344Likes449Downloads1.7K

 Byquibeck_3353173Likes1.5KDownloads11.5K

 ByVaclav_ZahradkaLikes181Downloads1.2K

 ByowlartLikes527Downloads1.3K

 Bytjfenwick_306961Likes385Downloads1K

 ByAWSWLikes148Downloads575

 ByfifindrLikes216Downloads600

 Byskloter_271869Likes147Downloads419

 ByTommy3DLab_2023125Likes636Downloads2.5K

 Byelectric_pierogiLikes37Downloads382

 ByOspreyLikes206Downloads614