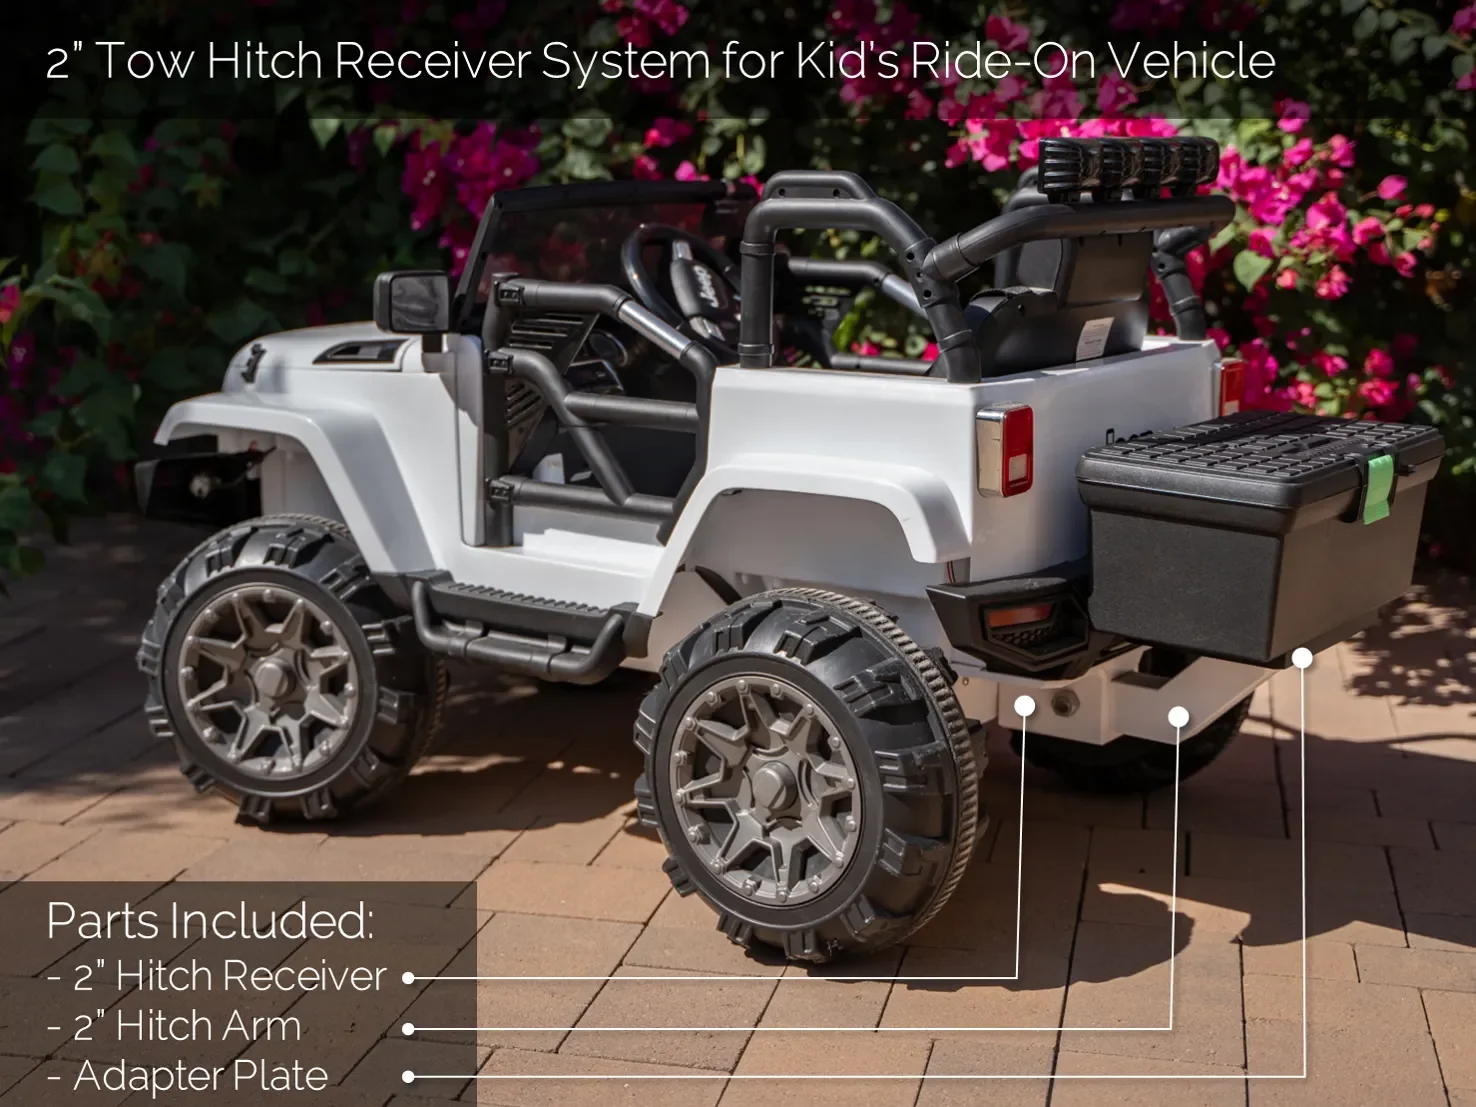
Does your child's ride need an upgrade? Do they drive their favorite power wheels all around the neighborhood, but don't have room for all their tag-along toys? Look no further than this awesome tow hitch receiver system (and adapter plate) for adding storage to the back of their wheels!!!
We chose to mount a cheap toolbox from a local hardware store on top of the adapter plate as shown in the photos attached. We purchased a toolbox (from Lowe's) almost identical to this one from Amazon: CRAFTSMAN Tool Box, Tool Storage, Lockable, Black, 16 Inch (CMST16005) - Amazon.com and quickly drilled holes through the thin bottom of the toolbox to mount it to the plate. Voila! A tool chest that our son can throw his bulldozers in to take to the playground!!! (If I'm being honest, Mommy and Daddy use it for snacks too!)
This system was originally modeled for a “Costzon Ride On Car, 12V Battery Powered Electric Ride On Truck” (resembles a Jeep Wrangler). Ours was purchased from Amazon, but various vendors carry Costzon. The hitch receiver may need to be adjusted for other models, but I've provided the native CAD files (SolidWorks and STL) below in case you'd like to modify for personal use.
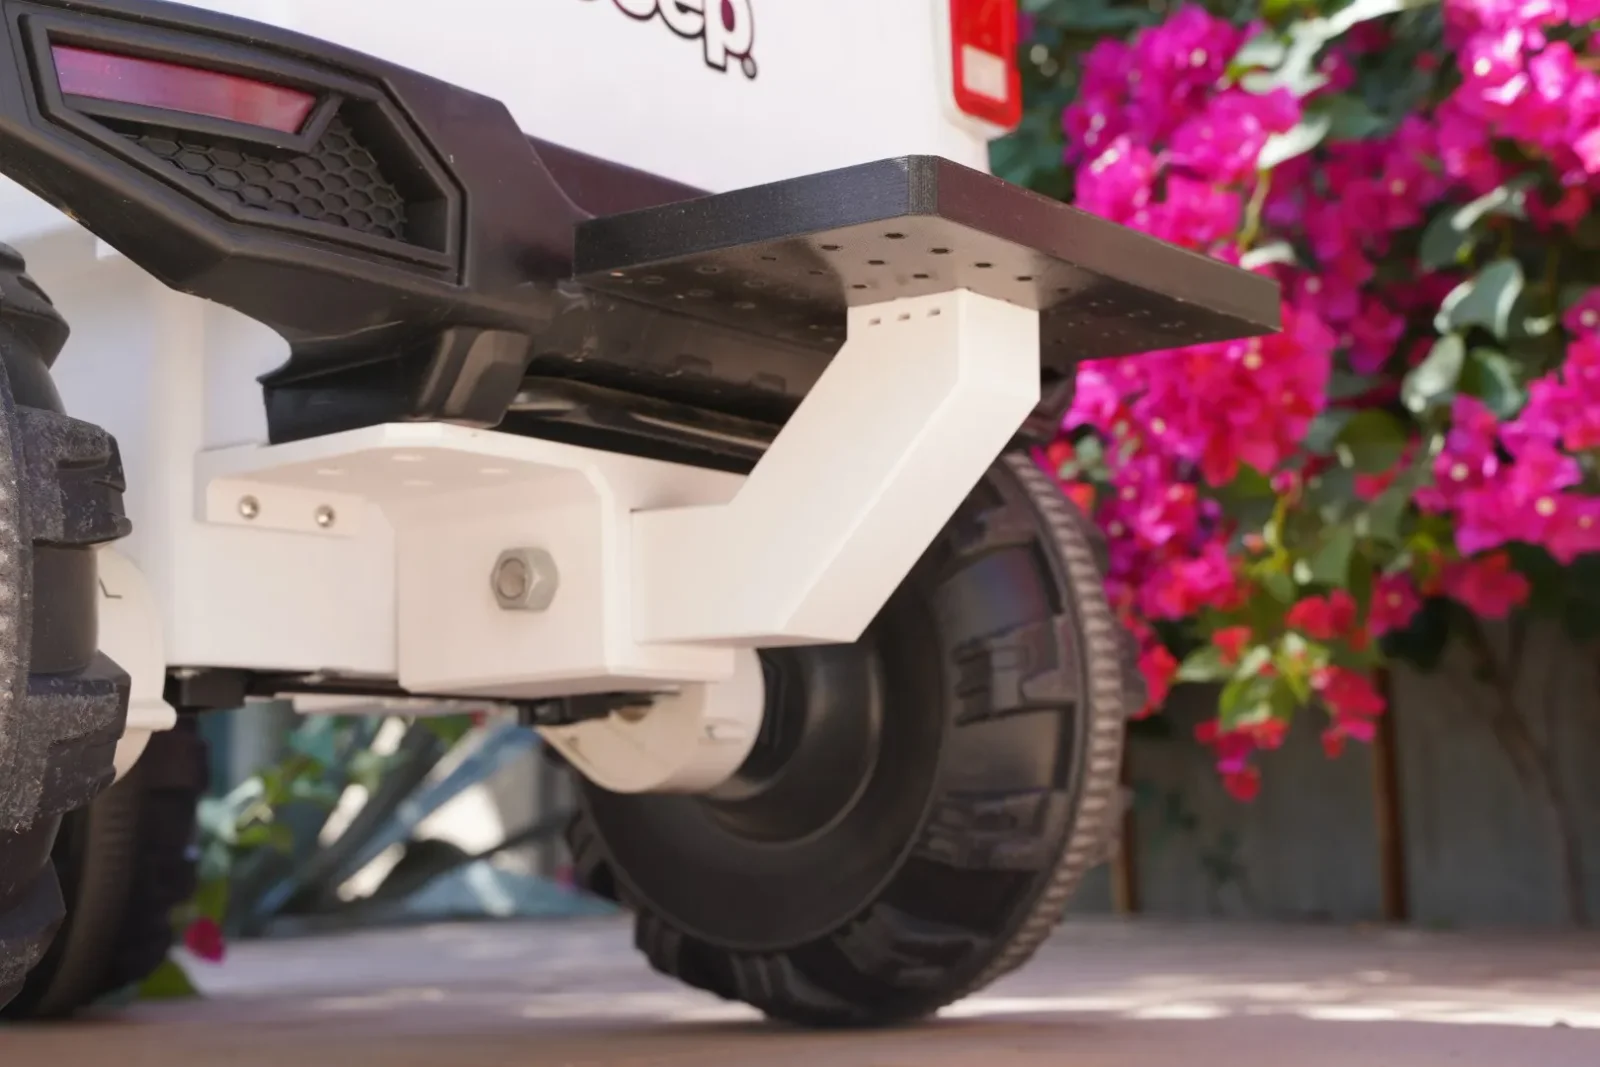
It uses a standardized 2" hitch receiver as the foundation for the design - so it should be compatible with most 2" hitches/adapters. The hitch pin is 5/8" - you can use a long bolt and nut or an actual hitch pin.
Uses
- Add a storage box solution to the back of a kids ride-on power wheels vehicle!
- Tow lightweight trailers or other objects behind a kids ride-on power wheels vehicle!
- Attach a hitch coverto add some style!
- Add some gridfinity storageby attaching a gridfinity base plate to the adapter plate???
- Utilize any lightweight 2" hitch equipment / adapters
Specifications
Parameter
Value
Receiver Dimensions (Overall)
11" x 3.4" x 4.5"
Hitch Simple Shelf Dimensions (Overall)
8.75" x 4.625" x 2"
Adapter Plate (Overall)
9.5" x 6" x 0.75"
Recommended Materials
- Receiver-to-Vehicle Fasteners
- Qty 12 - #8 x ~0.5" to ~1", Sheet Metal or Self-Tapping Screw
- Note: Length depends on type of vehicle and thickness of bottom shell
- OR in metric, might be able to get away with M4 fasteners
- Hitch Pin - One of the options below:
- Qty 1 - 5/8" hitch pin OR
- Qty 1 each - 5/8" hex bolt and nut
- Bolt needs to be at least 3.5" long
- Threadlock solution might be helpful if using a bolt + nut
- Hitch Simple Shelf (Arm)-to-Adapter Plate Fasteners
- Qty 9 - M3 x 20mm SHCS
- Qty 9 - M3 Hex Nut
- Adapter Plate-to-Toolbox Fasteners
- Qty 4 up to 44 - M3 x 12mm (could go up to 16mm probably)
- Note: Length depends on thickness of equipment/toolbox
Considerations
- Receiver compatibility: The hitch receiver is highly tuned for our son's exact model of power wheels - the Costzon “Jeep-like” ride-on car/truck.
- You may need to remix / model your own hitch receiver, but the arm and adapter plate should work as long as the inner-dimension (ID) of the hitch receiver matches.
- Receiver Mounting: Our hitch receiver utilizes sheet metal style fasteners (wide pitch, sharp self-cutting threads) to mount to the vehicle. I wanted to assemble entirely from the exterior - I didn't want to tear into the vehicle to add something more robust like threaded inserts or backside nuts. As a result, I added a lot of fasteners on multiple axes to distribute the load.
- Standardized Hitch: This is designed to accommodate standard hitch equipment.
- Test-Fit Articles: Before committing to printing the full parts, you can easily create test-fit articles by slicing the larger parts up and only printing the section(s) of interest. I highly recommend this if your child has a different vehicle for your child.
- I did this to incrementally converge on the correct dimensions - gotta love rapid-prototyping. Went through 8 different test print articles to nail the hitch receiver monolithic v2.
- Strength:no structural analysis conducted, we've had no issues thus far. Our toddler has put this through some brutal testing! We drive over large pebbly-rock, occasional curbs/drop offs, etc. and it's held ~10lb, maybe more loads just fine.
Printing
- Files: See 3MF or STL folder. If using the STL folder, you may want check the 3MF files for the recommended print orientation.
- Material: Recommend printing with PETG for strength and outdoor durability. PLA should be strong enough, but not tested.
- Supports: Nope. No supports required!!!
- Nozzle: 0.4mm standard nozzle was used in printing ours, but any size should work
Assembly
- Post-Process / Prepare individual parts for assembly
- Parts are generally ready to use, but if you'd like, you can deburr, destring, lightly stand, etc. to remove sharp edges, help with fit, etc.
- Hitch Receiver - no preparation work required
- Hitch Simple Shelf (Arm) -
- See image for visual version of instructions below.
- Insert M3 nuts (aka nut-serts) into a channel on the end of the part.
- For each, insert a screw from the top and thread into the nut to “pull” into their hexagonal pocket.
- Tighten to feel, then back out the screw and the nut should be tightly seated in place.
- Repeat for 8x remaining nut-serts.
- Install Hitch Receiver onto the Vehicle
- Use sheet metal fasteners to install.
- Note: When installing the hitch receiver onto the vehicle, use hand tools or a very low torque setting on a power drill to avoid stripping plastic on the vehicle body.
- Install HitchSimpleShelf (aka Hitch Arm) into Receiver
- Install with hitch pin or 5/8" carriage bolt and nut
- Install Adapter Plate with 2-3x fasteners (temporary install)
- Test Fit the Desired Equipment (e.g. toolbox) to Mount to the Adapter Plate
- Lay on top of the adapter plate
- Mark the alignment of the adapter plate
- Remove the desired equipment from the adapter plate
- Remove the Adapter Plate and Transfer Drill Pattern to Desired Equipment (e.g. Toolbox)
- For this step, I flipped the toolbox over so that it's top is resting on a work surface.
- Next, I laid the adapter plate over the toolbox where I marked on step 5
- Then, I transfer marked and drilled a hole pattern from Adapter Plate through the bottom of the toolbox. The adapter plate uses M3 fasteners, so drill a clearance hole for an M3 fastener.
- Attach the Adapter Plate to the HitchSimpleShelf (Arm)
- Install all 9x M3 SHCS fasteners for maximum strength
- Attach the Desired Equipment (e.g. Toolbox) to the Adapter Plate
- Install as many of the adapter plate holes as you'd like
- Complete.
- See Toddler faces glow as they haul stuff to the playground!




 ByRaven_1221160Likes36Downloads181

 ByJakub_1491555Likes745Downloads2K