


Vải In 3D Cấu Trúc Hình Bát Giác (Octagon Fabric)
 ByDrewmundLikes833Downloads4.6K
Build another version of this model.
***************************************************************************************
************ 2026.03.25 more riggid version (v04) ************
***************************************************************************************
the wall-thickness of the thread has increased from 0.8mm to 2.0mm --> more rigged
***************************************************************************************
************ 2025.04.18 no sealing ring needed anymore ************
***************************************************************************************
Hi my lovely balloon community,
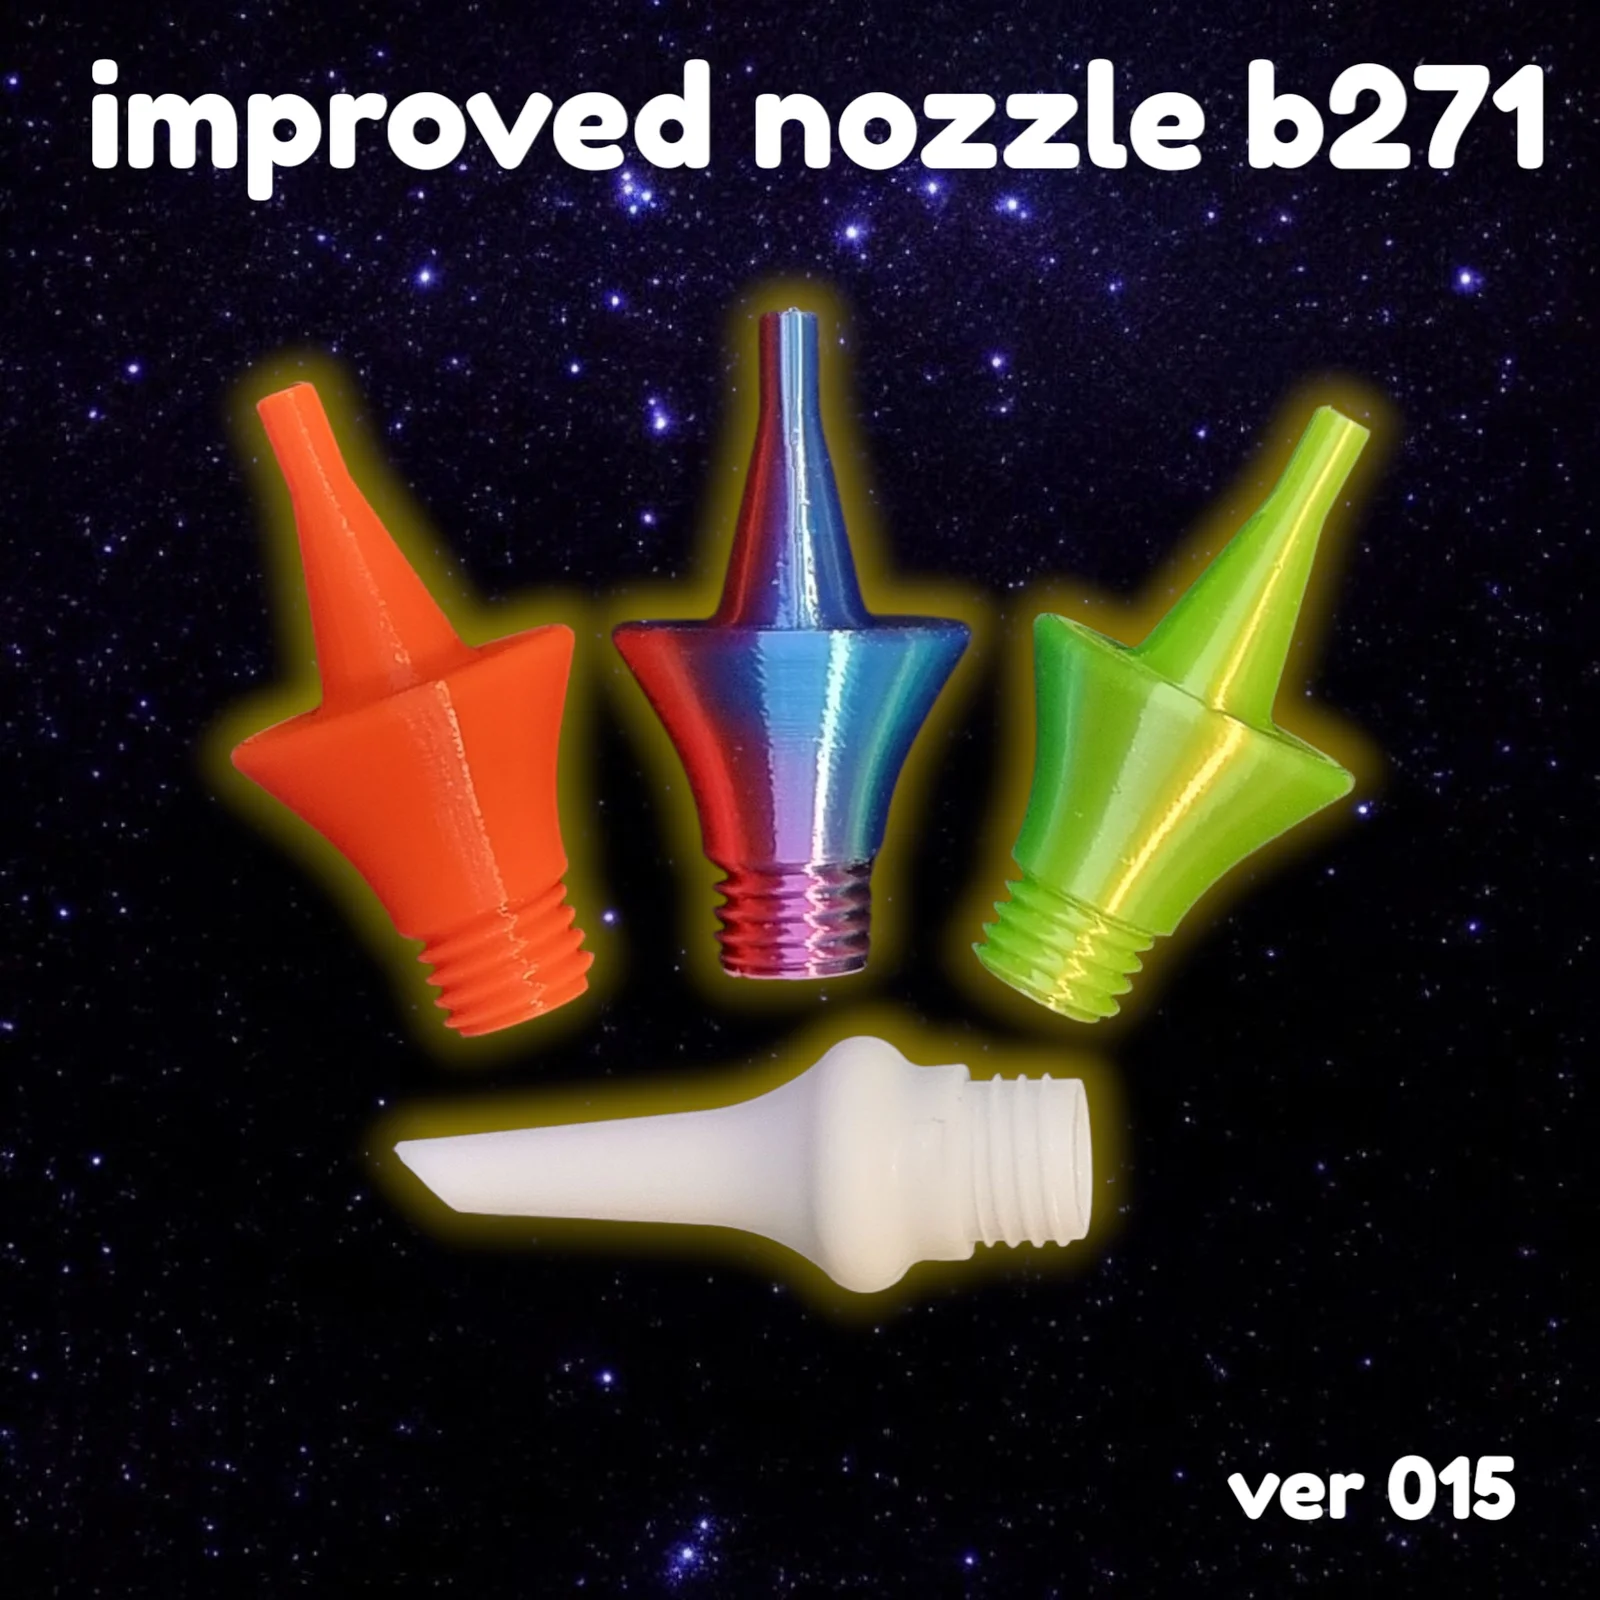
here some versions of a improved nozzle for the popular borosino b271 electron balloon inflator.
The original nozzle was too big to put 160 modelling balloons on in a comfortable way. This one is designed differently so 160 will be no hassle at all. Some users find it difficult to push the nozzle down, because of its slimness. This is fixed by adding a rim to the nozzle.
Always remember: Sharing is Caring
If you like this design please leave me a ‘like’ here - if you print this, I would love to see a photo from it in the ‘make’ section.
Stay healthy and happy!
NOTE: work in progress, check for updates
________________________________________________________________________________________________________
Description:
__________________________________________________________________________________________________________
The design is pretty straight forward, you will need:
_________________________________________________________________________________________________________
Printing:
_________________________________________________________________________________________________________
printed on a Prusa MK4S
PLA and PETG
layer 0.15mm STRUCTURAL
infill: 15% (or higher)
perimeters: 2
brim: yes
supports: no
_________________________________________________________________________________________________________
Assembly:
_________________________________________________________________________________________________________
screw the nozzle in the pump
smile happily
_________________________________________________________________________________________________________
Technical notes:
_________________________________________________________________________________________________________
_________________________________________________________________________________________________________
notes on older version:
_________________________________________________________________________________________________________
Comments on the sealing ring:
the sealing ring proofs to be very benefical, without I do not want to recommend it
the sealing ring can stay within the pump, the original nozzle works with it also
O-sealing ring (I used OD 10,7mm, ID 7.1mm, CS 1.8mm, rubber) - basically any sealing ring will do, which fits inside the pump (see photos)
those version rely on sealin ring:
01 → no rim, slick version
v007 → with rim, more supportive to push down
ByDrewmundLikes833Downloads4.6K

 ByFastRaccoon_718321Likes461Downloads1.5K

 ByvexanixLikes168Downloads1.3K

 ByIvoLikes196Downloads1.1K

 Bynonoobybut_3307010Likes364Downloads1K

 ByvojtagrecLikes289Downloads896

 ByCodyMeyer_2545340Likes163Downloads719

 ByPexPeppers Hot Sauce Hot SauceLikes114Downloads553

 ByFotisMintLikes71Downloads411

 ByAryserLikes36Downloads384

 ByowlartLikes56Downloads368

 ByHowler117Likes27Downloads339