



Kẹp giữ sợi Filament
 Bytinx_1344834Likes1.2KDownloads6K
Build another version of this model.
Air Filter for Elegoo Saturn 4 Ultra 16k Resin Printer, or other models.
-Summary-
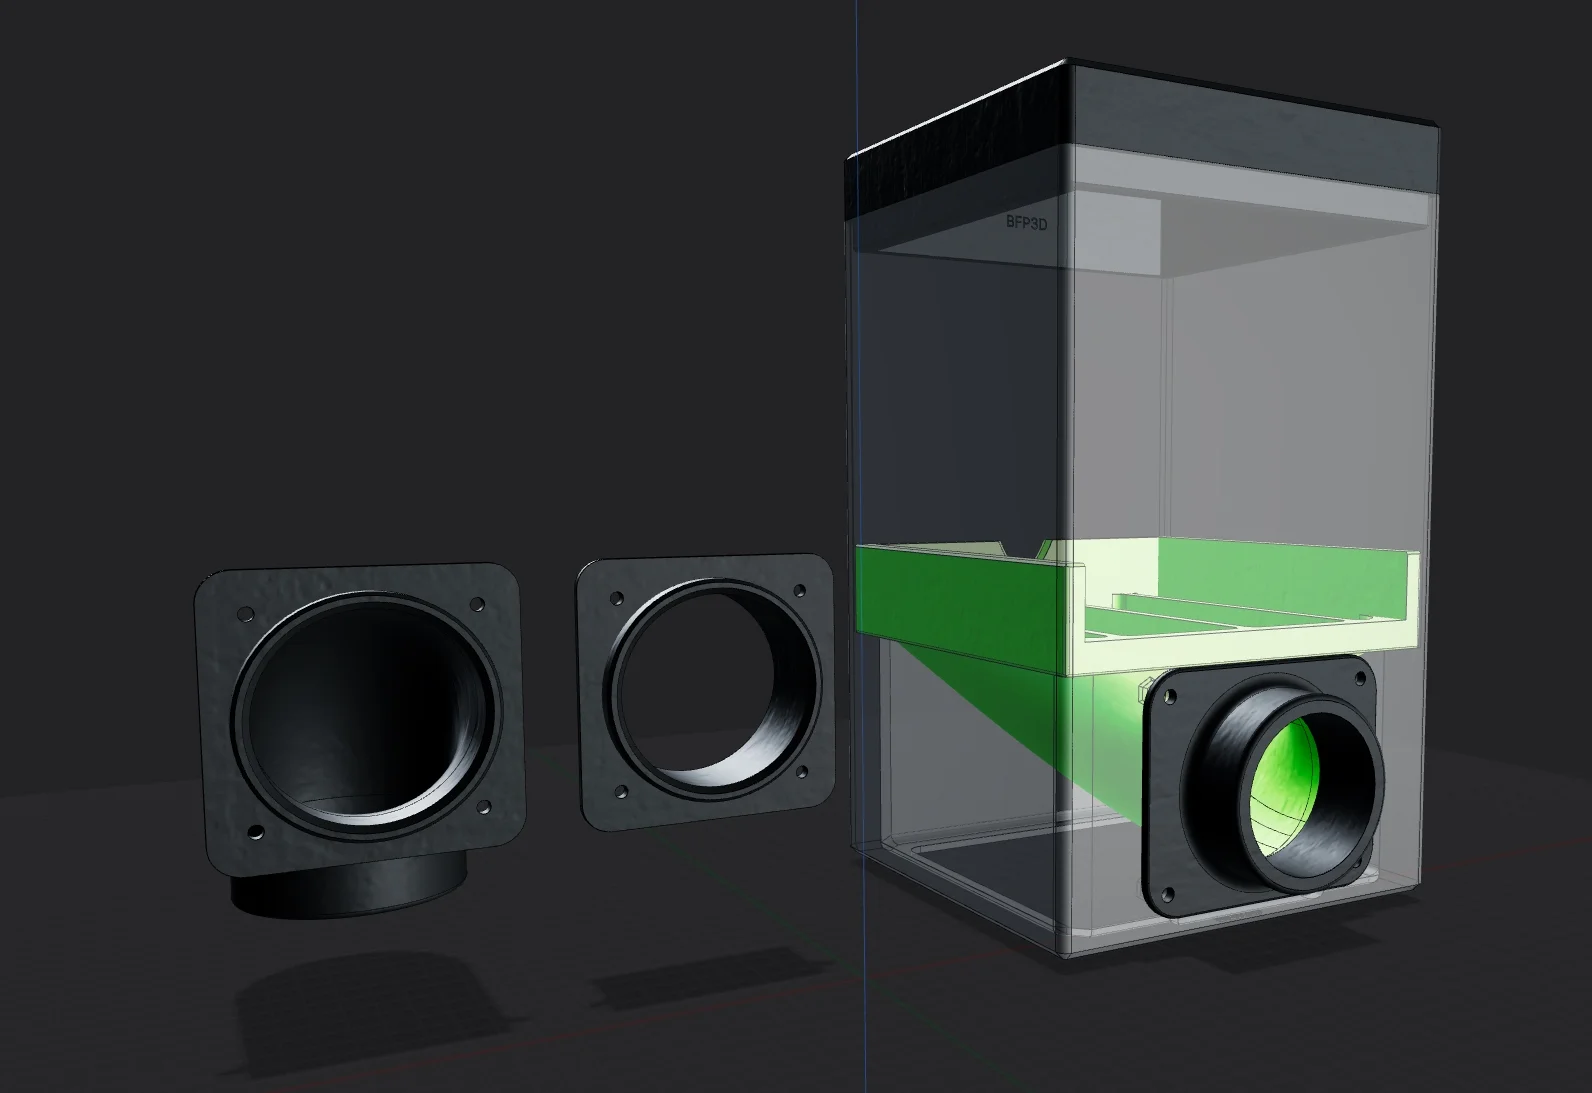
This 3D printable air filter is designed to fit the Elegoo Saturn 4 Ultra 16k resin printer. I don't own any other resin printers, so compatibility is up to the user to determine. Uses 3in duct hoses and an in-line fan to push air through 2 HEPA filters and a large amount of activated carbon. Uses the original screws from the cover plate of the printer's exhaust port to secure the adapter.
NOTE: The hose adapters (straight and 90 degree) which fit on the back of the printer are specifically made for the Saturn 4 Ultra / Ultra 16k, and may not fit the exhaust port of other machines. STEP files for these parts are included to help make adjustments easy.
All STL files (excluding adapters, for now) are pre-oriented for best printing results. You do NOT need supports for any of the main components. You will want to use supports for the printer adapters.
-Hardware-
You will need:
M3x5x4 Threaded inserts x4 (For the adapter to the printer body. You can also just use M3 nuts with longer M3 screws)
M3 Screws (use original hardware)
M5x10 Button head screws x4 (purifier body adapter only)
M5 Nuts x4 (purifier body, to secure the adapter)
HEPA filters - 6x6x1in x2 (These are the ones I used)
1 Gallon of activated carbon (This is the one I used)
In-line duct fan which can connect to 3in hose
3in duct hose
Up to 4 hose clamps depending on how you choose to connect the hose
-Assembly-
Press the first HEPA filter into the Air Duct Insert, with the foam strips facing the front and back; you may need to remove the foam strips if the fit is too tight.
Press the Air Duct Insert down into the Purifier Body. It should stop when it hits the ledge on the inside.
Press the second HEPA filter into the Purifier Body Lid, removing the foam on the sides if needed. NOTE: There is extra room for the foam on the sides with the BFP3D logo, as it is intended to face that direction.
Use the M5x10 button head screws and the M5 nuts to connect the 3in Hose Adapter (Purifier-Body) to the Purifier Body. There are recesses on the inside of the Purifier Body for the nuts, and the bottom is cut open to allow easy access.
Fill the Purifier Body with activated carbon pellets until they reach about 1in below the top. Make sure the filters are both in place before you do this.
Press the Purifier Body Lid onto the top of the Purifier Body to seal the pellets in.
Remove the cover plate on the back of your printer (Saturn 4 Ultra 16k in my case) and reuse the M3 screws to attach the 3in Hose Adapter (Printer) part. You can use either the printer-straight or printer-90deg parts for this, I've included both versions but you only need one of them.
Connect your fan to the hoses so that it PULLS air from the printer and PUSHES it through the air purifier. Make sure you have it facing the right direction!
Bytinx_1344834Likes1.2KDownloads6K

 ByreddLikes216Downloads2.1K

 ByJasonOlliff_519145Likes241Downloads2K

 Byarhi_585078Likes64Downloads536

 ByHanzo3dLikes155Downloads410

 ByGeek5DLikes147Downloads480

 ByBrokentooth_designsLikes23Downloads402

 By3DSourcererLikes48Downloads373

 ByWyomingWolf_261196Likes52Downloads423

 Bytopronix_2170418Likes41Downloads292

 ByJeffFaer_238746Likes31Downloads77

 ByBlackky98Likes25Downloads204