

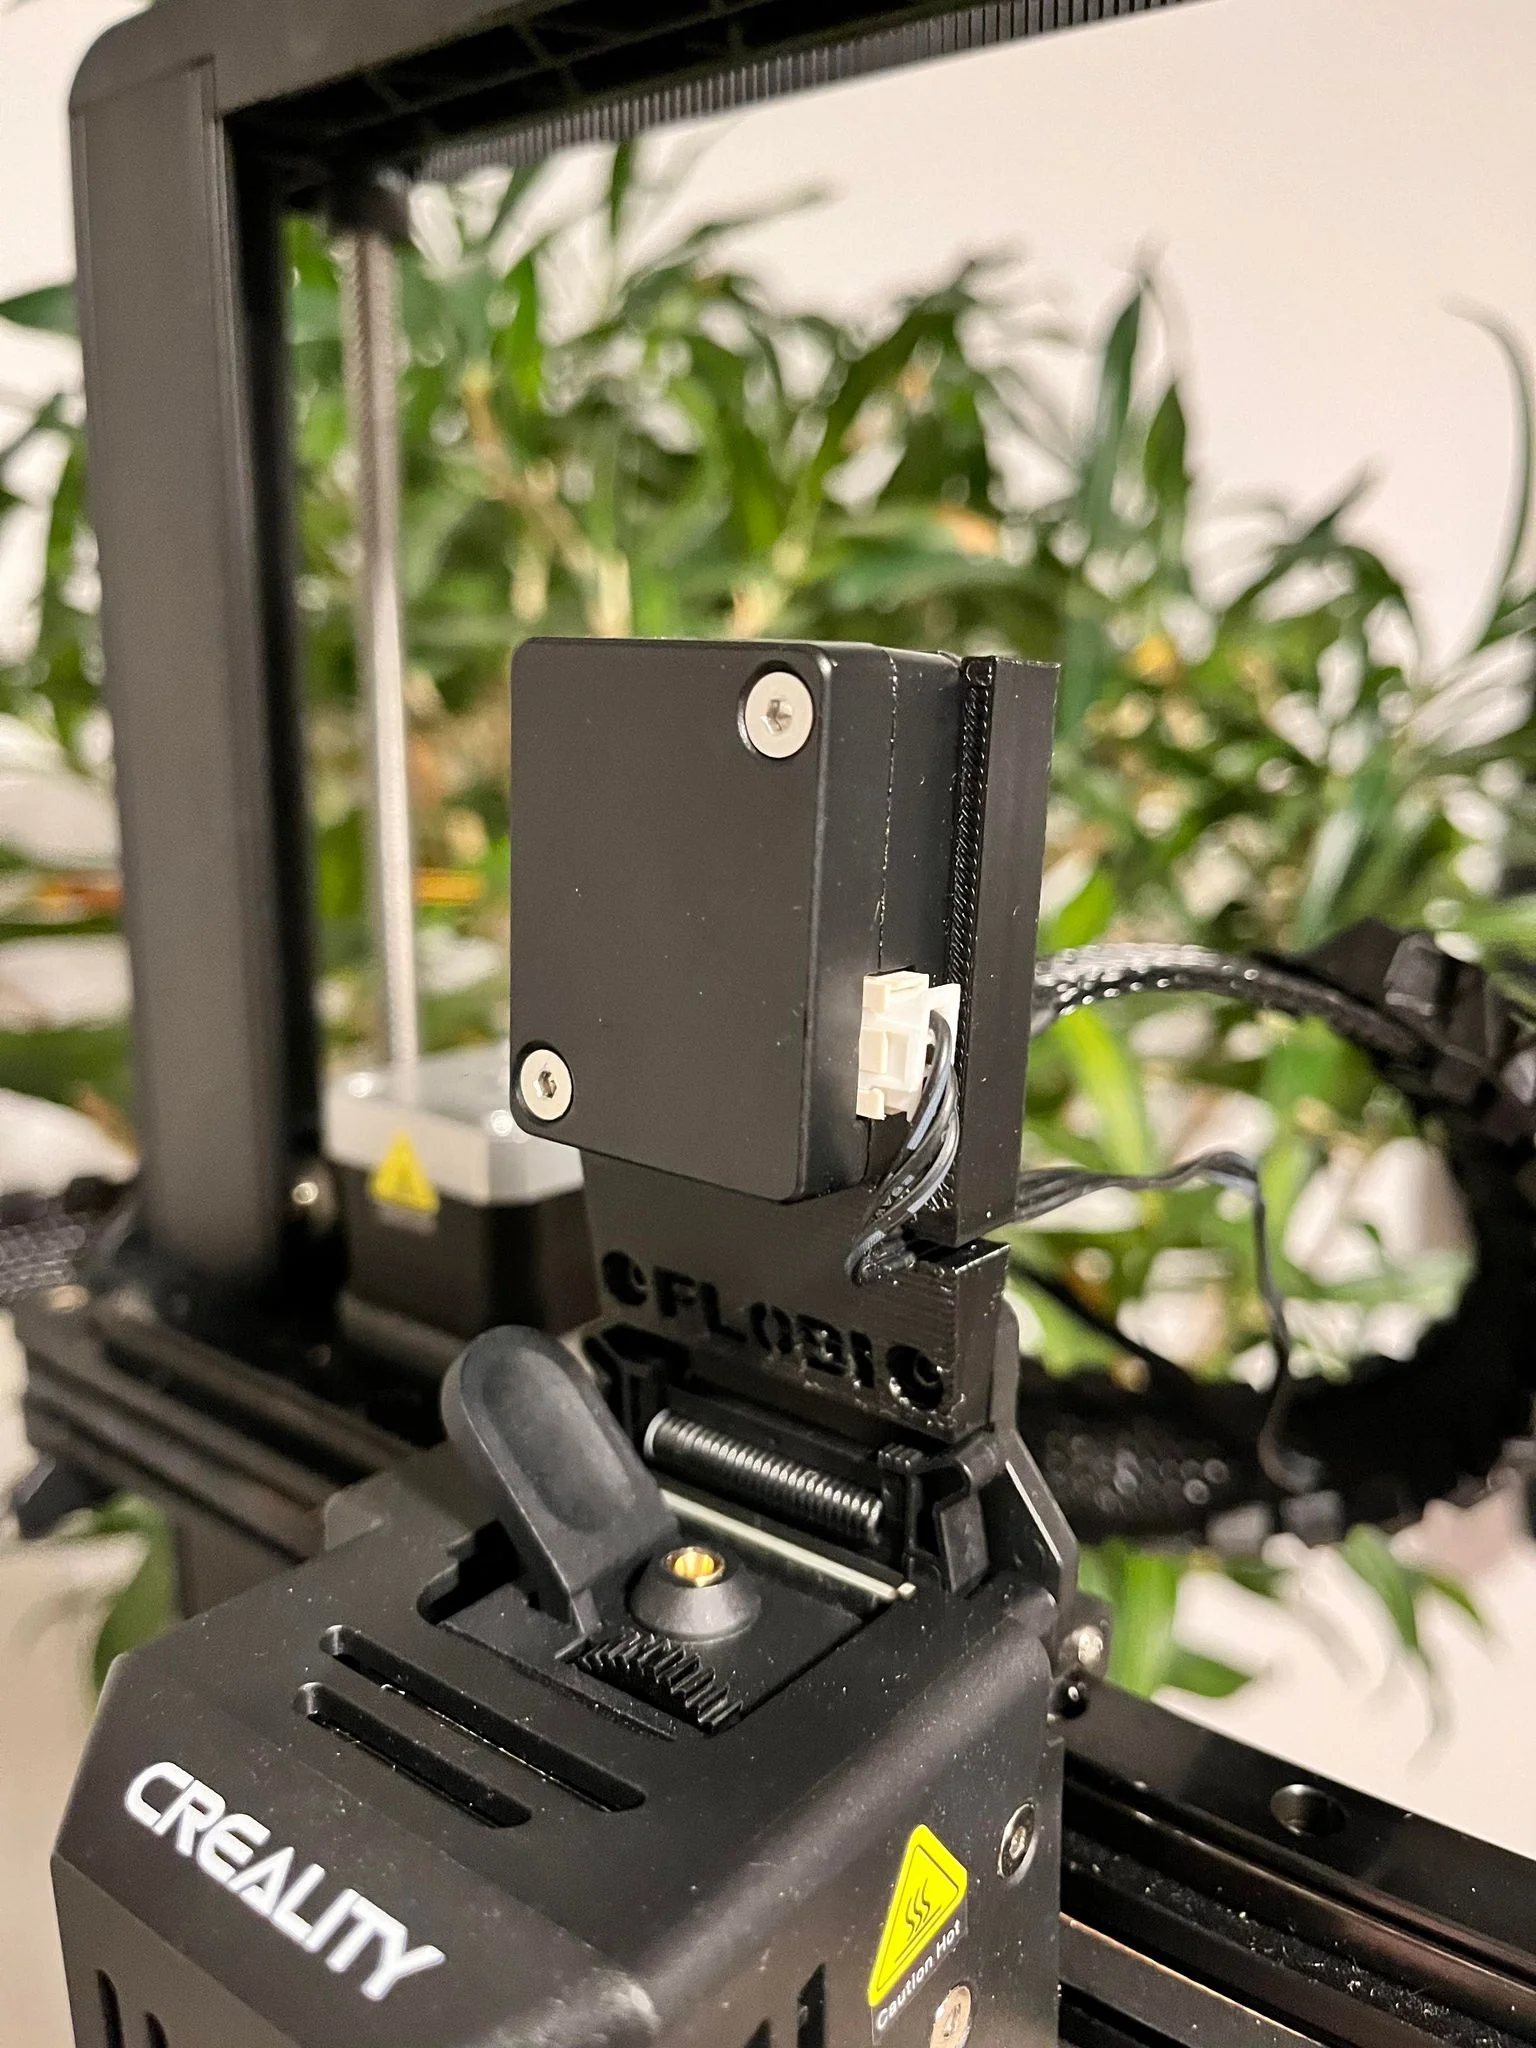



Kẹp giữ sợi Filament
 Bytinx_1344834Likes1.2KDownloads6K
Build another version of this model.
If you like my work, tinkering and messing around with stuff. Then please consider supporting, it would be greatly appreciated!
I'll be looking forward to interact with you guys and our shared passion for making! :)
https://www.buymeacoffee.com/flobi
________________________________________________________________________________________________________________
Had to make a simple bracket to relocate the filament runout sensor, so the best location in my case was above the print head. There is almost only positive things to this relocation in my humble opinion. I've had ZERO issues with it so far. :)
The only slight annoying part, is that you need to disassemble part of the printer to change the location of the runout sensor cable. (Not really a big deal i think)
You'll have to dismount the left z-axis gantry tower, and loosen the right one. Otherwise, the tiny white connector at the end of the sensor cable wont be able to fit through the bottom housing. I guess that would maybe be a bit cumbersome for some users, but to me it isn't a big deal other then taking a bit of time to do.
Pros:
- Uses almost every last bit of filament
- Uses the standard screws & bolts
- Easier to insert new filament
- Friction fit
- Looks cool
Cons:
- Filament MIGHT get tangled in the X-Axis belt. (Haven't happened to me yet)
________________________________________________________________________________________________________________
Parts list:
1x Runout Sensor Print Head Mount
1x Runout Sensor Print Head Mount - Washer
Print instructions:
All files prints very nicely on the Ender V3 KE. Fits the SE too! :D
The only things i changed in the print settings are the following:
- Build Plate Adhesion (Brim)
- Support Structure
- Support Pattern
- Infill Density
- Infill Pattern
Follow the below matrix to achieve the same great results as i got:
Parts
Quality
Support
Infill
Brim
Runout Sensor - Print Head Mount - Washer
0.2mm
No
10% Gyroid
No
Runout Sensor - Print Head Mount
0.2mm
Normal - Gyroid
10% Gyroid
No
Bytinx_1344834Likes1.2KDownloads6K

 ByBrokentooth_designsLikes17Downloads142

 ByreddLikes216Downloads2.1K

 ByJasonOlliff_519145Likes241Downloads2K

 Byarhi_585078Likes64Downloads536

 ByHanzo3dLikes155Downloads410

 ByGeek5DLikes147Downloads480

 By3DSourcererLikes48Downloads372

 ByWyomingWolf_261196Likes52Downloads422

 Bytopronix_2170418Likes41Downloads292

 Byoe123_1307374Likes7Downloads63

 ByBlackky98Likes25Downloads204